


1 items
About this mod
A TUW GUI to make generating mods faster and easier.
- Requirements
- Permissions and credits
- Changelogs
What it is:
A TUW (command line GUI) exe crafted specifically for making Aliens: Dark Descent mods, as well as a blank PAK file for completing mods.
If you want to do it yourself, grab the GUI definition file from the Dark Descent Reference Project repo.
How to use it:
You WILL need Unreal Engine 4.27 to complete a mod.
If you want to skip steps 1 and 2, go here to download extracted uAssets:
https://github.com/korgano/Dark-Descent-Reference-Project/blob/main/DarkDescent_ZenToolsDump_Data.zip
https://github.com/korgano/Dark-Descent-Reference-Project/blob/main/DarkDescent_ZenToolsDump_Effect.zip
https://github.com/korgano/Dark-Descent-Reference-Project/blob/main/DarkDescent_ZenToolsDump_TacticalMode.zip
Step 1:
Download Zentools-UE4 and read the instructions: https://github.com/WistfulHopes/ZenTools-UE4
Use the filter /Game/Content/[Rest of Path to Whatever]
Step 2:
Extract uAssets. The most mod relevant uAssets are contained in the Blueprint/Data path (Enemies, items, etc...). Wait for the program to go through all the game's UTOC files.
Step 3:
Copy the uAssets you intend to mod to specific directory. The file path should look like this: SomeFolder\ModName\ASF\Content\Blueprint\Directory\Directory.
If you're not sure what the file path should be, get Fmodel and start digging around /Contents/Pak/pakchunk0-WindowsNoEditor.utoc to get an idea of where things are.
Step 4:
Download the latest version of uAssetGUI and Tuw-DarkDescent.
Step 5:
Open uAssetGUI and navigate to the folder containing the uAssets you want to edit.
Step 6:
Make sure you save whenever you are done with edits, as there is no autosave when switching between files.
Step 7:
Open a terminal in the whatever your Unreal Engine 4 directory is. Example: D:\EGS\UE_4.27\Engine\Binaries\Win64
Step 8:
Download the zModGeneric file and rename it to whatever you want.
Step 9:
Open your Dark Descent Unreal Project file and create two text files. The first will contain the commands for generating the UTOC/UCAS files, in this format:
Example:
The second file is a list of the uAssets that should be packaged into the mod:
Example:
Save the first file with whatever name you want, but MAKE SURE the second file has the same name with "-response" at the end. This to make sure that you keep the files associated with specific mods.
Step 10:
Get all the file/folder paths required:
Ignore the \\ - they're a JSON limitation. The command line program takes in \ just fine.
Step 11:
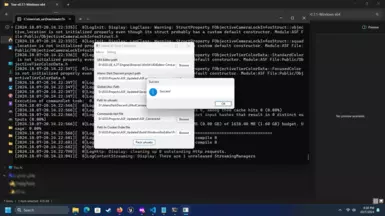
Press the "Pack uAssets" button
Step 12:
Check the generated files. If the file size for the UTOC/UCAS is 1 KB, check the terminal log to see if there are file path errors. This is usually caused by putting a / at the end of the path to the folder containing your uAssets, or putting your uAssets directly in the [ModName] folder.
Step 13:
Copy and paste the Pak/UTOC/UCAS into the game's Content/Pak folder, then boot the game to verify that the changes are happening.
Step 14:
If your mods are functional, zip up the files and upload to your preferred site.
Credits:
TUW is created by matyalatte.
A TUW (command line GUI) exe crafted specifically for making Aliens: Dark Descent mods, as well as a blank PAK file for completing mods.
If you want to do it yourself, grab the GUI definition file from the Dark Descent Reference Project repo.
How to use it:
You WILL need Unreal Engine 4.27 to complete a mod.
If you want to skip steps 1 and 2, go here to download extracted uAssets:
https://github.com/korgano/Dark-Descent-Reference-Project/blob/main/DarkDescent_ZenToolsDump_Data.zip
https://github.com/korgano/Dark-Descent-Reference-Project/blob/main/DarkDescent_ZenToolsDump_Effect.zip
https://github.com/korgano/Dark-Descent-Reference-Project/blob/main/DarkDescent_ZenToolsDump_TacticalMode.zip
Step 1:
Download Zentools-UE4 and read the instructions: https://github.com/WistfulHopes/ZenTools-UE4
Use the filter /Game/Content/[Rest of Path to Whatever]
Step 2:
Extract uAssets. The most mod relevant uAssets are contained in the Blueprint/Data path (Enemies, items, etc...). Wait for the program to go through all the game's UTOC files.
Step 3:
Copy the uAssets you intend to mod to specific directory. The file path should look like this: SomeFolder\ModName\ASF\Content\Blueprint\Directory\Directory.
If you're not sure what the file path should be, get Fmodel and start digging around /Contents/Pak/pakchunk0-WindowsNoEditor.utoc to get an idea of where things are.
Step 4:
Download the latest version of uAssetGUI and Tuw-DarkDescent.
Step 5:
Open uAssetGUI and navigate to the folder containing the uAssets you want to edit.
Step 6:
Make sure you save whenever you are done with edits, as there is no autosave when switching between files.
Step 7:
Open a terminal in the whatever your Unreal Engine 4 directory is. Example: D:\EGS\UE_4.27\Engine\Binaries\Win64
Step 8:
Download the zModGeneric file and rename it to whatever you want.
Step 9:
Open your Dark Descent Unreal Project file and create two text files. The first will contain the commands for generating the UTOC/UCAS files, in this format:
-Output=[Folder You'll Save To]\[Mod File Name].utoc -ContainerName=[Mod File Name] -ResponseFile=[File Path to TXT file with uAsset list, requires quotes]Example:
-Output=D:\EGS\Projects\ASF_Updated\Saved\StagedBuilds\ASF\Content\Paks\zModLDDRupgrades_P.utoc -ContainerName=zModLDDRupgrades_P -ResponseFile="D:\EGS\Projects\ASF_Updated\ASF_Upgrades_resp.txt"The second file is a list of the uAssets that should be packaged into the mod:
"[Folder Containing uAssets]\[Filename].uasset" "../../../ASF/Content/Blueprint/Data/[Specific Folder]/[Filename].uasset" -compressExample:
"D:\AliensDarkDescent\zModLDDR_Upgrades_P\ASF\Content\Blueprint\Data\Upgrades\PDA_Upgrade_TacticalDroneWelder.uasset" "../../../ASF/Content/Blueprint/Data/Upgrades/PDA_Upgrade_TacticalDroneWelder.uasset" -compressSave the first file with whatever name you want, but MAKE SURE the second file has the same name with "-response" at the end. This to make sure that you keep the files associated with specific mods.
Step 10:
Get all the file/folder paths required:
- UE4 Editor path - "placeholder": "D:\\EGS\\UE_4.27\\Engine\\Binaries\\Win64\\UE4Editor-Cmd.exe"
- Aliens: Dark Descent project path - "placeholder": "D:\\EGS\\Projects\\ASF_Updated\\ASF.uproject"
- Global.Utoc Path - "placeholder": "D:\\EGS\\Projects\\ASF_Updated\\Saved\\StagedBuilds\\WindowsNoEditor\\ASF\\Content\\Paks\\global.utoc"
- "Path to uAssets" - "placeholder": "D:\\AliensDarkDescent\\zModCamera"
- Commands text file - "placeholder": "D:\\EGS\\Projects\\ASF_Updated\\ASF_Upgrades.txt"
- Path to Cooker Order file - "placeholder": "D:\\EGS\\Projects\\ASF_Updated\\Build\\WindowsNoEditor\\FileOpenOrder\\CookerOpenOrder.log"
Ignore the \\ - they're a JSON limitation. The command line program takes in \ just fine.
Step 11:
Press the "Pack uAssets" button
Step 12:
Check the generated files. If the file size for the UTOC/UCAS is 1 KB, check the terminal log to see if there are file path errors. This is usually caused by putting a / at the end of the path to the folder containing your uAssets, or putting your uAssets directly in the [ModName] folder.
Step 13:
Copy and paste the Pak/UTOC/UCAS into the game's Content/Pak folder, then boot the game to verify that the changes are happening.
Step 14:
If your mods are functional, zip up the files and upload to your preferred site.
Credits:
TUW is created by matyalatte.