


0 of 0

About this mod
Texture library that contains various custom color overrides and microblends required by my Military Clothing Mods.
- Requirements
- Permissions and credits
- Changelogs
- Donations
Overview:
This is a texture library that contains Color Overrides and Microblends used by my Military Sets.
I will remake this damn description eventually.
A more detailed explanation of how this mod came to be, as well as a part of my journey in modding in the spoiler below:
Download & Installation:
The mod is available as a single main file. You can install it via Vortex (recommended) or manually:
Permissions & NPVs:
Regarding permissions, the following applies:
Contact & Support:
If you wish to contact me, you can do so on Discord (ScorpionTank) or on Nexus.

This is a texture library that contains Color Overrides and Microblends used by my Military Sets.
I will remake this damn description eventually.
A more detailed explanation of how this mod came to be, as well as a part of my journey in modding in the spoiler below:
Spoiler:
The Context:
In Cyberpunk, there are two ways to texture meshes:
The Supershader:
The Multilayered Texture System has large selection of materials, colors and patterns, but via modding we can add even more. However, this requires creating and editing new files.
This system is optimized. Any mod created using this texture approach will be very performance friendly.
The Problems:
For a long period, all of my mods used to have patterns baked into the PBR textures of various materials. This resulted in a very complex and cluttered project, because I needed to edit 5 files for each material. But there were more issues that resulted from this.
This process was extremely time-consuming and inefficient, cluttering my mods with so many files and making it very difficult to sync colors and patterns across different mods. A change had to come.
The First Attempt:
It was obvious that something had to change, so the first place I looked was the reusable bits of my mods.
However, I didn't let that discourage me. Maybe I failed here, but there was another part of my mods worth looking at that would save me time.
The Second Attempt:
With the failure of my universal library, I shifted focus to other aspects of my mods that consumed significant time: the variants.
This was a significant improvement, but it still wasn’t quite enough. What came next would be the turning point.
The Breakthrough:
While working on the faction sets, I was introduced to microblend files. These are files the Multilayered system uses to add camo patterns to faction clothing.
This conversion process reduced my textures from over a hundred files to just a handful. And that’s not even mentioning the other benefits that came from microblend approach.
The Final Approach:
After that major breakthrough, I realized I finally had all the pieces of the puzzle ready to assemble: reusable colors, customizable microblend camos, and a more manageable set of color options.
With the library complete, the path forward was clear, but now I was faced with another challenge: overhauling all my existing mods to integrate with this much-improved texture system.
The 3.0 Overhauls:
The texture set was ready to be put to work. My existing projects at the time were the first to be converted to this new system. But the 3.0 overhauls were destined to be much more than just a texture upgrade.
As I rewrite this story in January 2025, I continue refining both my workflow and my mods. There’s always more to learn and achieve.
Final Thoughts:
There were still a few loose ends to tie up.
And that’s how Zenitex was born. But perhaps I’ll delve into that story another time…
Show
The Context:
In Cyberpunk, there are two ways to texture meshes:
- The first uses dedicated PBR textures: Normal, Roughness, Metalness, and Diffuse maps. This is what most clothing mods use. Mods made this way are larger in size, have fewer variants, and often look out of place in the game when put aside the vanilla art style clothing (e.g., my Comfy Boots). And depending on the resolution of those maps, they may cause performance issues.
- My mods use the second method, the Multilayered Texture System, this is the supershader that CDPR used to texture most of the game. This keeps the mods small in size and very well integrated with the game's art style by using existing textures directly from Cyberpunk.
- Imagine this system as a large bucket of configurable materials that you can use for any mesh.
- For each mesh, think of the Multilayered Texture System like a Photoshop project with 20 layers. Each layer comes with a mask. These masks apply materials from the base game on certain parts of this 3D model. All I do is specify which material, color and properties to be used on each layer.
The Supershader:
The Multilayered Texture System has large selection of materials, colors and patterns, but via modding we can add even more. However, this requires creating and editing new files.
- Adding new colors is easy. Each material in this supershader has a .mltemplate file which contains a small array of colors and seamless PBR textures, specific to the material. To add a new color, I create a duplicate of this .mltemplate file in my project and edit the color array. However, this procedure must be performed for every material where I want a new color.
- For patterns, there are 2 ways they can be added to materials. The seamless PBR textures contained within the .mltemplate file of each material can be edited to "bake" a pattern onto their textures. This method however, is very inefficient and limited. Before 3.0 updates, this was how my patterns were applied.
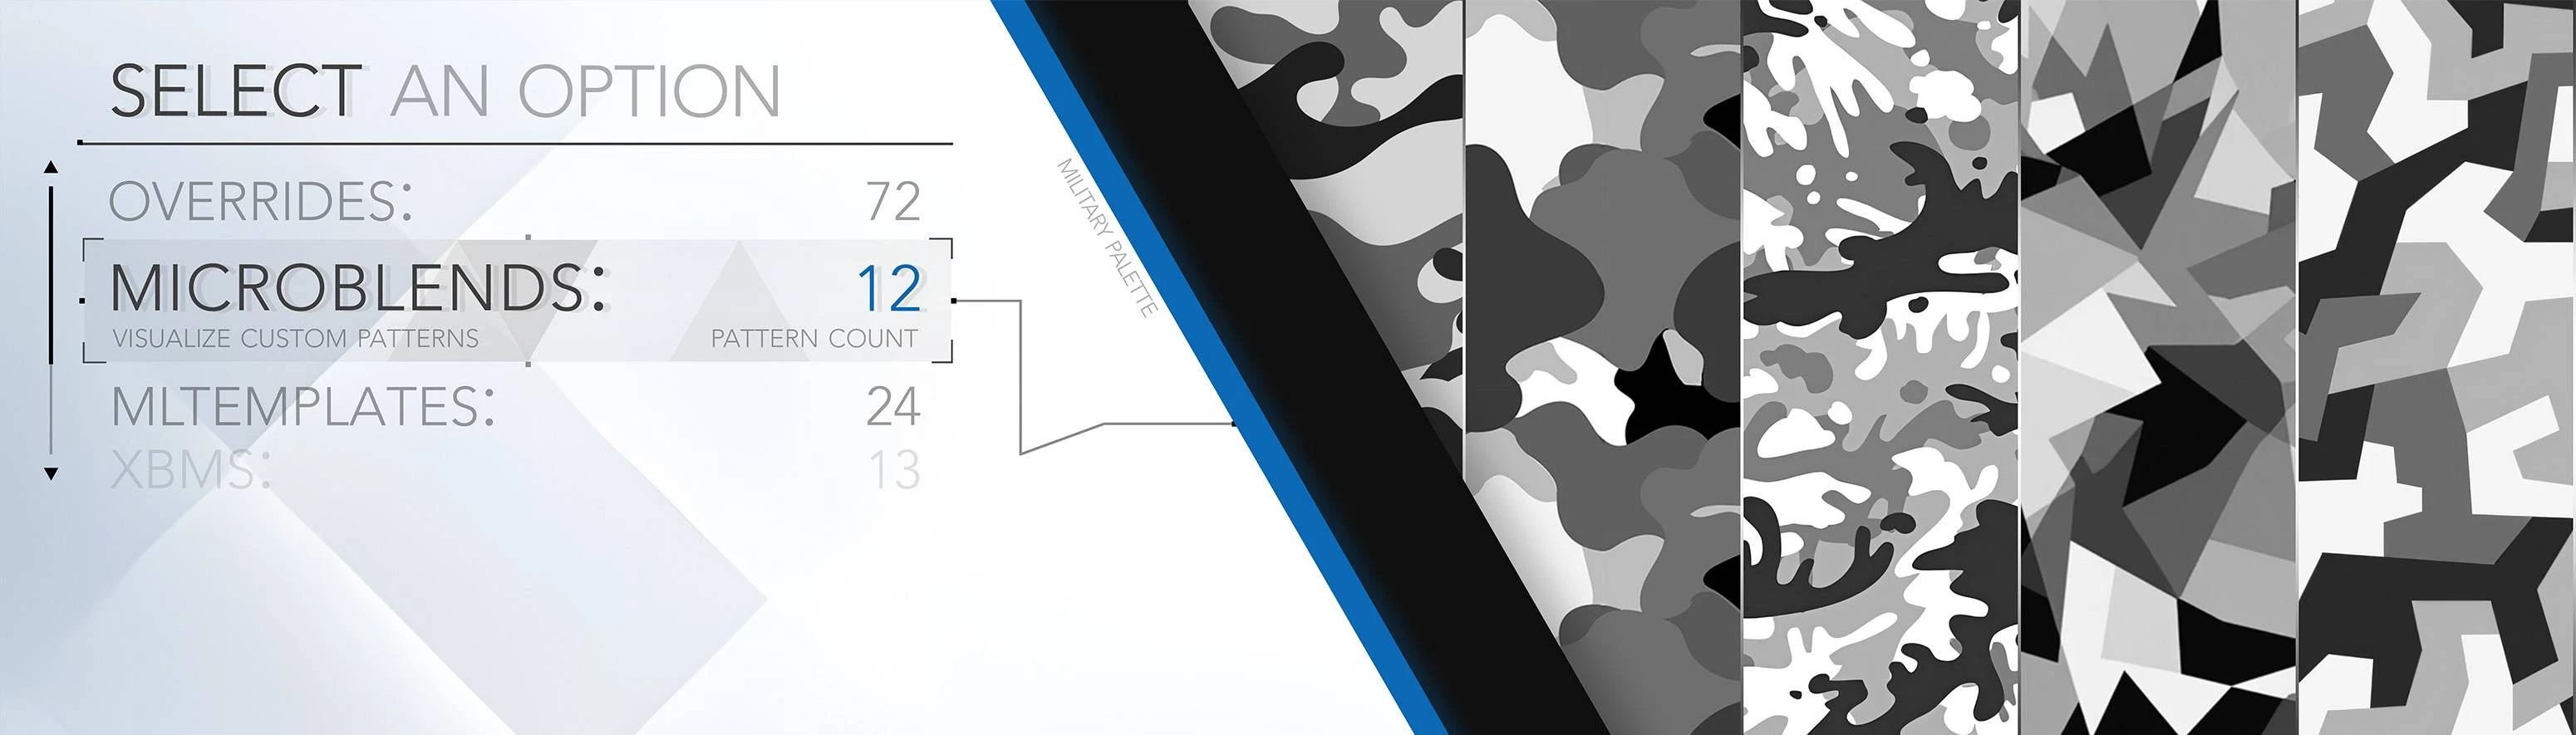
- The other way of adding patterns is via microblends, a very neat and modular design native to this supershader. But more on these microblends later below.
This system is optimized. Any mod created using this texture approach will be very performance friendly.
The Problems:
For a long period, all of my mods used to have patterns baked into the PBR textures of various materials. This resulted in a very complex and cluttered project, because I needed to edit 5 files for each material. But there were more issues that resulted from this.
- The biggest problem here was the amount of files needed to be edited per mod. Each variant (e.g., Arctic or Urban), had many different materials, sometimes up to 7 or 8. Multiply this with 5 files that required editing per material along with my previous 8 pattern variants per mod, this quickly ramped up to triple digits worth of files on every release, which is a lot.
- Another problem was the lack of reusability. Since "baking" patterns onto textures effectively "locked" the material with a set resolution and camo density, it meant that I always had to re-do the entire process again for a material of new item even if I previously used that same material sometime before in another mod. This is because my previous edit of that material wouldn't look good on the new mod. Camo would be too dense or too sparse.
- Some of my previous patterns were baked on the materials with colors too. This made the situation even worse, as now I was facing the problem of having to further edit the colors of non-pattern materials as well to roughly match the colors from the pattern material. Due to the way of how Cyberpunk rendering works, the colors I input are always a different shade in-game than on paper, which meant that all of this was eyeballing and guesswork.
This process was extremely time-consuming and inefficient, cluttering my mods with so many files and making it very difficult to sync colors and patterns across different mods. A change had to come.
The First Attempt:
It was obvious that something had to change, so the first place I looked was the reusable bits of my mods.
- Some materials were reusable across multiple mods, so I decided to create a universal texture library. This library was first implemented in the legacy versions of three mods: Ballistic Vest, Ops-Core FAST, and Combat Boots. Initially, it seemed like a time and space saving solution. However, I later realized that including the entire library actually increased file sizes and created duplicated assets, which were overwriting each other across these mods.
- This first attempt was by all means, bad. It did make my materials easier to access, saving me some time, but it came at the cost of overwriting issues and increased file sizes. While I managed to avoid issues temporarily by naming mod archives in a way to ensure the latest library loaded first, it was clear this approach wasn't something worth going forward with.
- It introduced conflicts and it only going to get worse as I'd release more and more mods. It also added the problems of bloating the internals of my mods with redundant files. After launching the Combat Boots, I abandoned the library idea altogether. Around this time, I even considered stepping away from public modding entirely due to the increasing complexity required to make these mods be the way I wanted them to be.
However, I didn't let that discourage me. Maybe I failed here, but there was another part of my mods worth looking at that would save me time.
The Second Attempt:
With the failure of my universal library, I shifted focus to other aspects of my mods that consumed significant time: the variants.
- When I released my first public mod, the Tactical Vest, it included 28 variants with many different colors and patterns. Shortly after this release, I asked myself how I could stand out from other clothing modders. Making random clothing mods was fine, but it felt a bit uninspired and repetitive. That’s when I decided to focus on creating matching sets of military-themed clothing. A series of clothing that was seriously underrepresented in a first-person shooter game like this.
- Following the release of the Tactical Vest, I committed to designing matching military sets. However, this decision introduced a massive workload: I had to repeat the same 28 color sets across every mod. Over time, I noticed that most players were primarily using black, white, and tan variants, which made the other sets a time-sink from my perspective. I'm sure that some players used them, but I had to make a choice to make my modding workflow easier.
- To address this, I revamped my color options. I eliminated the least-used colors and focused on the most popular ones, reducing the variants by more than half. The reduction was too great in my opinion, so I decided to introduce a few new sets based on what people would likely use more. This is where the now-iconic "Alpine" set and faction-based color sets were added.
- I also streamlined my workflow so that, for example, I could use one color variant to serve as a base in creating others.
This was a significant improvement, but it still wasn’t quite enough. What came next would be the turning point.
The Breakthrough:
While working on the faction sets, I was introduced to microblend files. These are files the Multilayered system uses to add camo patterns to faction clothing.
- The first challenge was figuring out how microblend patterns worked. Thanks to our amazing community, existing guides covered the basics, and I was able to get an idea of the system relatively quickly. Microblends act as an additional pattern layer that overlays over a color layer in a .mlsetup file.
- They also have extensive customization, separated from the main layer they're on. You can modify coordinates, density, color, transparency without affecting the PBR textures, and most importantly, they were reusable. It was like a dream implementation. For a short time, I even considered dropping my PBR-based camo patterns entirely in favor of already existing microblends. However, at this point in time, my mods, and their colors, were gaining popularity, so I knew I couldn’t abandon the designs players were using.
- Ironically, I did end up phasing out the PBR camo textures, but not for the reasons you might think. The real breakthrough came when I discovered how to convert my PBR camo patterns into microblends.
- The guide for this process existed for some time, but it didn’t help me. It assumed I would only have fully opaque layers, while my camo designs required multiple levels of transparency across different regions, all within a single microblend layer, not over multiple.
- This is where my experience in Photoshop, that came through my virtual photography, became very valuable. By experimenting with selection tools, contrast adjustments, layers, and masks, I developed a method to convert my PBR camo textures into these seamless microblend files with multiple transparency levels and no overlapping parts over regions of the camo, all while maintaining the original shape of the PBR camo. This was a huge milestone for me.
- I immediately began converting all my camo patterns. While the process was time-consuming, I only had a few camos to convert. Seeing them in-game in their new microblend form, blending so much better with the game’s vanilla aesthetic, was an enormous relief.
This conversion process reduced my textures from over a hundred files to just a handful. And that’s not even mentioning the other benefits that came from microblend approach.
The Final Approach:
After that major breakthrough, I realized I finally had all the pieces of the puzzle ready to assemble: reusable colors, customizable microblend camos, and a more manageable set of color options.
- With far fewer files needed for my camos, i realized I could revive my initial failed attempt at a universal library. The reusable colors from that attempt were still viable, and now, with much fewer files responsible for textures, I could consolidate everything into that universal library I had envisioned back then.
- The size of my first library attempt was a bloated 60 MB and hundreds of files. But now, with this refined approach, I managed to reduce it to around 40 files and only a few megabytes. Everything was reusable, adjustable, easy to maintain and very efficient. The universal library was truly "universal", and the final step was to package it as a separate mod. This resolved the last issue of my earlier implementation which was the conflicting texture files across mods.
- And so, the Military Palette Texture Library came to be. At first glance, it might seem insignificant to you, a small mod with a negligible file size, but it represents my many months of work, trial and error, and lessons learned since the day I started modding. To me, it’s a huge achievement.
With the library complete, the path forward was clear, but now I was faced with another challenge: overhauling all my existing mods to integrate with this much-improved texture system.
The 3.0 Overhauls:
The texture set was ready to be put to work. My existing projects at the time were the first to be converted to this new system. But the 3.0 overhauls were destined to be much more than just a texture upgrade.
- By then, I had gained substantial knowledge of ArchiveXL, enough to confidently say I can optimize my clothing mods for gameplay. My goal was to make them not only visually appealing but also functional and valuable for players during their playthroughs, beyond just being photomode outfits. With this in mind, I developed a new, reusable, and adaptable ArchiveXL template specifically for my clothing mods.
- Without going into the technical details, this template marked a turning point on its own. It was as if I was starting my modding journey anew, treating all my previously published projects as “training” or "learning" mods. This was effectively a fresh start, with a carefully crafted plan, new tools, and the lot of skills and experience I gained along the way.
- My Military Clothing Line was finally on track to become the vision I had always aimed for. Of course, this was just the beginning. Throughout the summer of 2024, I spent my free time overhauling my mods to this much-improved standard.
As I rewrite this story in January 2025, I continue refining both my workflow and my mods. There’s always more to learn and achieve.
Final Thoughts:
There were still a few loose ends to tie up.
- Why would I call these overhauls 3.0 instead of 2.0? The answer is quite simple. I had already released mods beyond version 2.0, and once a version is out, there’s no going back. I’m also not the type to re-release duplicates of my own work, even if they’re entirely rebuilt from scratch. That’s why these overhauls were rolled out as updates rather than new standalone mods.
- With nearly every aspect of my mods overhauled, the final piece of the puzzle was creating a new and vastly improved modpage to reflect my cleaner, more organized approach. For this, I took inspiration from Detroit: Become Human, a game with a modern, simple, and visually stunning UI that happens to be one of my personal favorites as well. My modpages are like extensions of the mods themselves, and I wanted their presentation to be just as good as my overhauls and new releases. It’s an ongoing effort, but with reusable templates and text, maintaining and refining them has become much easier over time.
- Finally, to bring everything together, I added a bit of lore to my mods. Each modpage has a little fragment of much larger stories I made, tying everything together in my universe, the same way my mods are interconnected on both a technical and user level.
And that’s how Zenitex was born. But perhaps I’ll delve into that story another time…
Download & Installation:
The mod is available as a single main file. You can install it via Vortex (recommended) or manually:
- Vortex installation: Press the Mod Manager Download button. Press the Install then Enable buttons that will pop up in Vortex.
- Manual installation: Press the Manual Download button. Extract the contents of the zip file into the Cyberpunk 2077 root folder as shown below.
- archive\pc\mod\#_scorpion_military_palette_texture_library.archive
Permissions & NPVs:
Regarding permissions, the following applies:
- You are prohibited from reuploading this mod's assets, modified or not, on Nexus or other sites.
- You are allowed to use the assets from this mod for private & personal NPV projects.
- For anything else, contact me on Discord or on Nexus.
Contact & Support:
If you wish to contact me, you can do so on Discord (ScorpionTank) or on Nexus.
- If you enjoy my work and wish to support me, you can do so on my Ko-fi page or on Nexus.
- I can take commissions when I have time, but these are to be discussed only on Discord.