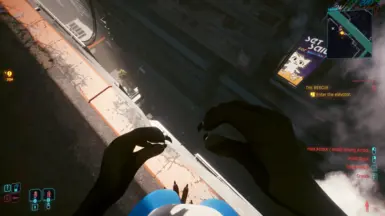
About this mod
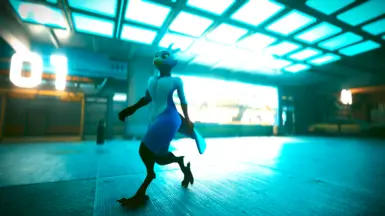
Replaces the female player character with an exotic bird person
- Permissions and credits
Install:
Copy BirdAvatar.archive to your mod folder (create it if needed):
SteamLibrary\steamapps\common\Cyberpunk 2077\archive\pc\mod
or
GOGLibrary\Games\Cyberpunk 2077\archive\pc\mod
or
EpicLibrary\Cyberpunk 2077\archive\pc\mod
Launch the game!
------------------------------------------------------------------
This was made as a basic template/reference for people with custom avatars (FBX/VRM/Blend/other) that they use for VRChat or similar, and want to port it over to Cyberpunk. If you have a custom avatar that is optimized to only use 1-3 materials, this is possible using WolvenKit and the Blender Add-On. There are three materials, tied to three mesh types, with this configuration: Head, Eyes, and Body, to make it as easy as possible to update. It may be necessary to atlas your textures if your avatar uses more than 3 materials/meshes with unique textures.
------------------------------------------------------------------
Step-by-step guide for replacing this avatar with something else:
0. Install the BirdAvatar.archive mod (copy the archive to steamapps\common\Cyberpunk 2077\archive\pc\mod)
1. Install WolvenKit Nightly > Open WolvenKit > Continue to editor > File
i. New Project > View > Asset Browser (turn off and on)
ii. Click toggle for "Mod Browser" in Asset Browser
iii. Click "BirdAvatar.archive", right click engine and base folders, Add selected items to project
2. When the Project Explorer shows the added files, click Tools > Export Tool to Export Selected files:
i. Export these files so they can be updated and re-imported:
t0_000_pwa_base__full_seamfix.meshBody Mesh/.glb (Menus/Mirrors)(Export with garment support unchecked)
t0_000_pwa_fpp__torso.meshBody Mesh/.glb (First Person)
h0_000_pwa__morphs.morphtargetHead Mesh/.glb (Menus/Mirrors)
he_000_pwa__morphs.morphtargetEyes Mesh/.glb (Menus/Mirrors)
body_d.xbmBody Color/png
eyes_d.xbmEyes Color/png
head_d.xbmHead Color/png
3. After exporting, look for the exported png and glb files in the raw folder in Project Explorer
i. Right click any of these files to Show in File Explorer
ii. Replace the textures (1024x1024 png files) or edit in an image editor
iii. Tools > Import Tool > Import Selected, for each of the updated files
4. Install Blender 3.6+, go to Edit > Preferences > Add-ons, Install the Add-on file: Cyberpunk-Blender-Add-on-1.3.0.zip
i. Blender: https://www.blender.org/download/releases/3-6/ (delete default cube/scene after launching the project)
ii. Add-on: https://github.com/WolvenKit/Cyberpunk-Blender-add-on/releases/tag/1.3.0 (do not extract the .zip)
iii. File > Import > "Cyberpunk GLTF (.gltf/.gib)", import each of the glb files listed above from the raw folder
iv. Select all imported meshes to duplicate (CTRL+D) and merge them (CTRL+J) into one reference mesh
5. Import your avatar, scale/rotate in Object Mode to align your avatar with the reference mesh, Apply All Transforms
i. Pose your avatar to match the Cyberpunk exports/reference mesh, all body parts should be aligned delete all shape keys, apply the Armature modifier
ii. Select your avatar's mesh, delete all materials on the Material tab, delete all vertex groups on the Data tab
iii. Add a Data Transfer modifier to your avatar, set the source to the reference Cyberpunk (combined) mesh
iv. Data Transfer settings: check Vertex Data, click Vertex Groups, set mapping to Nearest Edge Interpolated
v. Click Generate Layers, confirm this generated vertex groups on the Data tab, then use the dropdown arrow on the Data Transfer modifier to click Apply
6. Select your avatar's head and split it from the body (P) to create a separate object
i. Duplicate these new Body and Head meshes (CTRL+D) to create copies that can be merged with the Cyberpunk exports
ii. Note the last/lowest vertex group on the original head mesh that came from WolvenKit. Delete any new vertex groups that appear after merging.
ii. Enter Object Mode, select the newly separated head mesh for your avatar, Shift+Click the old head, CTRL+J to join (now delete any new vertex groups)
iii. Select and delete the vertices/faces of the old head in Edit Mode, so only the new avatar vertices remain in the object that imported from WolvenKit
iv. Repeat the process for each of the Body meshes
7. Select the meshes for one of the now-updated imported items (Head or Body)
i. File > Export as GLB for Cyberpunk, overriding the one in the raw folder
ii. Return to WolvenKit, Tools > Import Tool > Import Selected with the newly updated glb file checked
iii. Build > Install & Launch Game to see the result! If the bird is still showing, remove BirdAvatar.archive from the mod folder first, then relaunch.
-------------------------------------
Optional steps that take more time and add more detail:
ii. Optional textures to export, update, and import for more detail:
body_n.xbmBody Normal/png
body_r.xbmBody Roughness/png
eyes_n.xbmEyes Normal/png
eyes_r.xbmEyes Roughness/png
head_n.xbmHead Normal/png
head_r.xbmHead Roughness/png
iii. Optional meshes for configuring detailed finger bone movement:
a0_000_pwa_base_hq__l.meshLeftArm
a0_000_pwa_base_hq__r.meshRightArm
a0_000_pwa_fpp__full_l.meshLeftArm
a0_000_pwa_fpp__full_r.meshRightArm
Additionally there are separate arm meshes for gorilla/strong arms and mantis blade arms, getting upgrades later in the game may require replacing those arm meshes instead, under the Cyberware folder, or else the arms could be invisible with those upgrades.
NOTE: If you plan to use these, un-toggle "Mod Browser" in Asset Explorer, then right click the
two Body meshes, two LeftArm, and two RightArm meshes in Project Explorer, to "Replace with Original" before exporting.
Double-click to open each of these arm meshes after resetting, and update the materials in the LocalMaterialBuffer to use the same textures as other customized objects (see the Values)
Update baseMaterial to custom_body.mi. Full path to this file can be found by opening the torso/body meshes as a reference.
By default they are customized in the BirdAvatar mod to be hidden. This re-imports the originals, with finger weights.
Also note the arms should be removed from the Body/Torso meshes in Blender now, to prevent arm clipping or overlap.
Note: Having extra data on the meshes like new materials or vertex groups that were not on the originally exported meshes, can result in errors. Generally speaking the mesh exports need to be as like-for-like as possible to import correctly.
