


2 items
File information
Last updated
Original upload
Created by
Katycat Zeibach CbethaxUploaded by
cbethaxVirus scan
Safe to use
Current section
About this mod
Add custom skins
- Requirements
-
Nexus requirements
Mod name Notes Language Helper Off-site requirements
Mod name Notes Unity Mod Manager 0.27.3.0+ Mods requiring this file
- Permissions and credits
-
Credits and distribution permission
- Other user's assets All the assets in this file belong to the author, or are from free-to-use modder's resources
- Upload permission You are not allowed to upload this file to other sites under any circumstances
- Modification permission You must get permission from me before you are allowed to modify my files to improve it
- Conversion permission You are not allowed to convert this file to work on other games under any circumstances
- Asset use permission You must get permission from me before you are allowed to use any of the assets in this file
- Asset use permission in mods/files that are being sold You are not allowed to use assets from this file in any mods/files that are being sold, for money, on Steam Workshop or other platforms
- Asset use permission in mods/files that earn donation points You are not allowed to earn Donation Points for your mods if they use my assets
Author notes
This author has not provided any additional notes regarding file permissions
File credits
Katycat
ZeibachDonation Points system
Please log in to find out whether this mod is receiving Donation Points
- Changelogs
-
-
Version 4.3.0
- Build 99.4 compatibility
-
Version 4.2.5
- Fix issue causing cars to not couple
-
Version 4.2.2
- Fix compatibility with Loco Mesh Splitter/Car Changer
- Fix DE6 skins not actually being allowed on slugs
-
Version 4.2.1
- Fix primer being applied to random locos
- Fix detail normal map intensity
- Fix bogies getting stuck as full black on some locos
-
Version 4.2
- Fix packager not importing all theme settings
- Fix LODs not being reskinned
- Allow resources to be shared between any car types
-
Version 4.1.1
- Fix custom can colors not working
- Fix interiors on non-theme vehicles (eg DM1U) not receiving skins
- Fix error in can label generation
- Allow custom prices for paint cans
-
Version 4.1.0
- Fix certain vehicles (DM1U, slug, caboose) not applying skins properly
- Fix shop conflict with Custom Items Mod
- Fix bug preventing use of the texture name scrollbar in packager app
- Add option to always allow comms radio reskin mode, even in career
- Add new inventory icons for custom paint cans
- Add option to prevent certain skins/themes from being applied to newly spawned vehicles
- Export textures from all themes for each vehicle type
-
Version 4.0
- Build 99 Compatibility
- Paint cans for locomotives spawn randomly in shops
- Add localization support for comms radio, items, and UMM settings
- Add short flatcar, covered hopper, DM1U to packager
-
Version 3.4.1
- Fix bug with normal map compression
-
Version 3.4.0
- Update for b98
- Add microshunter
- CCL support
-
Version 3.3.2
- Packager - fix broken file name selector
- Packager - fix incorrect zip archive path separators
- Packager - add busy indicators for long operations
-
Version 3.3.1
- When applying default skin to S282, also apply to attached tender
- Fix cache file access errors cause by multiple reads at once
-
Version 3.1.2
- Fix bug preventing legacy skins from being loaded
- Publish configurator as standalone app
-
Version 3.1.1
- Fix crash from corrupted cache file
- Add LocoS060 to configurator
- Fix remapped name of DE6 bogie texture causing body to get overwritten
- Add settings window to save default texture work directory and DV install location
- Add option to export skin pack to folder rather than zip file (allows quick install without UMM)
- Add option to import skins from older zip file (quick conversion of old pack)
-
Version 3.1.0
- Simulator (build 95) and UMM Support
-
Version 3.0.0
- Simulator (build 93) Support
-
Version 2.5.3
- Fix GetCurrentSkin returning a random skin when the car is actually using the default textures
-
Version 2.5.2
- Properly bust cached textures when reloading from in-game menu
- Add path support for CCL car default skins
-
Version 2.5.1
- Add option to reload skins at runtime
-
Version 2.5
- Check image extension before loading files from skins
- Custom Car Loader Integration - skins for CCL cars
- Major code base & public interface refactor
-
Version 2.4
- Load textures in background
- Cache DXT compressed textures
-
Version 2.3.1
- Build 92 compatibility
-
Version 2.3.0
- Allow reskinning already-skinned cars
- add reskin mode to comms radio
-
Version 2.2.6
- Add Occlusion map replacement
-
Version 2.2.5
- Added option to increase Anistropic Filtering level to 5 for sharper textures.
-
Version 2.2.4
- Match Tender to Steamer skin
-
Version 2.2.3
- dont show vanilla skin if custom is available
- potentially reduce RAM usage
-
Version 2.2.2
- load emission maps (only gauges supported currently)
-
Version 2.2.1
- Added ability to export interior
- load interior textures
-
Version 2.2.0
- fixed Normals
- fixed Exported Normals
-
Version 2.1.0
- Added metalic and normal textures replacement (Use exporter to learn the proper file names)
- Fixed doors on big diesel using vanilla texture
-
Version 2.0.0
- updated for Overhaul
-
Version 1.1.1
- add alias name for shunter file "body"
-
Version 1.1.0
- Added window to select default skin when a trian car is spawned
-
Version 1.0.3
- fixed export
-
Version 1.0.2
- fix issues with bogie materials
-
Version 1.0.1
- make bogie textures editable
-
Now Compatible With Build 99
Skin Installation instructions have changed since Overhauled! See the updated instructions below.
Note: Do not report bugs to the developers of the game if you are using mods!
What this Mod Does:
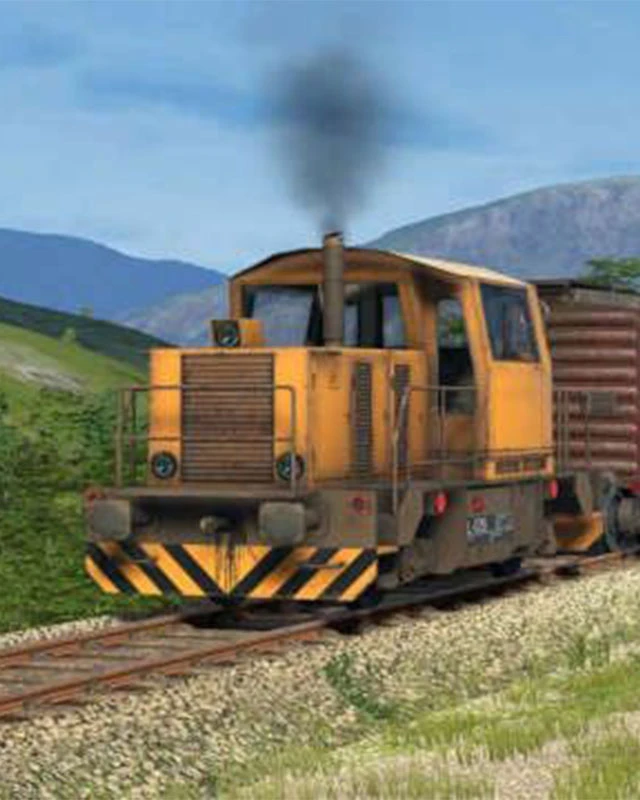
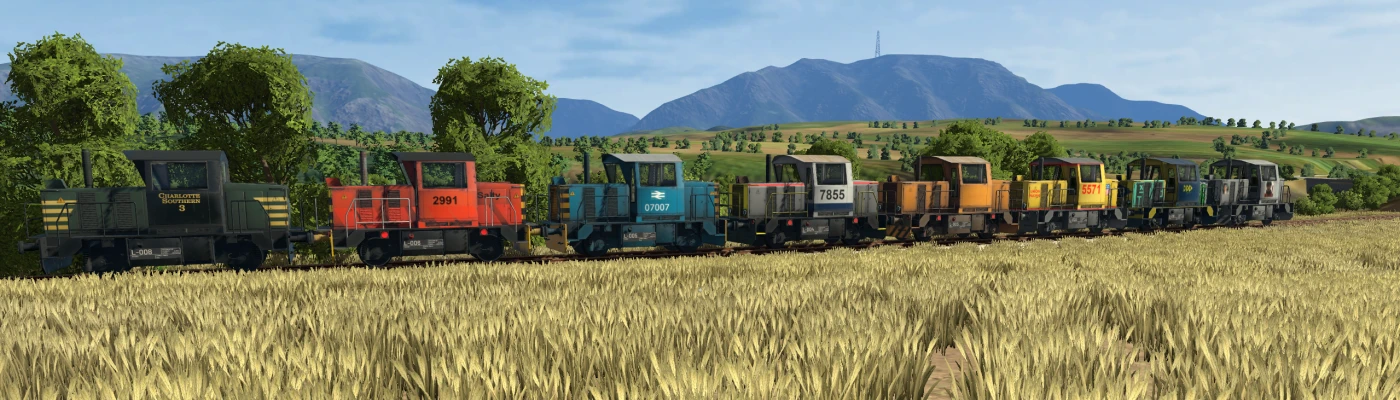
This mod allows vehicles in the game to have multiple different textures applied to them; recreate your favorite liveries or design your own! Skins are applied randomly to newly spawned locomotives and cars. If you are playing in career mode, you can change the skin of locomotive using the new paint sprayer from the museum. You can buy paint cans from shops - different ones will show up each time you visit a city. In sandbox mode, the skin of a vehicle can be changed using the Reskin mode on the comms radio - first select the car to reskin, scroll through the available skins, then select the car again to confirm. The mod now also includes parallel loading, caching, and compression algorithms to speed up load times after the first launch.
How to Install the Mod:
How to Add Skins:
v3.1 and Newer Skins:
As of v3.1, skins are now treated as their own mods by Unity Mod Manager. If the skin is compatible, you can simply drag and drop the zip into the mods tab of UMM. If this results in an error, you are likely dealing with an older format of skin. See the instructions below.
v3.0 and Earlier Skins:
The easiest way to install earlier skins is to use the packager app:
Last Resort Instructions:
The initial release of skin manager for Simulator was based on BepInEx. Skins made for this period of time should have a BepInEx folder inside
the archive. Install the skin by extracting the archive and merging its BepInEx folder into the BepInEx folder of the Game (\Steam\steamapps\common\Derail Valley\BepInEx).
If you are using an older skin (one that contains either a Skins folder or just car type folders), navigate to the skins folder in your DV install (\Steam\steamapps\common\Derail Valley\Mods\SkinManagerMod\Skins\). Extract each of the car type folders from the archive into the SkinManagerMod\Skins folder. The proper skin path should look like this - Derail Valley\Mods\SkinManagerMod\Skins\content\skins\<train-car-type>\<skin-name>\<skin-files>.
How to Create Skins:
Exporting Textures:
Creating a Pack:

If you have additional questions or problems with installing or creating skins, you are welcome to join the official Discord server - https://discord.gg/24G5uQt
Additional:
Credits:
Skin Installation instructions have changed since Overhauled! See the updated instructions below.
Note: Do not report bugs to the developers of the game if you are using mods!
What this Mod Does:
This mod allows vehicles in the game to have multiple different textures applied to them; recreate your favorite liveries or design your own! Skins are applied randomly to newly spawned locomotives and cars. If you are playing in career mode, you can change the skin of locomotive using the new paint sprayer from the museum. You can buy paint cans from shops - different ones will show up each time you visit a city. In sandbox mode, the skin of a vehicle can be changed using the Reskin mode on the comms radio - first select the car to reskin, scroll through the available skins, then select the car again to confirm. The mod now also includes parallel loading, caching, and compression algorithms to speed up load times after the first launch.
🌍 You can help with translating the mod into other languages! 🌏
Check out the translation spreadsheet and request access if you'd like to contribute a language!
Full Support:
🇬🇧 🇩🇪 🇪🇸 🇮🇹 🇷🇺 🇨🇳 🇹🇼
Check out the translation spreadsheet and request access if you'd like to contribute a language!
Full Support:
🇬🇧 🇩🇪 🇪🇸 🇮🇹 🇷🇺 🇨🇳 🇹🇼
How to Install the Mod:
- Download and install Unity Mod Manager
- Download the Skin Manager zip from Main Files
- Install the mod by dragging and dropping the archive into the Mods tab of the Mod Manager application.
- Run the game
How to Add Skins:
v3.1 and Newer Skins:
As of v3.1, skins are now treated as their own mods by Unity Mod Manager. If the skin is compatible, you can simply drag and drop the zip into the mods tab of UMM. If this results in an error, you are likely dealing with an older format of skin. See the instructions below.
v3.0 and Earlier Skins:
The easiest way to install earlier skins is to use the packager app:
- Download and launch the Skin Packager application
- In the menu bar, click Import > Import Old Zip...
- Use the file picker to select the skin pack that you want to install
- Any skins found in the pack will be listed in the window. You may need to adjust the Names and Car IDs by selecting a skin in the list and using the inputs at the bottom of the window. You can also remove skins by selecting them and clicking the "Remove Skin" menu button.
- If you only want to use the skin on your own computer, you can click the yellow "Install Unzipped..." button.
- A folder picker should appear - if it is not already pointed at your steamapps/common/Derail Valley/Mods folder, navigate there yourself. Select or create a new folder under Mods to hold the skin pack.
- Once you've picked the destination, hit Select Folder and you should get a message saying the export was successful.
- Run the game
Last Resort Instructions:
The initial release of skin manager for Simulator was based on BepInEx. Skins made for this period of time should have a BepInEx folder inside
the archive. Install the skin by extracting the archive and merging its BepInEx folder into the BepInEx folder of the Game (\Steam\steamapps\common\Derail Valley\BepInEx).
If you are using an older skin (one that contains either a Skins folder or just car type folders), navigate to the skins folder in your DV install (\Steam\steamapps\common\Derail Valley\Mods\SkinManagerMod\Skins\). Extract each of the car type folders from the archive into the SkinManagerMod\Skins folder. The proper skin path should look like this - Derail Valley\Mods\SkinManagerMod\Skins\content\skins\<train-car-type>\<skin-name>\<skin-files>.
How to Create Skins:
Exporting Textures:
- Start the game
- Hit ESC to open Main Menu (Default is ESC)
- Open Mod Manager (Default is Ctrl-F10)
- Go to 'Skin Manager' and click the ... icon to toggle the options
- Select a car from the dropdown and click 'Export Textures'
- Close the game and navigate inside Derail Valley\Mods\SkinManagerMod and open 'Exported' folder (\Derail Valley\Mods\SkinManagerMod\Exported\)
- Copy the exported textures to a folder on your computer and edit them using an image editor
Creating a Pack:
- If you haven't already, download and extract the Skin Packager zip. You can run it from anywhere, but you might need to also install the .NET 6 runtime.
- At this point, you should have one or more folders containing edited textures, one for each individual skin
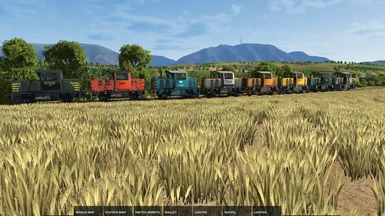
- Launch the SkinPackager exe. It will bring up a GUI (shown below) where you can select a Name, Version, and Author (optional) for your skin pack.
- If you are starting from scratch, use the "Skins -> Import..." button to select each of the folders containing your skin files. They will be added to the list in the GUI and you will be able to select a Name and the Car ID that the skin should apply to. You can remove a skin by selecting it and clicking "Remove Skin". You can add multiple skin folders for the same car type using the "Add Multiple..." button - this will allow you to select a folder and create an entry for each subfolder inside it.
- When you select a skin or resource from the list, the right panel will show a list of files contained in that folder. You can manually add, replace, or remove files using the buttons at the top.
- You can use the Theme Config section below the skin list to create a custom paint can for your locomotive skin. You can choose to use the default Cube Industries 3-color can, a unique texture, or remove the skin from stores entirely.
- Once you have set your pack and skin properties, you are ready to export. The large Zip button should be green and enabled - if it is grayed out, there is a required field that hasn't yet been filled in.
- Click the "Zip For Release..." button to save your pack to a .zip file that users can install with UMM. The export process may take a few seconds, especially when dealing with lots of textures.
- You can use the "File -> Open Folder..." or "Open Zip..." buttons to open an existing skin for editing, regardless of whether it's for Simulator, Overhauled or BepInEx. Click the button and select the top folder/zip archive containing the skin files, and the app will do its best to infer which skins are contained inside. If this fails, you can also manually add each skin folder from inside the older pack.
- If you change the type of a skin to Resource, you can then set other skins in the pack to share the resource's files - i.e., if you have some files that are identical between a few different skins, you can separate those files into a Resource to save disk and memory space.
If you have additional questions or problems with installing or creating skins, you are welcome to join the official Discord server - https://discord.gg/24G5uQt
Additional:
- Source code
Credits:
- katycat6 - support and features
- Zeibach - support and features - StbImage library