About this mod
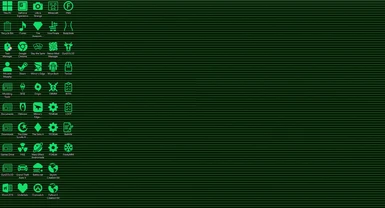
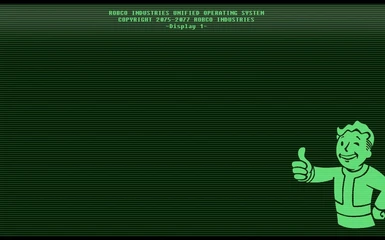
After spending hours creating icons and finding backgrounds, I decided to put my effort to good use and allow others to use the resources I made in order to turn their own desktop into a brand-new Pip-Boy 3000.
- Permissions and credits
- Mirrors
Accomplishing this is a lot easier than it looks. When I was customizing my own desktop, I found easy-to-configure icons online and set the color of every custom icon I downloaded to the same hex code. I then had to convert every icon from .png to .ico. Finally, I went into the properties settings of each shortcut and manually set each of them to their new icon.
However, the above process took a large amount of time to accomplish (especially since some of the icons, such as Undertale and Overwatch, had to be found and edited with other sources). Since I knew that other people would likely be interested in customizing their desktop the same way I did, I decided to upload the icons and backgrounds I made/used to reddit and the Nexus in order to save everyone time.
Base “Mod” Requirements
Except for a computer that runs Windows 10 (no Android or Apple products are currently supported), there are no requirements! Simply follow the installation instructions.
Custom Icon Requirements
Icon Downloads and Customization Tool: https://www.flaticon.com/
.png to .ico Converter: http://icoconvert.com/
Pixlr Editor: https://pixlr.com/editor/
Color Hex Code: #13DF6D
Installation Instructions
All of the below instructions require that you either download or create your own icons and wallpapers, or extract the files I included to a convenient spot. To extract the files, open the .zip folder and drag and drop all of the contents somewhere easy to find. Once you’ve done this, follow the instructions below to complete any steps that you don’t already know how to accomplish.
Creating Custom Transparent Icons
There are two methods to creating custom icons. The first is using a website called Flaticon, which has a lot of pre-made icons available. If you want to create your own icon using a different image, skip the steps below and follow the instructions after them.
- Go to https://www.flaticon.com/
- Create a free account.
- Once you're logged in, use the search bar near the top of the page to find an icon that suits you.
- Click on the icon you want and select Edit icon in the new window.
- Click anywhere on the icon and type in the hex code 13DF6D next to the numerical symbol under the color chart. You can change this color to your liking using the color chart above, but write down or copy your new hex code so that your other icons will match.
- Repeat the above step until all of the icon's colors are changed.
- Under the icon, click Download.
- Select PNG as your format and select the size that you want your icon to be from the drop-down menu.
- In the new window, navigate to where you want your icon to be saved and click Save.
If you want to use a different image as your icon, then you have to follow a few extra steps to ensure that the image is transparent. To do so, follow the below instructions.
- Using your preferred search engine, download a picture of the icon you would like to create. A white or other plain background is preferred.
- Go to https://pixlr.com/editor/
- Click on Create a New Image.
- In the New image tab, change the width and the height so that your downloaded picture will fit.
- Check the box labelled Transparent.
- At the bottom of the window, click OK.
- At the top of the page, click on Layer and select Open image as layer at the bottom of the drop-down menu.
- Select the image that you downloaded previously and click Open.
- Press W on your keyboard, or select the Wand tool from the panel on the left side of the page.
- Using the Wand tool, click anywhere on the background of the picture and press Delete once the background is selected.
- Continue to select and delete any area of the image that you don't want to be in your icon. The Eraser tool can also be used to accomplish this.
- Click on the black box underneath the Zoom and Hand tools.
- On the right side of the new window, type in the hex code 13DF6D next to the numerical symbol. You can change this color to your liking using the color chart to the left, but write down or copy your new hex code so that your other icons will match.
- At the bottom of the window, click OK.
- Press G on your keyboard, or select the Paint bucket tool from the panel on the left side of the page.
- Use the Paint bucket tool to change the colors of your image.
- Once you're done editing the image, you need to crop it. Press C on your keyboard, or select the Crop tool from the panel on the left side of the page.
- Click and drag with your mouse to select the area of the image that you want to keep and press Enter on your keyboard. Keeping the image approximately square in shape is preferred.
- Press Ctrl + S on your keyboard, or click on File at the top of the page and select Save at the bottom of the drop-down menu.
- Under Format in the new Save image window, click on the arrow or JPEG (Good for most photos) and select PNG (Transparent, full quality) from the drop-down menu.
- At the bottom of the window, click OK.
Now that the image that you want to use as an icon has been fully customized, all that you have to do is convert it to .ico format.
- Go to http://icoconvert.com/
- Under Step 1, click on Choose File and find the image you want to convert. Select the image and click Open at the bottom of the window.
- Under Choose File, click Upload.
- Scroll down to Step 5 and click Convert ICO.
- Once the image is done converting, click Download your icon(s). In the new window, navigate to where you want your icon to be saved and click Save.
Changing Desktop Icons
- Right-click on the icon you want to change and click Properties at the bottom of the drop-down menu.
- The Shortcut tab should be selected in the new Properties window.
If the Shortcut tab does not exist, the Web Document tab should be selected. If this is not the case either, the icon may need to be changed in Settings. If so, skip the below two steps and follow the instructions after them.
- At the bottom of the Shortcut tab, click Change Icon.
- Click Browse near the top right. Find the location of the files you extracted and select the icon you want.
If the icon can’t be changed using the above instructions, then the next step to try is to change the icon under Settings. To do so, follow the below instructions.
- Right-click anywhere on your desktop and click Personalize at the bottom of the drop-down menu.
- Find the Themes tab on the left side of the window and select it.
- On the right side of the Themes tab, select Desktop icon settings under Related settings.
- Select the icon you want to change and click Change Icon.
- Click Browse near the top right. Find the location of the files you extracted and select the icon you want.
Changing Desktop Wallpaper
- Right-click anywhere on your desktop and click Personalize at the bottom of the drop-down menu.
- The Background tab should be selected in the new Settings window.
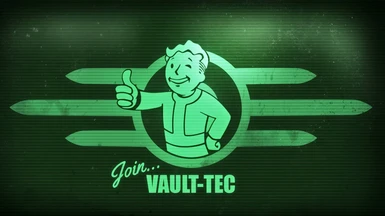
- Click Browse under Choose your picture. Find the location of the files you extracted and select the desktop wallpaper you want.
Changing Lock Screen
- Repeat the first step from above if the Settings window is not already open.
- Find the Lock screen tab on the left side of the window and select it.
- Repeat the last step from above and select the lock screen you want.
Credits
Icons: https://www.flaticon.com/ and http://icoconvert.com/
Desktop Wallpaper, Lock Screen, and Custom Icons: Unknown, Google search
My Other Mods
Unstoppable Junk Jet
Institute Grass
