


0 of 0

About this mod
.psd templates for creating your own custom comic and magazine covers, with separated elements and easy colour editing.
- Permissions and credits
- Changelogs
.psd files organised into individual groups for each cover, for easily creating your own replacement dds files.
This started with just a template for Grognak covers, but since I want an easy way to edit every comic and magazine, I'm going to update this page with new templates as I go.
Currently completed:
Grognak
Picket Fences
Each GROGNAK group contains:
Each PICKET FENCES group contains:
*Each of the individual colour layers has its own Recolour Adjustment mask, letting you easily change the colour of every element directly from the layers menu, without needing to use selection tools.
(and if you don't want the background or highlight on a particular cover, you can now just turn that layer off)
All you need to do is insert the image of your choice, adjust layers to your liking, and save.
Saving dds files:
To install, copy your completed Textures folder to your Fallout 4 Data folder, or install with your mod manager.
I created my own resources for this but want to give credit to lomien's Editable Comic and Perk Posters for the inspiration and being a fantastic modding resource (and I stole a little bit of noise for the damage layer from them).
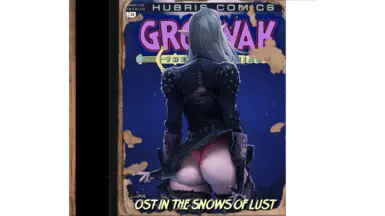
Image for example cover lovingly stolen from Alexis Flower's incredible I Roved Out In Search Of Truth And Love.
This started with just a template for Grognak covers, but since I want an easy way to edit every comic and magazine, I'm going to update this page with new templates as I go.
Currently completed:
Grognak
Picket Fences
Each GROGNAK group contains:
- The original cover for reference/to copy elements from (largely sourced from here).
- A damage texture layer (it's the same for every group, but so are the ones used on the original covers - if you want variety you can easily erase parts of it or duplicate/flip it), with a Vibrance Adjustment mask so you can change how aged it looks.
- The price/issue box, with a Vibrance Adjustment mask.
- Individual layers for the Hubris Comics top bar, the Hubris Comics text, each element of the Grognak logo (outline, text fill, highlight, background), and each element of the sword (outline, blade and handle, handle details, text fill).*
Each PICKET FENCES group contains:
- The original cover for reference/to copy elements from.
- Two damage texture layers (one that matches issue 2, one that matches 3/4/5, I didn't make one to match issue 1 because it's a mess), with a Vibrance Adjustment mask so you can change how aged they look.
- The top white box, with a Vibrance Adjustment mask. I didn't make one for the bottom because I won't use it and you can just copy the top box if you want it.
- Individual layers for the Picket Fences logo, and the price/issue number.*
*Each of the individual colour layers has its own Recolour Adjustment mask, letting you easily change the colour of every element directly from the layers menu, without needing to use selection tools.
(and if you don't want the background or highlight on a particular cover, you can now just turn that layer off)
All you need to do is insert the image of your choice, adjust layers to your liking, and save.
Saving dds files:
- The zip file contains an empty Textures folder that has been set up with the folder structure you need.
- Use the NVIDIA Photoshop dds plugin/GIMP/whatever you normally use.
- The .psd groups are named according to the final required filename, so save a dds file with that name in Textures->Props->ComicsAndMagazinesHighRes->[Comic/Magazine name without spaces] (these are the images you'll see when inspecting/on loading screens).
- Then temporarily reduce the image size by 50% and save another dds file with the same name in Textures->Props->ComicsAndMagazines->[Comic/Magazine name without spaces] (these are the images you'll see in the game world).
- DON'T FORGET TO UNDO THE SIZE CHANGE AFTER SAVING THE LOW RES DDS
To install, copy your completed Textures folder to your Fallout 4 Data folder, or install with your mod manager.
I created my own resources for this but want to give credit to lomien's Editable Comic and Perk Posters for the inspiration and being a fantastic modding resource (and I stole a little bit of noise for the damage layer from them).
Image for example cover lovingly stolen from Alexis Flower's incredible I Roved Out In Search Of Truth And Love.