About this mod
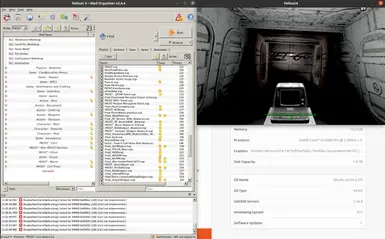
Brief guide for installing Mod Organizer 2 and getting mods (including scripts through F4SE) working with Fallout 4 on Ubuntu 20.04 (may apply to other distros as well).
- Requirements
- Permissions and credits
- Donations
A more in-depth modding guide is incoming, including installing and running additional utilities (FO4Edit, NifSkope, BodySlide and OutfitStudio, etc) and game engine tweaks (Buffout 4, High FPS Physics Fix, etc).
After a lack of good guides on how to mod Fallout 4 on Ubuntu 20.04, and fighting with Lutris/Vortex Mod Manager for a couple days, I've made this as a reference so that other people don't need to spend days researching this. I make no guarantees that it will work for you, but at this point I'm running custom textures and scripts, so I assume it should scale up from there.
This is aimed at being a complete guide on how to install Mod Organizer 2 (MO2) and get mods working (including scripts) on the Steam version of Fallout 4; ensuring that the mods themselves are functional and compatible is beyond the scope of this tutorial. I will walk through all the steps, but effectively you will need:
- Fallout 4 on Steam
- Proton
- WINE
- winetricks
- protontricks
- Mod Organizer 2 Linux Installer
- Optionally: F4SE (Fallout 4 Script Extender)
So, without further ado, here's how I got mods to work with the Steam version of Fallout 4 on Ubuntu 20.04:
First, you need to install Fallout 4 through Steam and make sure it will run. Assuming you haven't done so already, here's how you get Fallout 4 on Ubuntu:
- Install the Steam client and log in.
- Go into the "Settings" menu (Steam -> Settings).
- Select the "Steam Play" tab on the left (at the very bottom).
- In the right panel, under the "Steam Play Settings", select "Enable Steam Play for supported titles".
- Under the "Advanced" section below, select "Enable Steam Play for all other titles".
- The Mod Organizer 2 install (below) recommends using Proton 6.3 due to extensive testing, but I ended up running it with Proton Experimental; if you choose to run a newer version of Proton than what's technically supported by MO2, then expect there may be issues.
- Click "OK" to save your settings.
- Install Fallout 4 as usual, then launch it and make sure it runs; I would run it at least through until you exit the Vault (also a good position to test mods later).
- Before continuing, make sure that there are no additional "Launch Options" set for the game (open the game in your library, click on the "gear" icon below the image, select the "Properties", and make sure the "Launch Options" text box is empty).
- Note that the author of MO2 on Linux indicates that it may not work with any games installed after you install MO2, so make sure you have Fallout 4 ready to go before continuing.
Now you can install Mod Organizer 2:
- Everything listed here is outlined on the Mod Organizer 2 Linux Installer github located here: https://github.com/rockerbacon/modorganizer2-linux-installer
- If the above link doesn't work, it's a github repository by rockerbacon called modorganizer2-linux-installer. Note that I am not the author of this repo, but going this route has made it stupidly quick and easy to get back into Fallout 4.
- I will outline the main points below, but everything is covered in the README on the above repository.
- I had WINE, winetricks, and 7z installed before doing the following steps, but you will need to install those first if you don't have them. On Ubuntu, they can be installed using "sudo apt install".
- First, you will need to install protontricks, which can be found here: https://github.com/Matoking/protontricks. If the link doesn't work, it's a github repository by Matoking called protontricks. The github recommends using Flatpak (which you will have to install if you don't already have it), although I installed it manually using the terminal. If you'd like to install it manually, I used these instructions (https://simpler-website.pages.dev/html/2021/1/protontricks/), although essentially you will need to go into your terminal and type:
1 sudo apt install python3-pip python3-setuptools python3-venv
2 python3 -m pip install --user pipx
3 python3 -m pipx ensurepath
1 pipx install protontricks - Download the latest stable release of the Mod Organizer 2 Linux Installer from rockerbacon's github and extract it.
- Open the extracted folder and run "./install.sh", then follow the installation instructions (I did this through the terminal).
- Once installation completes, you'll want to launch Fallout 4 from Steam, and it should launch directly into MO2.
- At this point, you will be provided with a series of options; I chose to install separate instances (portable instead of global), as I've read previously that there may be issues with getting mods to work properly using a global install. If you're only modding Fallout 4, there's no real reason to do a global install anyway, so no sense risking it.
- I kept all of the other defaults, with the exception of adding my API key for Nexus Mods (although you can do that later if needed, and it's likely not required).
- I've read that launching webpages from MO2 on Linux can cause crashes, so I selected "No" for the tutorial (as it forces you to navigate to the web at one point).
- Once MO2 loads up, launch Fallout 4 from within it to make sure everything launches properly; if all works, then you can quit out from the game and return to MO2.
At this point, the Steam launcher should load MO2 instead of Fallout 4, and you should be able to launch Fallout 4 from within MO2 without issues. If you're not able to do this, then take a step back and make sure you've followed everything correctly. At worst, you may have to remove and reinstall Fallout 4 entirely, then reinstall MO2.
Manually loading and installing mods in MO2:
- I haven't tried automatically downloading and installing mods from Nexus using MO2, so it may or may not work. I get my mods from other sources as well, and already had most of them downloaded, so I chose to manually install them.
- Note that this will not work for installing F4SE (Fallout 4 Script Extender)! Installation of F4SE is covered in the next section.
- Download the mods you want.
- Open a file explorer window and navigate to your main "Downloads" directory (or wherever your mod is stored).
- Open a second file explorer window and navigate to the MO2 download directory; mine was located at:
~/Games/mod-organizer2-fallout4/modorganizer2/downloads - Move or copy the mod file from your main "Downloads" directory to the MO2 "Downloads" directory. You might be able to drag it directly from your main "Downloads" directory into the "Downloads" pane in MO2, or the folder itself within MO2, but I found it easier to go between the two folders directly.
- If MO2 isn't running yet, launch it and you should see the mods appear in the "Downloads" pane on the lower right of the window (make sure to select the "Downloads" tab if needed).
- At this point, you should modify the fallout4custom.ini file. On my computer, this file was located at:
~/Games/mod-organizer2-fallout4/modorganizer2/profiles/Default/fallout4custom.ini - In the fallout4custom.ini file, add the following lines:
[Launcher]
bEnableFileSelection=1
[Archive]
bInvalidateOlderFiles=1
sResourceDataDirsFinal= - At this point, you can create separate profiles for your mod lists; if you modified the default fallout4custom.ini file as above, you can either copy the Default profile and rename it, or select the "Default Game INI Settings" when making a new profile. Otherwise, you will have to modify the fallout4custom.ini file for each profile.
- Install the mods you want from the "Downloads" pane (double-click or right click -> "install"). You will need to choose the appropriate options and maintain compatibility yourself.
- Enable the mods in the main mod pane.
- Launch Fallout 4 from MO2 and check that your mods are showing up and active.
Installing F4SE (Fallout 4 Script Extender):
- F4SE needs to be installed directly into the main Fallout 4 directory in order to work; MO2 does not like the F4SE directory structure and will not install it properly for you.
- Download the current version of F4SE from silverlock.org: http://f4se.silverlock.org/
- Open a file explorer window, navigate to your main "Downloads" directory, and unpack the archive.
- Open a second file explorer window and navigate to your main Fallout 4 installation directory. The main Fallout 4 installation directory will contain "Fallout4.exe" and "Fallout4Launcher.exe"; mine was located at:
Note that ".steam" indicates a hidden directory/file, so you will need to enable "Show hidden files" in your file explorer window to get there.
~/.steam/debian-installation/steamapps/common/Fallout 4 - Move (or copy) everything from the F4SE archive you unpacked into the main Fallout 4 installation directory; this should include "Data" and "src" directories, as well as 5 files (all named "f4se_...").
- At the beginning of the file transfer, you should get a popup asking you to merge the "Data" directory; you want to make sure you merge the directories, as that will transfer the needed F4SE files from the archive to the "Data" directory without overwriting/removing needed files.
- Launch MO2 and select "F4SE" from the drop-down menu on the upper right (next to the "Run" button), then click "Run".
If all has gone well, at this point Fallout 4 should launch and your scripts should be working. If not, make sure you've followed all of the steps correctly and your fallout4custom.ini file has the correct lines in it; otherwise, it could be an issue with the mod itself, or you may need to try a complete reinstall of MO2 (or Fallout 4).
Happy modding!


