


0 of 0


About this mod
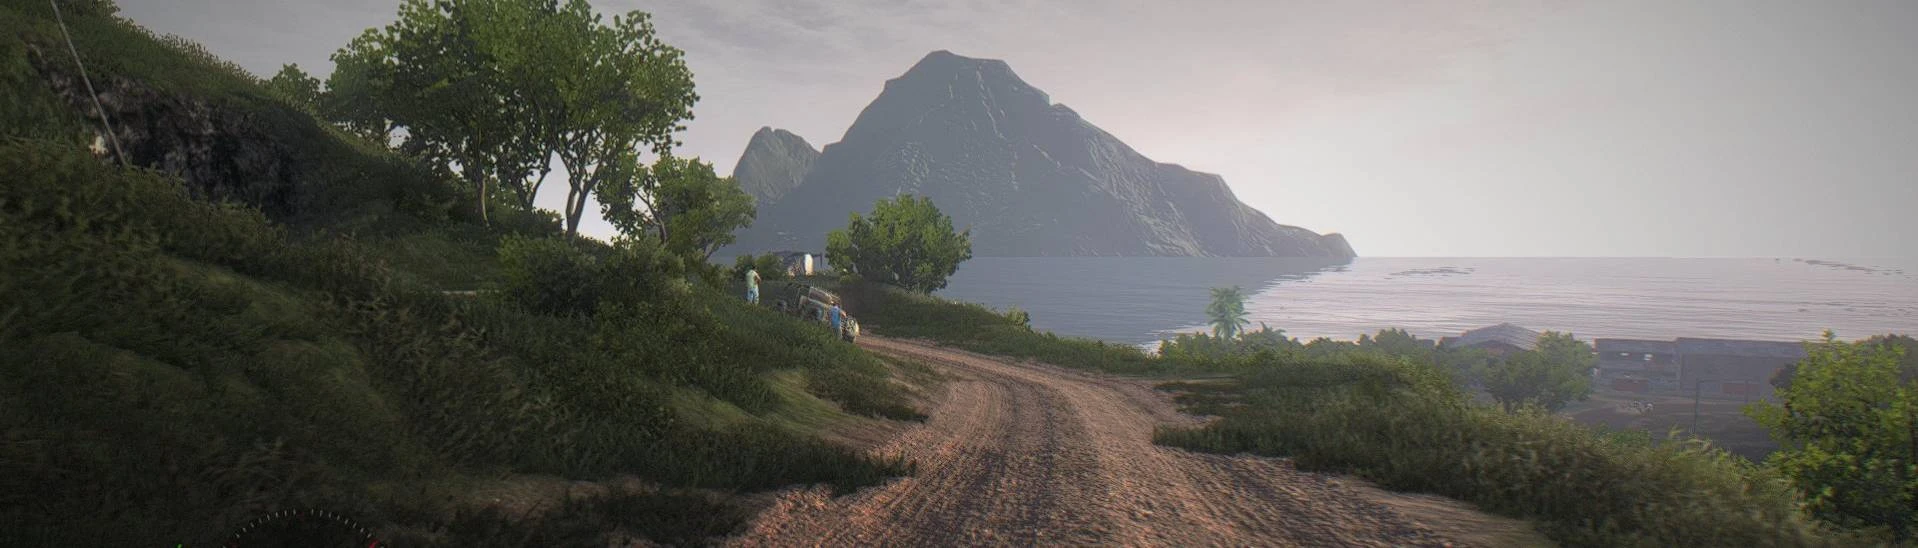
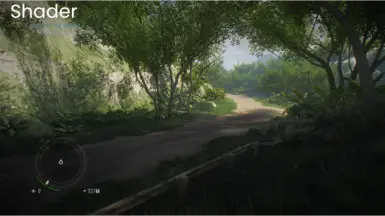
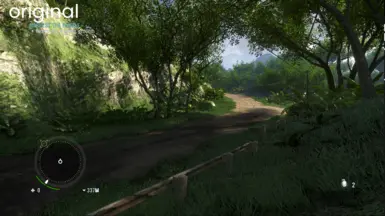
Alex Tuduran’s ReShade preset transforms your game into a cinematic masterpiece, amplifying realism with a darker, grimier, and more atmospheric look. Designed to push the limits of lighting, shadows, and post-processing, this preset enhances textures, deepens contrast, and adds a subtle filmic grain for a lived-in, immersive aesthetic.
- Requirements
- Permissions and credits
Far Cry 3.5 ReShade Preset Installation GuideStep 1: Install ReShade
Step 3: Import the Preset
Step 5: Toggle Effect Keybind (Optional)This allows you to see the before and after or quickly disable effects during gunplay.
Step 6: (Optional) Install Far Cry 3 Reborn Mod
Step 7: Enjoy!
- Download ReShade from the official website: https://reshade.me/
- Open the ReShade installer and select the Far Cry 3 executable located in:
Far Cry 3 - Duology\Far Cry 3\bin
- Launch Far Cry 3.
- Go to the VIDEO options in the game menu.

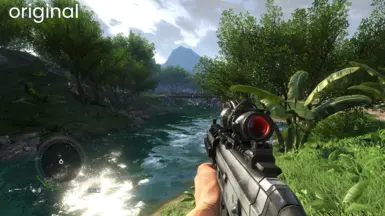
- Check whether your game is using DirectX 9 (DX9) or DirectX 11 (DX11) (See provided image example).
- Close the game and return to the ReShade installer.
- In ReShade, select the correct API (DX9 or DX11) based on your game settings.

Step 3: Import the Preset
- Download the Alex Tuduran's ReShade Preset.
- In ReShade, click on Import and select the
.inifile of the preset. - ReShade will automatically check all the necessary shader boxes.
- Wait for the installation process to complete.
- Launch the game, and when you press the Home key on your keyboard, you should see a ReShade overlay pop-up (See image example).


- The game has an issue where Scene Ambient Occlusion (AO) gets overwritten, causing grass to lose the screen space shader at certain angles.
- If this issue annoys you, follow these steps:
- Open the ReShade menu in-game (press Home key).
- Locate the affected shader in the list.

- Untick the shader to disable it.
- (Press Active to the Top for easier management.)
Step 5: Toggle Effect Keybind (Optional)
- You can assign a keybind to toggle the effect on and off:
- Open the ReShade menu.
- Go to the Settings tab.
- Assign a key to toggle ReShade effects.

Step 6: (Optional) Install Far Cry 3 Reborn Mod
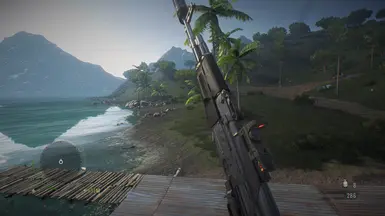
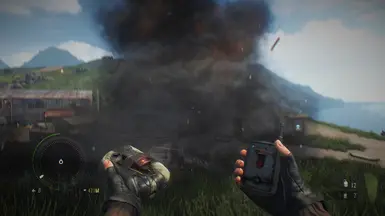
- The screenshots provided use the Far Cry 3 Reborn mod.
- To install:
- Drop the mod's two patch files into the game's Win32 directory.
- Make a backup of your existing two patch files before replacing them.
Step 7: Enjoy!
- Check out the screenshots for a preview of the improved visuals.
- Credits: All credit goes to Alex Tuduran for the preset. I am simply uploading it to Nexus with a tutorial for others to enjoy!