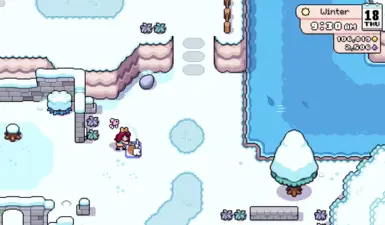
About this mod
This mod changes the item you will obtain from the next dig spot. It effectively allows you to use dig spots to obtain any item in the game (with some special cases)!
- Requirements
- Permissions and credits
This mod allows you to choose the item that will be obtained from the next dig spot! Choose an item by pressing F11 and inputting the desired item name. You can look up every item available on my GitHub here:
https://github.com/AnnaNomoly/YYToolkit/tree/stable/DigUpAnything
Important Notes
- Since this mod uses YYTK to change some of the game's code, it will only work on the Windows version of the game.
- Press F11 to open the window where you input an internal item name. Then, go find a dig spot!
- The mod will only change the next dig spot after you specify an item. If you want another item, press F11 again and repeat the process! This was done to allow you to continue digging up unmodified dig spots during normal gameplay.
Version 1.2.0: Config File
Added a configuration file allowing the mod's activation key to be changed. See the "Configuration File" section for more details.
Version 1.1.1: Displayed Name or Internal Item Name
As of version 1.1.1 the mod allows you to input the desired item's name as the Displayed Name or Internal Item Name. The GitHub table with item information has been updated to include both for every item. The Displayed Name is the actual item name you see in tooltips.
When entering a Displayed Name the mod will ignore capitalization and leading or trailing spaces to make item name entry more convenient.
Version 1.1.0: Multiple Items
As of version 1.1.0 the mod allows you to specify how many of the spawned item to give you. It will default to one (1), and the provided value must be a whole number between 1 and 999 (inclusive). If an invalid value is provided the default (1) will be used.
Additionally, for items that have yet to be acquired (such as artifacts), the mod will only allow you to spawn one of them until you use it. This is to prevent game crashes. For example, if you have never found a Perfect Ruby (perfect_ruby) before, and spawn that item, the mod will only let you spawn one. If you try to spawn more, it will prevent it from being spawned, until you use the unidentified artifact. Once you've identified it (and therefore, "acquired" it), you can freely spawn as many as you want.
Configuration File
- Added a configuration file that will be automatically created. A folder named "mod_data" will be created where the game is located. Another folder will be created inside the mod_data folder named "DigUpAnything" which contains the config file, named "DigUpAnything.json". In short, the path will look like: <game_folder>/mod_data/DigUpAnything/DigUpAnything.json
- The mod will need to be started (title screen loaded) once in order to create the config file. It will be created with default values.
- Close the game, edit the config file, and restart.
An example of the default configuration file as-of DigUpAnything v1.2.0 is below.
{
"activation_button": "F11"
}
The activation_button property must be a string value (enclosed in quotes like above), and must be one of the following values:
FUNCTION KEYS
"F1", "F2", "F3", "F4", "F5", "F6", "F7", "F8", "F9", "F10", "F11", "F12"

NUMPAD KEYS
"NUMPAD_0", "NUMPAD_1", "NUMPAD_2", "NUMPAD_3", "NUMPAD_4", "NUMPAD_5", "NUMPAD_6", "NUMPAD_7", "NUMPAD_8", "NUMPAD_9"

NUMBERS
"0", "1", "2", "3", "4", "5", "6", "7", "8", "9",

LETTERS
"A", "B", "C", "D", "E", "F", "G", "H", "I", "J", "K", "L", "M", "N", "O", "P", "Q", "R", "S", "T", "U", "V", "W", "X", "Y", "Z"

SPECIAL KEYS
"INSERT", "DELETE", "HOME", "PAGE_UP", "PAGE_DOWN", "NUM_LOCK", "SCROLL_LOCK", "CAPS_LOCK", "PAUSE_BREAK"

CONTROLLER BUTTONS
"GAMEPAD_A", "GAMEPAD_B", "GAMEPAD_X", "GAMEPAD_Y", "GAMEPAD_LEFT_SHOULDER", "GAMEPAD_RIGHT_SHOULDER", "GAMEPAD_LEFT_TRIGGER", "GAMEPAD_RIGHT_TRIGGER", "GAMEPAD_DPAD_UP", "GAMEPAD_DPAD_DOWN", "GAMEPAD_DPAD_LEFT", "GAMEPAD_DPAD_RIGHT", "GAMEPAD_LEFT_STICK", "GAMEPAD_RIGHT_STICK", "GAMEPAD_BACK", "GAMEPAD_START"
Requirements
The Mods of Mistria Installer (MOMI) is required for installation.
Installation
HEY, LISTEN!
Back up your save game before trying this mod for the first time!
- Create a folder named mods where the game (FieldsOfMistria.exe) is located. If you're using Steam, you can easily locate that by right-clicking the game in your Library and going to Installed Files > Browse in the modal window. The game's directory path will look similar to what's below:
C:\Program Files (x86)\Steam\steamapps\common\Fields of Mistria - Download the DigUpAnything.zip file and save it inside the mods folder you created.
- Extract the zip file in this directory. There should now be a folder called DigUpAnything inside the mods folder.
- Delete (or move) the original zip file. Leave the unzipped folder alone.
- Run MOMI and install the mod!
Usage
Run the game via Steam, or the the game executable (FieldsOfMistria.exe) directly. Optionally, edit the config file.
Uninstallation
Follow the standard uninstallation procedures specified by MOMI.
Source Code
https://github.com/AnnaNomoly/YYToolkit/blob/stable/DigUpAnything/source/ModuleMain.cpp
Shout Outs
- Archie (@archie_uwu): For making Aurie + YYTK and teaching me how to use it.
- Garethp (@garethp): For MOMI.


