


0 of 0

About this mod
Designed for HDR. This reshade is designed to fix the overall raised light levels in the native presentation, along with that little extra punch that HDR can bring without crushing black levels.
- Requirements
- Permissions and credits
- Changelogs
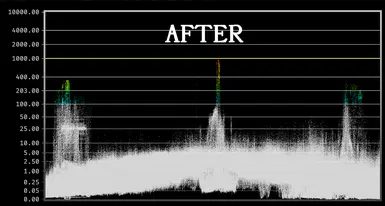
The goal of this reshade was to adjust the HDR presentation to make better use of its range, delivering what I believe is a more accurate representation of the game's art. The most important shaders are "Lilium's HDR black floor fix" and "prod80_03_Shadows_Midtones_Highlights", which is configured to adjust the game's lower nit values to look more like the SDR presentation with a gamma of 2.2. The result is that it looks like a "fog" has been lifted. The other shaders try to tackle the oversharpened look the texture work can have, as well as replacing the film grain to run after tonemapping so the contrast adjustments don't ruin the look of the grain.
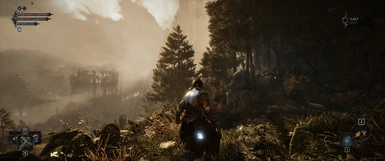
Unfortunately, Nexus doesn't support HDR image formats, so the included screenshot is in SDR with the non-HDR specific shaders enabled. The video is a proper HDR comparison and there are HDR photos in the files.
Shaders used:
I also highly recommend installing the Sharpening Removal mod. These contrast tweaks further expose the aggressive sharpening value the developers used. Even with it removed, I still decided to utilize BilateralCS to slightly soften the textures (that mod as well as this shader are used in the screenshots). Even if you prefer the sharpened look, you're better off using a sharpening filter through reshade, just make sure you place the sharpening shader after the other shaders (but before film grain) in the load order.
Installation
Special thank you to moke_2140 for help testing.
Unfortunately, Nexus doesn't support HDR image formats, so the included screenshot is in SDR with the non-HDR specific shaders enabled. The video is a proper HDR comparison and there are HDR photos in the files.
Shaders used:
- Lilium's HDR black floor fix
- prod80_03_Shadows_Midtones_Highlights
- BilateralCS (optional)
- Lilium's filmgrain (optional, replaces in-game option)
I also highly recommend installing the Sharpening Removal mod. These contrast tweaks further expose the aggressive sharpening value the developers used. Even with it removed, I still decided to utilize BilateralCS to slightly soften the textures (that mod as well as this shader are used in the screenshots). Even if you prefer the sharpened look, you're better off using a sharpening filter through reshade, just make sure you place the sharpening shader after the other shaders (but before film grain) in the load order.
Installation
- Download the latest ReShade without addon support (sometimes the latest build can have issues with EAC. If that happens, try the version before it).
- Download BetterHDR from the files tab.
- Paste the BetterHDR.ini file into the game install directory at <your path>\Lords of the Fallen\LOTF2\Binaries\Win64
- Run the ReShade installer that you downloaded in step 1, click Browse and locate LOTF2-Win64-Shipping.exe (DO NOT pick the exe in the root Lords of the Fallen folder).
- Make sure DirectX 10/11/12 is selected and click next.
- Click "Browse" and then select the BetterHDR.ini file, then click next.
- Install the Sharpening Removal mod by following the instructions on that page.
Note: If you want sharpening, apply your filter of choice through reshade after the tonemapping shaders (but try removing BilateralCS first and you may find it sharp enough). The tonemapping in this preset will make the in-game sharpening even more aggressive. - Boot up the game and head to the HDR calibration screen. You'll want it set to the defaults of 1000 nits. The in-game calibration is dysfunctional at any value other than 400 nits and sends out up to 10000 nits. The corresponding presets will tonemap this for you.
- Open up ReShade and go to the lilium tonemapping shader. Adjust the target brightness to match the peak nits for your screen (default is 1000).
- Everything is now setup, but you'll also want to disable Film Grain in-game. If you don't want film grain at all, then open ReShade again and disable the film grain shader there as well.
Special thank you to moke_2140 for help testing.