


0 of 0


File information
Created by
iffyfuistatementUploaded by
IffyfuistatementVirus scan
Some manually verified files
About this mod
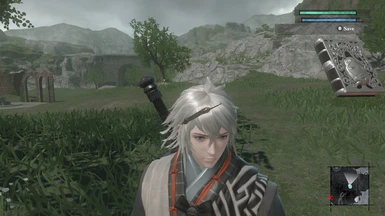
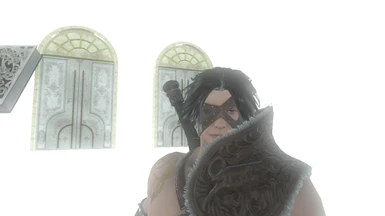
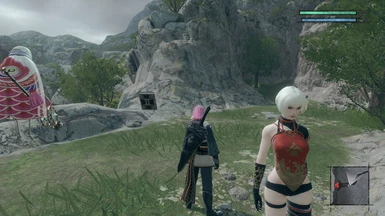
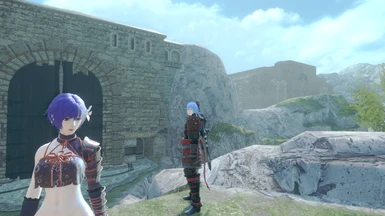
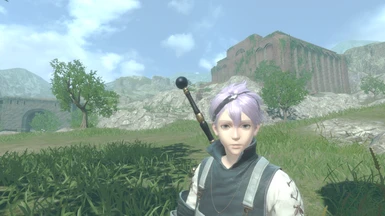
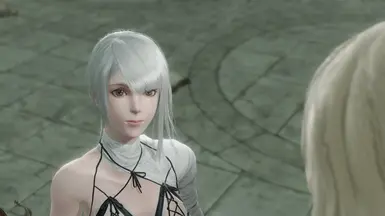
Dyes the hair of Papa Nier, Younger and Older Brother Nier, Kaine, and their alternate costumes.
Comes with the hair colors in the original RepliCant as well as all hair dyes featured in NieR: Automata's 3C3C1D119440927 DLC.
- Permissions and credits
Our salon is now open!
As the best (and only) salon in the area, we pride ourselves on delivering excellent service.
We offer all 18 hair colors from Automata, with no Colosseum fights required:
We offer three haircuts:
Hair dyes (and haircuts) work on the YorHa DLC costumes as well, since the hair is the same as their default outfits. Please use the files for the default outfits if you wish to change the hair of a YorHa DLC costume.
Kabuki Younger Nier and Kabuki Older Nier will have the same hair dye applied, as well as Samurai Younger Nier and Samurai Older Nier.
Our salon is known for its professionalism and quality. Please stop by!
________________________
Thank you to the Special K and Nier Modding Discord servers for helping me out.
Extra thanks to DevolasRevenge for both the idea and for making the Goth Kaine mod in the first place.
Installation guide (heavily based on the aforementioned Goth Kaine mod's guide):
1. Download and local install Special K. Here is a tutorial. Downloading the latest version should work fine.
For Step 5 in the tutorial, Nier Replicant uses a 64-bit executable and the DirectX 11 API.
For Step 7, rename the DLL file to d3d11.dll. dxgi.dll will not work
2. Download the mod file you chose. Pick one texture folder within the mod file. You cannot inject more than one of a texture with the same name at a time.
Find the file location of your game (the same place you put d3d11.dll earlier). Then, starting from there, place your chosen texture folder in SK_Res\inject\textures. If you are missing folders, create them
3. Start the game, load up a save, and then press CTRL-SHIFT-BACKSPACE to open the SpecialK menu. Click on "Render Mod Tools", then click on "Reload All Injected Textures"
Your character should now have their new hairdo. If not:
Fix for Cutscene Bro Nier and Alternate Kainé models:
When the aforementioned character is on screen, open the Special K menu and click Render Mod Tools. Find the hexadecimal name of the texture in the list. You may have to click "All Textures" and then "Refresh Textures" for it to show up.
Make the window large enough for you to see a picture of the texture. Then, if the "Reload Texture" button (NOT the "Reload All Injected Textures" button) is available for that texture, click it, and it should work, at least for a while.
If the button is not available/you only see a "Dump Texture to Disk" button, then the fix is not available this time. It's a bit of a toss-up, unfortunately. If the texture disappears entirely from models that already had it successfully injected, restarting the game will fix it.
As the best (and only) salon in the area, we pride ourselves on delivering excellent service.
We offer all 18 hair colors from Automata, with no Colosseum fights required:
- Black
- Brown
- Red
- Blue
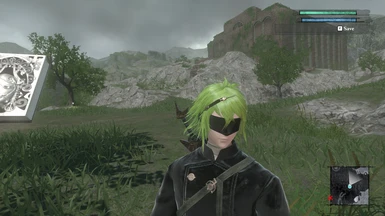
- Green
- Purple
- Ash Grey
- Golden
- Pastel Pink
- Light Blue
- Lime Green
- Light Purple
- Neon White
- Neon Yellow
- Neon Pink
- Neon Green
- and Neon Purple
- Original Blond (for Younger and Older Brother Nier, as well as their Kabuki and Samurai costumes)
- Original Silver (for Kaine and her Kabuki and Samurai costumes)
- Kabuki Red (for default Younger and Older Brother Nier)
- Samurai Silver (For default Younger and Older Brother Nier and default Kaine)
- White (For the Kabuki and Samurai alternate outfits)
We offer three haircuts:
- A microscopic trim, invisible to the human eye, for collecting DNA samp- I-I mean, taking care of split ends. This is mandatory.
- A buzzcut
- Bald
Hair dyes (and haircuts) work on the YorHa DLC costumes as well, since the hair is the same as their default outfits. Please use the files for the default outfits if you wish to change the hair of a YorHa DLC costume.
Kabuki Younger Nier and Kabuki Older Nier will have the same hair dye applied, as well as Samurai Younger Nier and Samurai Older Nier.
Our salon is known for its professionalism and quality. Please stop by!
________________________
Thank you to the Special K and Nier Modding Discord servers for helping me out.
Extra thanks to DevolasRevenge for both the idea and for making the Goth Kaine mod in the first place.
Installation guide (heavily based on the aforementioned Goth Kaine mod's guide):
1. Download and local install Special K. Here is a tutorial. Downloading the latest version should work fine.
For Step 5 in the tutorial, Nier Replicant uses a 64-bit executable and the DirectX 11 API.
For Step 7, rename the DLL file to d3d11.dll. dxgi.dll will not work
2. Download the mod file you chose. Pick one texture folder within the mod file. You cannot inject more than one of a texture with the same name at a time.
Find the file location of your game (the same place you put d3d11.dll earlier). Then, starting from there, place your chosen texture folder in SK_Res\inject\textures. If you are missing folders, create them
3. Start the game, load up a save, and then press CTRL-SHIFT-BACKSPACE to open the SpecialK menu. Click on "Render Mod Tools", then click on "Reload All Injected Textures"
- "Reload All Injected Textures" should be beside "Clear Debug". It should show up, but if you can't see it, go to the bottom right corner of the window and drag the little triangle. That should allow you to resize the window so you can reach the button.
- For Papa Nier, wait until you have entered the World of the Recycled Vessel before injecting the textures.
Your character should now have their new hairdo. If not:
- You may have put the texture folder in the wrong place. In the Special K menu go to File -> Browse Texture Assets -> Injectable Textures. This will open up the location the texture folder needs to be in for it to work. It will still work if it's in a subfolder. Restart the game afterwards if you're moving the file over while it's still running.
- From what I've personally seen, you don't need to downgrade your game for the texture injection to work, but it might be worth a shot, so here's the exe file for an older build. This link is directly taken from the Goth Kaine mod.
- Feel free to ask me questions! I probably forgot to add something
Fix for Cutscene Bro Nier and Alternate Kainé models:
When the aforementioned character is on screen, open the Special K menu and click Render Mod Tools. Find the hexadecimal name of the texture in the list. You may have to click "All Textures" and then "Refresh Textures" for it to show up.
Make the window large enough for you to see a picture of the texture. Then, if the "Reload Texture" button (NOT the "Reload All Injected Textures" button) is available for that texture, click it, and it should work, at least for a while.
If the button is not available/you only see a "Dump Texture to Disk" button, then the fix is not available this time. It's a bit of a toss-up, unfortunately. If the texture disappears entirely from models that already had it successfully injected, restarting the game will fix it.