


This guide is tailored for those who've embarked on their journey into Stalker Shadow of Chernobyl, captivated by its atmospheric setting but struggling with various obstacles hindering their progress—be it the unfamiliar interface, subpar weaponry, financial constraints, or the omnipresent threats of mutants, radiation, and anomalies. Additional info, that concerns Girly_SoC mod is added to every section.
INTRO
Thanks to STALKER 2 long-awaited release by GSC, a wave of new players has flooded into the Stalkers’ community. Due to the war, many experienced players went away, as they were mostly Moskovites though. As a supporter of Ukraine, I stand for their victory and feel both shame and sorrow for hailing from an aggressive nation. Slava Ukraine!
Original guide at Steam site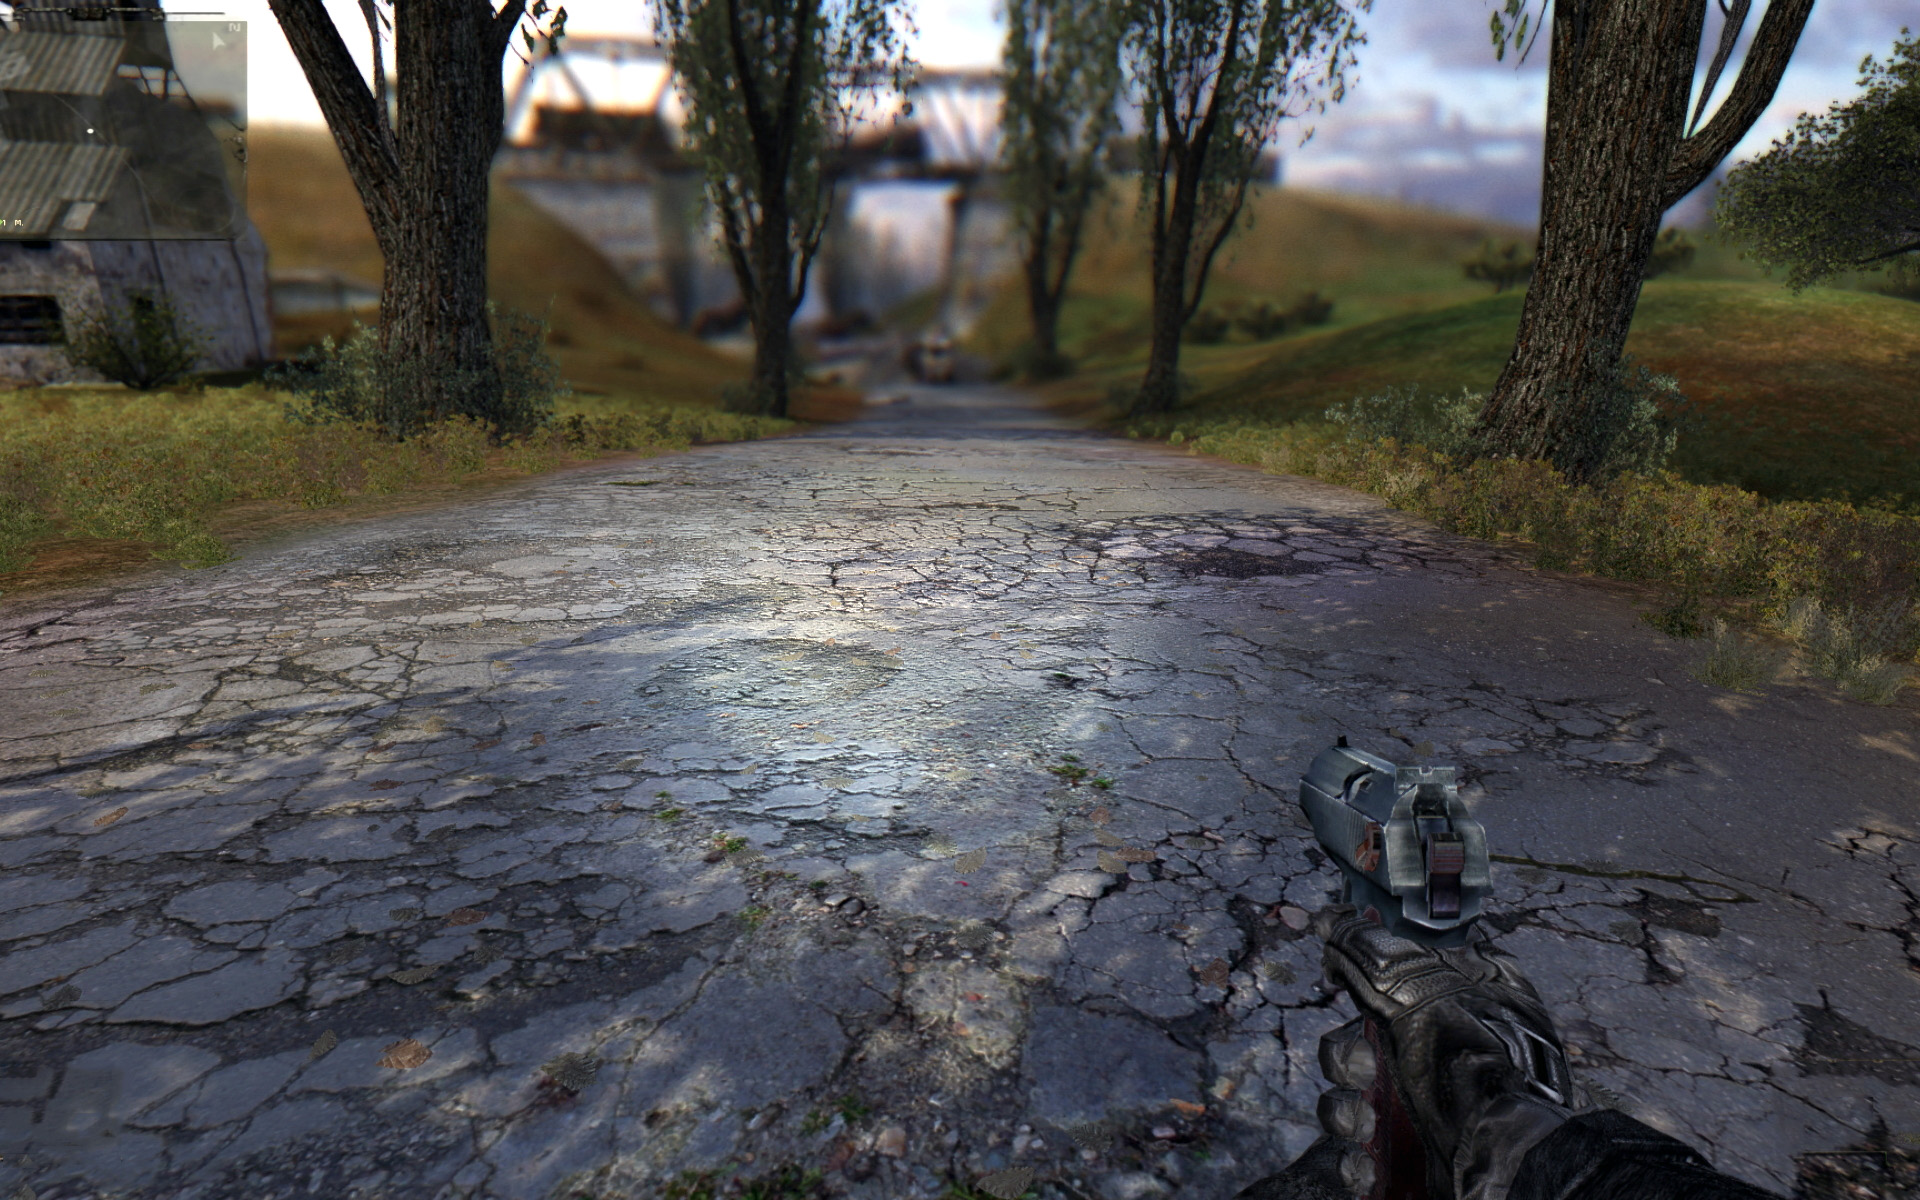
STALKER defies conventional genre categorization; it's neither purely FPS, RPG, survival, nor horror adventure. Instead, I'd label it a simulator set in a "post-apocalyptic" world, blending elements from all aforementioned genres. To truly thrive, you must fully immerse yourself in the game environment, making calculated decisions and relishing the experience. It's worth noting that while the setting is often described as post-apocalyptic, it should be more accurately described as a "Soviet post-accidential". For deeper insights, I recommend delving into the works of the Strugatsky brothers' "The Roadside Picnic" and HBO's "Chernobyl" series. While Tarkovsky's film "Stalker" won't offer much in terms of information, its atmosphere will resonate with the game's ambiance.
Assuming you've already perused the manual and acquainted yourself with characters like Sidorovitch, the local trader and task provider, as well as the basics of PDA management, allow me to stress the importance of the "Diary" section—particularly the "message history," where you can read all dialogs, you may have not listened and messages you haven’t read. That may become highly important, as dialogs never stop the time current and you may not finish dialog properly or miss some details, due to NPC started moving.
>>>> If you had already left Cordon and going nor to start over, neither going back, than skip ahead to the final sections — "Parting instructions' and "FAQ" <<<<
STALKER SoC manual.[ecx.images-amazon.com]
START and The First Tutorial Task
Precondition: You have agreed to listen that "brainwash" by the first NPC you've met (trader).
So, our journey begins by exiting Sidorovitch’s bunker and visiting the Rookie’s village. It is safe here – enjoy guitar music and camp-fire jokes. But, first of all, I must admit, that in spite of this game pretend to be open-world – it is not. Every location has a main road and some sites aside it. While you're free to engage in reckless behavior, it's advisable to stick to the storyline for your initial playthrough. This entails carefully heeding the advice of NPCs and following their directives (with the exception of bandits and that stalker at the Pig Farm).
The first task is to speak to Wolf (if you forget your main task – press TAB button) – so, do that. It's crucial to converse with him and to agree to save Nimble. After that, you will be gifted with some weapons, including knife, that could not be obtained by any other way.
Girly_SoC mod features are very visible at this site - random number of woman NPCs could be found here, and some of them speak English, and more - some male NPC speak English as well. I will not mention Ukrainian and new stories and cues in all languages.
KNIFE
Besides the surprisingly high damage during close combat, the knife is the best tool for crashing big wooden crates and small tin blue boxes – that may contain some useful goods. There are standard (fire button) and alternative (zoom button) knife strikes, and the latter is the best for treasure hunting. (You can also expend some bullets to crash boxes, or jump over blue launchboxes if you like)). The knife's hit amount was slightly increased in Girly SoC
You should know from the very start, that there is no "stealing", "theft" and "property" in vanilla game. Finder=Keeper! Grab anything you see, but remember about weight limit.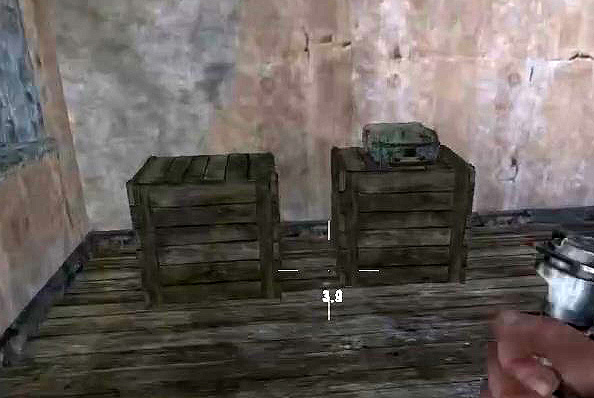
You can surely run to fight as you are - equipped with thin windbreaker and Makarov pistol (the worst gun in the game), without any food and medicines. But it is possible to find some goods in the village, If you explore thoroughly all houses, including basements and attics (each accessible in some manner) and crash all above mentioned containers. Additionally, this serves as excellent practice for movement, jumping, crouching, and climbing.
You may find there merc suit/400 makarov cartridges/ canned meat/ bandages/medkit and more, if you're lucky and attentive – or read / watch some guides about that to have a good start .
Note: Holster weapons with the same button you equip it!
HUD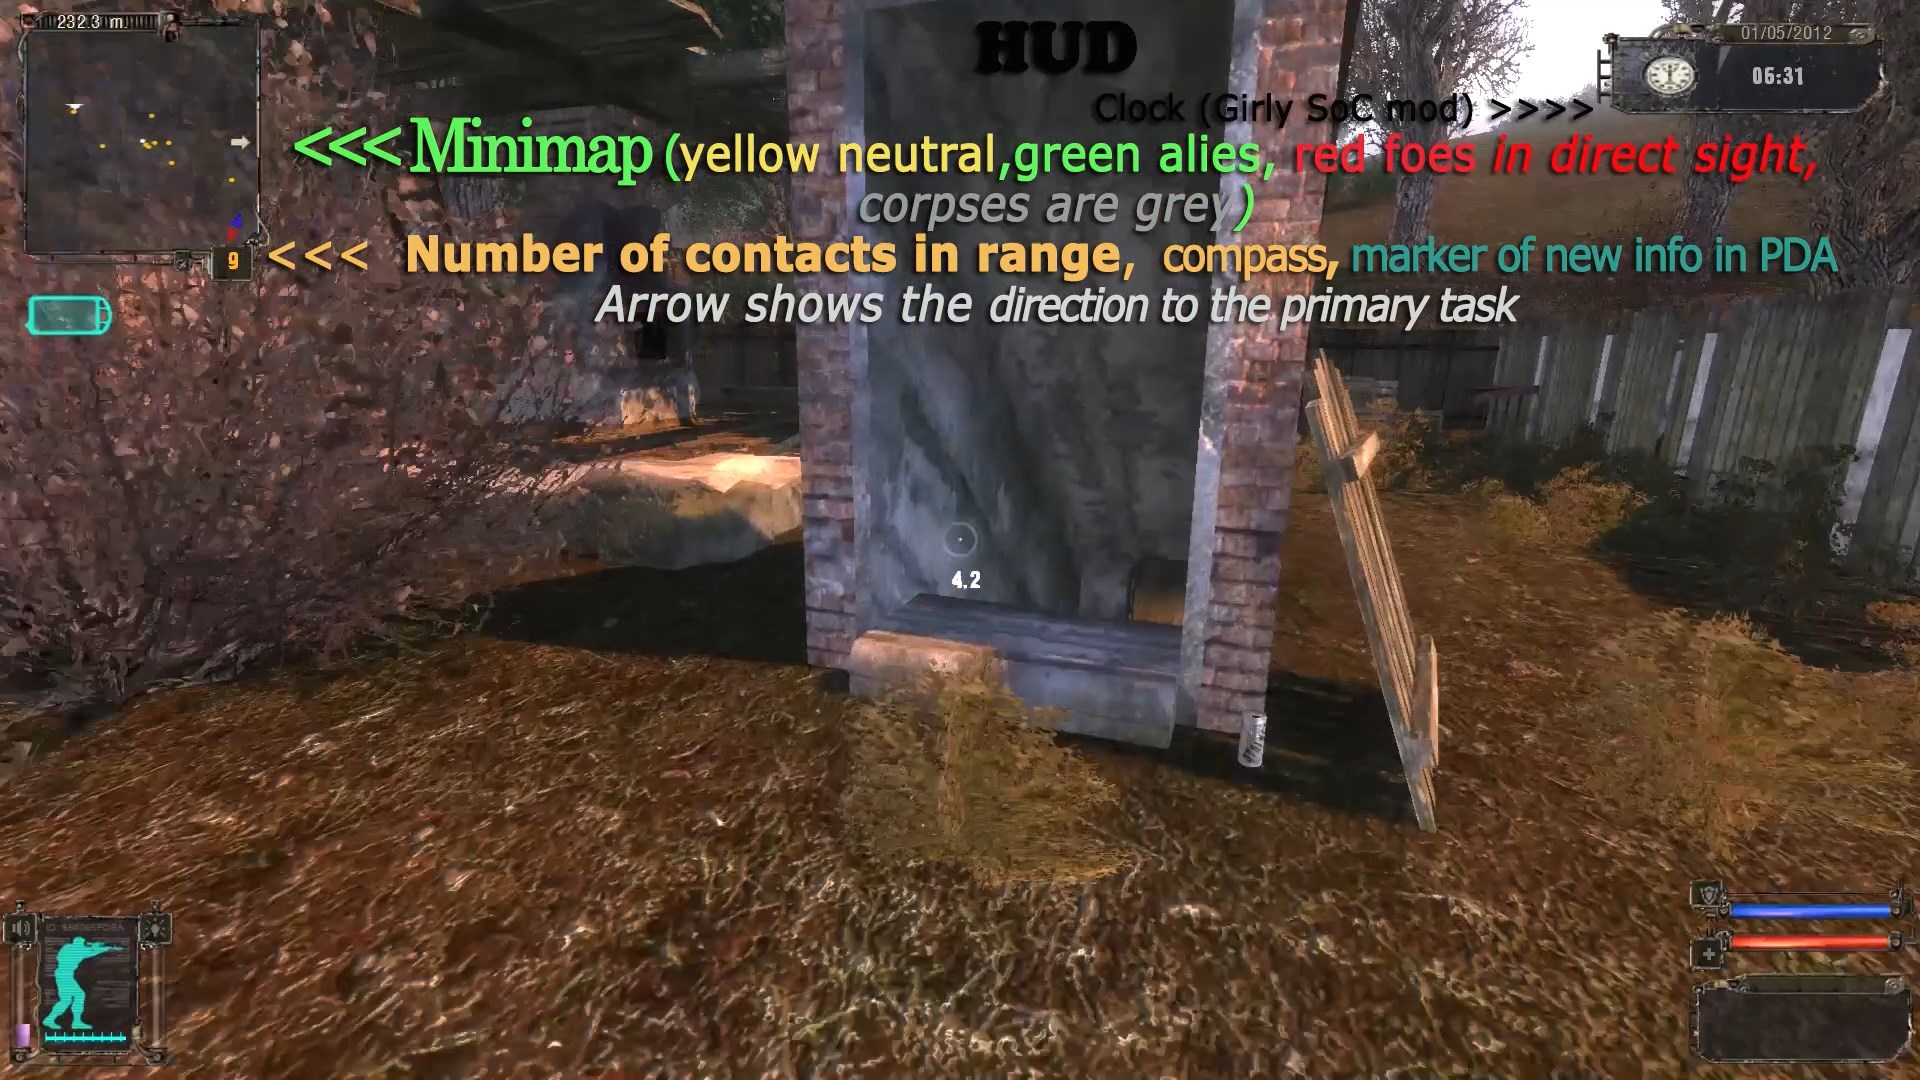
The only important information is that the number of ammo displayed – is the quantity of all the ammo OF THIS CALIBER you have (like FMJ and AP types)
Another important notice: mutants' corpses will not be shown on mini-map, 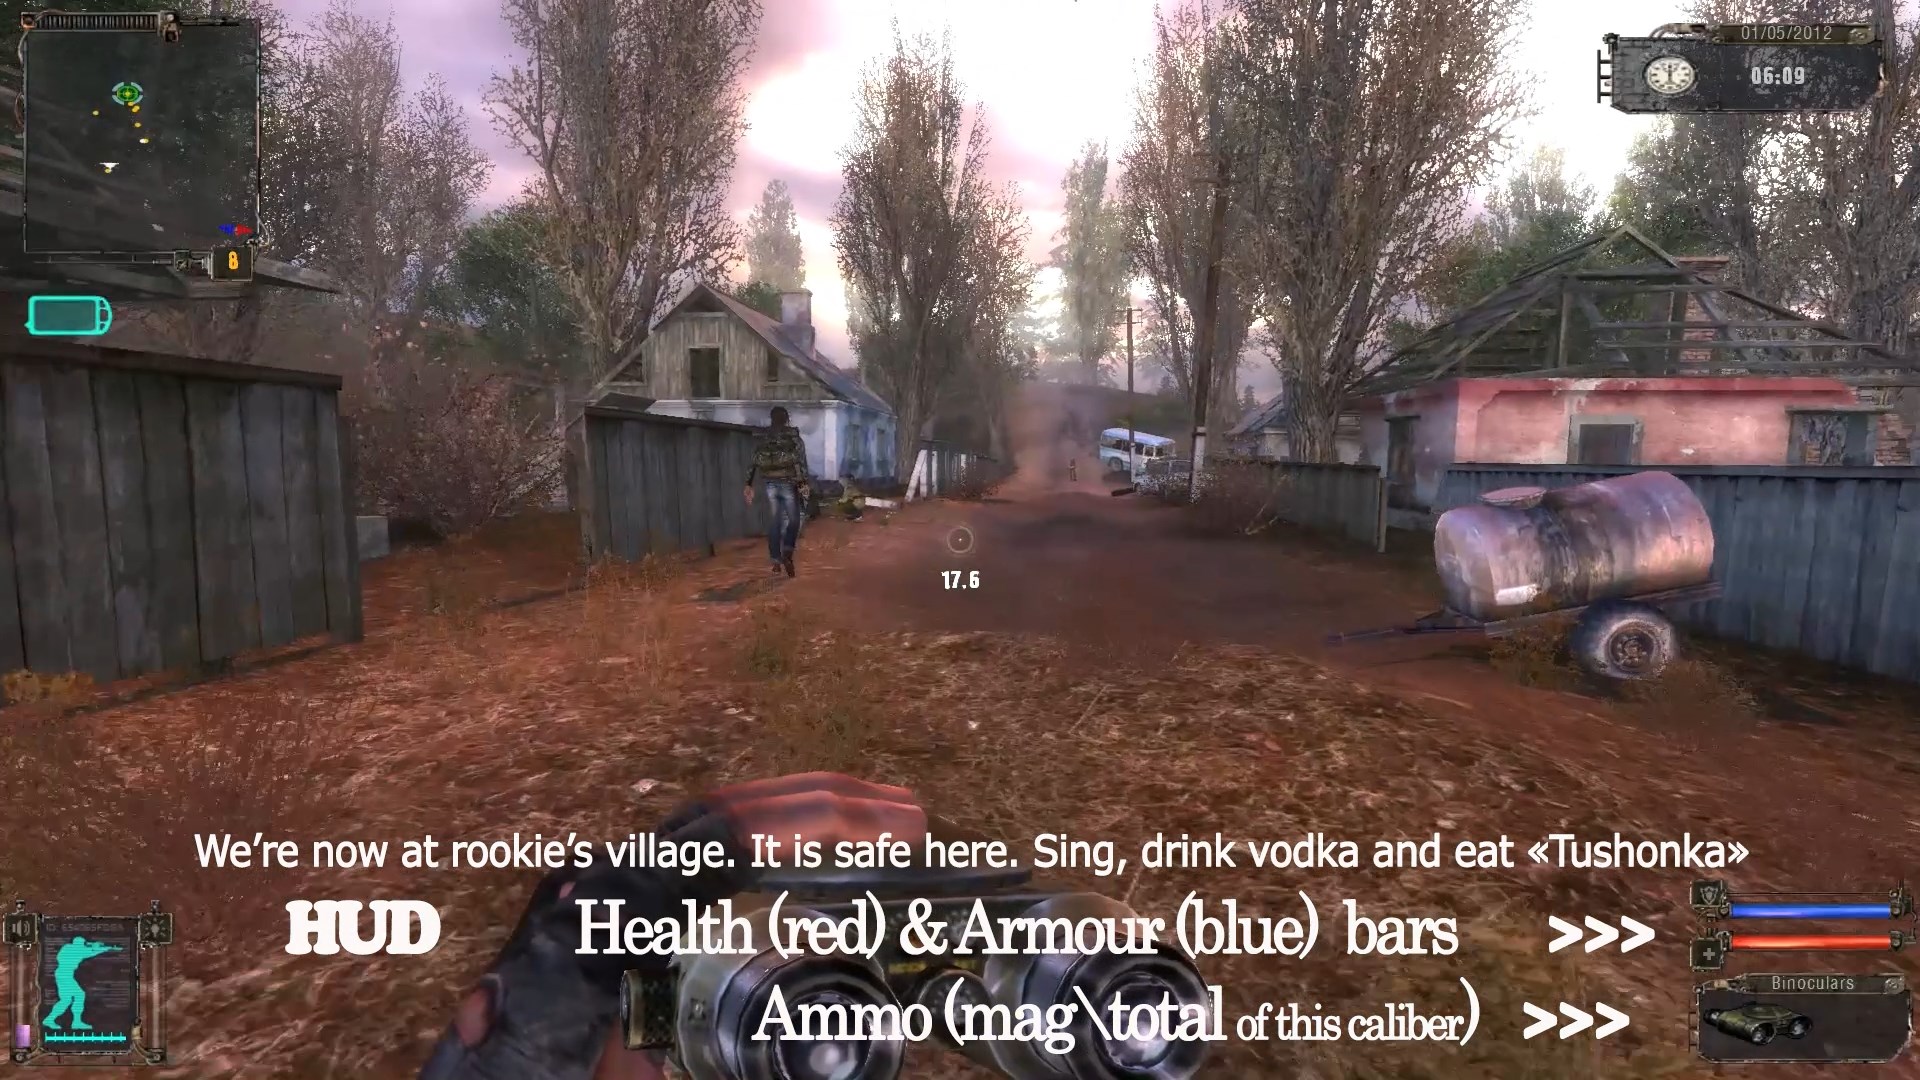
Back to game. If you've heard, how Wolf instructed his rangers by walky-talky, than you had passed the first Cordon Tutorial step “FOLLOW THE INSTRUCTIONS”
MAKE SAVE
Next task is VERY important: “MAKE SAVE”. Make your first full save on this location or quicksave if you hurry, or ignore this task if you are sure, that Universe loves you (Zone is not of this universe, however).
NOTE: Quicksave has a predefined key, the Full (hard, named) save is to be made from main menu (sorry to mention it)
Get out from the village and hit the road . Head north, and that will be your main direction ever (with some exclusions).
MEDKITS AND FOOD
Medkits restore health immediately in vanilla, but in Girly_SoC that is not so easy:
(all figures below mean quantity, equal to the part of full bar, which is “1” or 100%), Yellow is for Girly SoC only
• Regular medkit (orange) gives +2/3 (+70%) health, reduces 1/3 bleeding and removes 1/10 radiation, but increases starving and lowers stamina
• Army medkit (blue) restores full (+90%) health, totally stops bleeding and removes -1/10 radiation, but increases starving and lowers stamina
• Scientific medkit (yellow) restores full health, removes all (-80%) radiation and -1/3 bleeding, but increases starving and lowers stamina even more
• Bandage stops bleeding and adds 1/10 health, but lowers stamina
• Antirad removes all radiation, but increases starving and lowers health (-10%) and stamina
• Food restores health, too:
- Bread +5% (+3%),
- Diet sausage (Kolbasa, salami) +10% (+5%),
- Canned meat "Tourist’s delight' +15%(+7%)
- Canned fish +6%
- Processed cheese +4% (and +3% stamina)
- Peanuts +4% (and 1% stamina).
Satiety has a very weak influence on anything indeed, but you may die within 5 days without any food.
• Vodka removes 1/3 radiation and adds 1% health and satiety (and makes you dizzy, for sure)
• Energetic drink restores full stamina (90%) immediately
NOTE: Medkits and bandages have a predefined keys "[" and "]".
You can redefine them for quicker access (I use F1 - F2).
SLEEPING BAG
Will be added to your inventory from the very start. It makes possible to sleep anywhere. That is usefull for spending night hours, that are much darker in Girly_SoC, and to stay at safe place if blowout is known to occur soon. Activate it with RMB and sleep 1, 3 or 9 hours. If you occasionally sell or loose it, you can buy it from some traders
HELP WOUNDED
Next tutorial task is “HELP WOUNDED”. Easy - help the wounded guy (before you cross the bridge, left side) and talk to him. The soldiers in helicopter will discuss (by radio) to kill you or not. Take it easy - they will not, just to save their ammo.
He may give you some tips.
Explore the caravan-like house nearby and find some goods-in-the-box.
Next tutorial task: “Kill two dogs and loot the corpses”. That will make you acquainted with Makarov pistol. And blind dogs. Both-three are bad, but not deadly.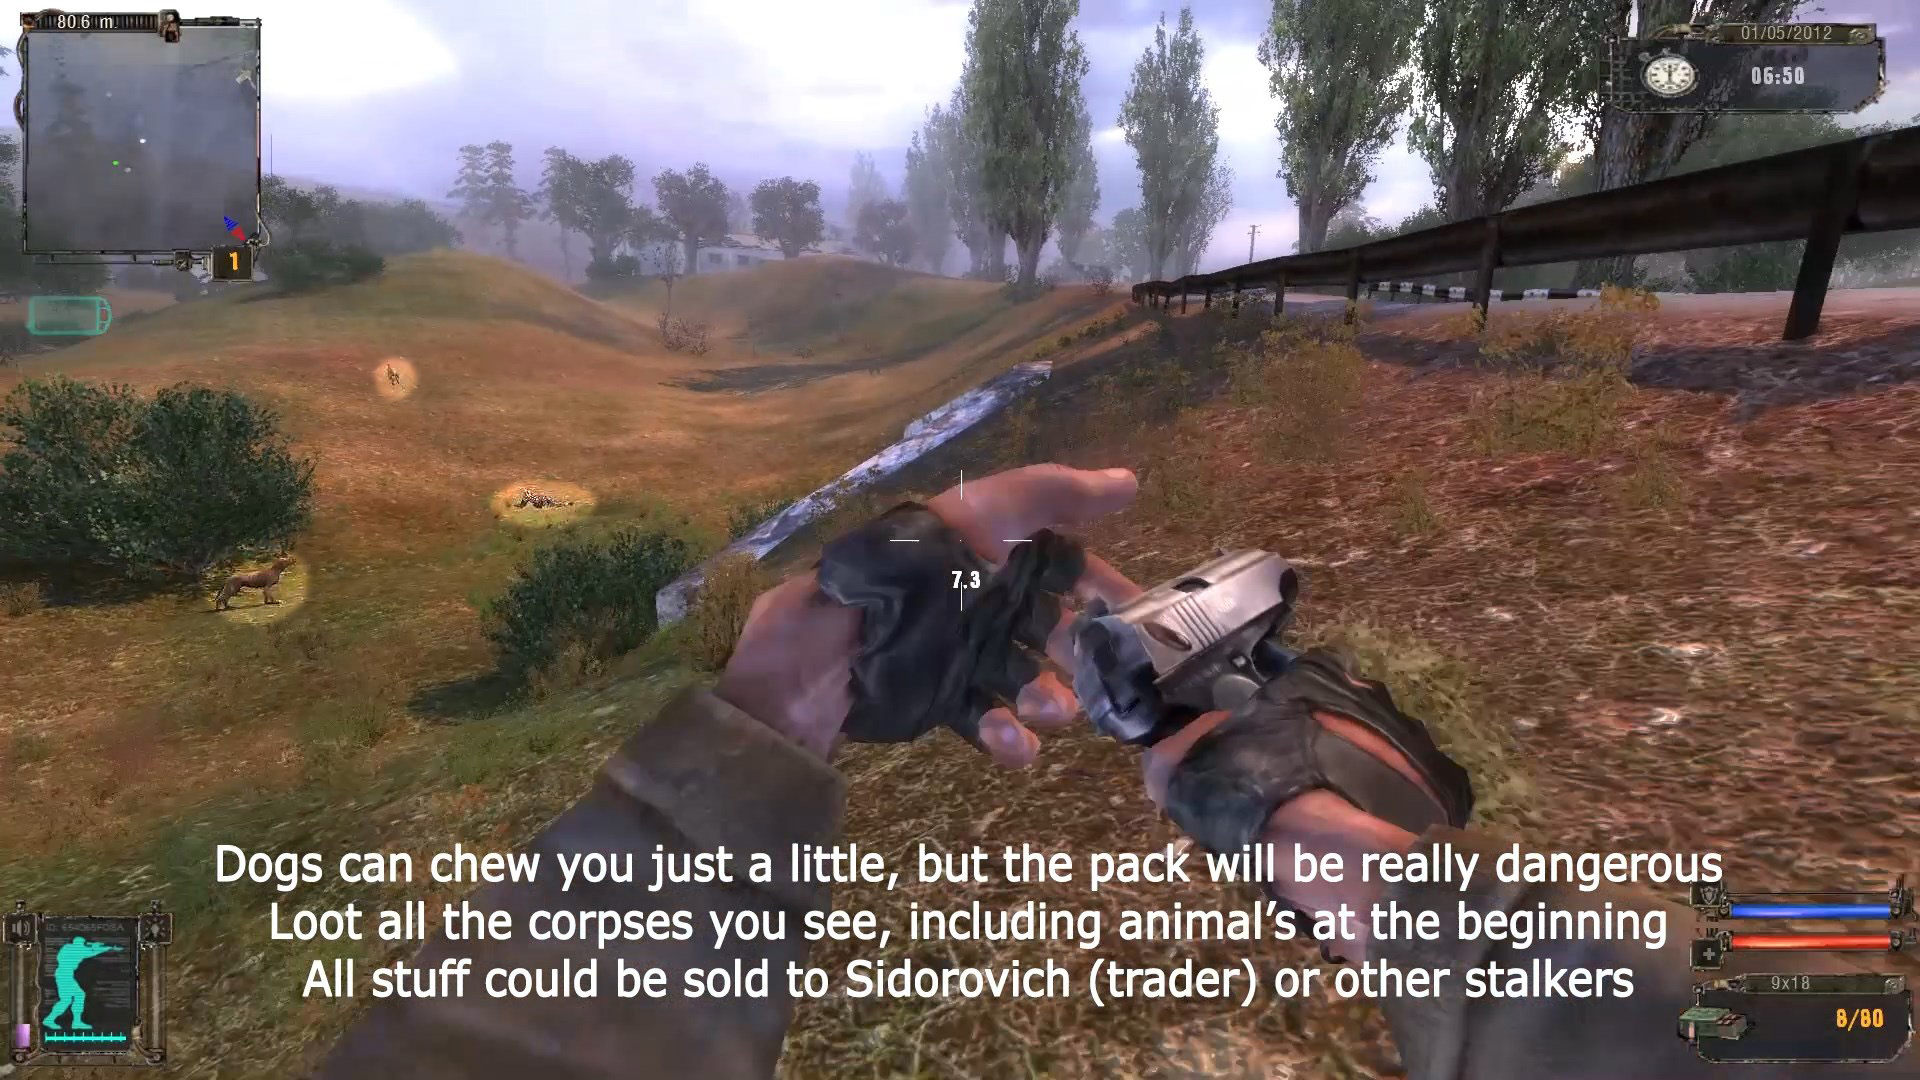
INVENTORY and Scout Petrukha
Enter the tunnel and find some more goods.
INVENTORY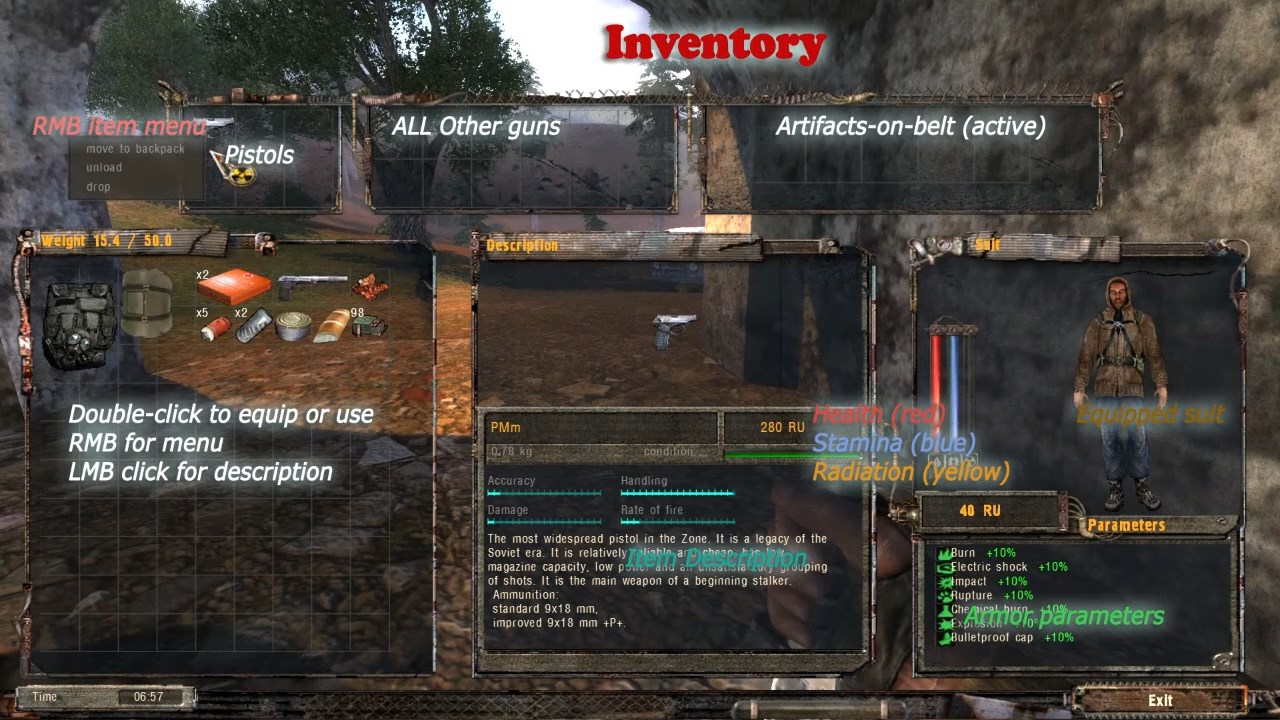
Pay attention to the condition bars of the weapons and suits!
You can double-click or drag-n-drop item to equip it.
Dont forget, that browsing your inventory will not stop the game! So you want to be quick or be in safe area. (same for dialogs)
Beware! In the inventory - the blue bar is not armor but mental health!
(So, I was mistaken when marking it as stamina in the video and on the picture)
Carry weight limit: The figures above your inventory (left) window are actual / maximum inventory weight. The heavier you loaded, the faster stamina depletes. You cant run when exhausted. The figures become red when reach the limit, and that means you will have your stamina drained in no time when running or jumping. If your junk weight exсeeds maximum weight+10 kilo - you will not be able to move at all!
So, monitor your weight.
Back to game. Scout Petrukha is marked on your minimap – speak to him and assault ATP (Car Park) with rangers’ help or without it.
NB Make a save before chatting with him!
FIGHTING
ATP assault is fighting and tactics training mission. You can drill your skills and find your own tactic many times, if you've saved the game before it. I am not a good fighter - so, I use tactic tricks, like climbing the roof, flanking, sneak distant attacks, etc.
The only advices:
- aim to head or pelvis,
- use lower position (crouch+walk) for better accuracy,
- aim and wait 1 second before the first shot (if possible),
- use cover and "Q" and "E" keys to peek.
- enemies will try to flank you silently, so watch your 3,9 and 6
- if you occasionally hit your mate, he may become hostile, as well as all his allies
When find sawed-off (it will automatically occupy your rifle slot "3"), use it for short distance only.
Use bandages when "blood drop" is yellow or red.
After you kill all (!) gangsters, speak to Nimble and loot all bodies.
NOTE: You will see one of the first annoying bugs here - the quest mark does not disappear after quest completed. There will be more such a cases - just make sure, that you've done the task and never get nervous about it.
BLOWOUT (Surge)
At 8:30 first blowout always occurs. Usualy, you should just've killed bandits up to this moment. See TIPS if you're somewhere else.
Blowout main features:
1. NPCs hide in shelters during the blowout
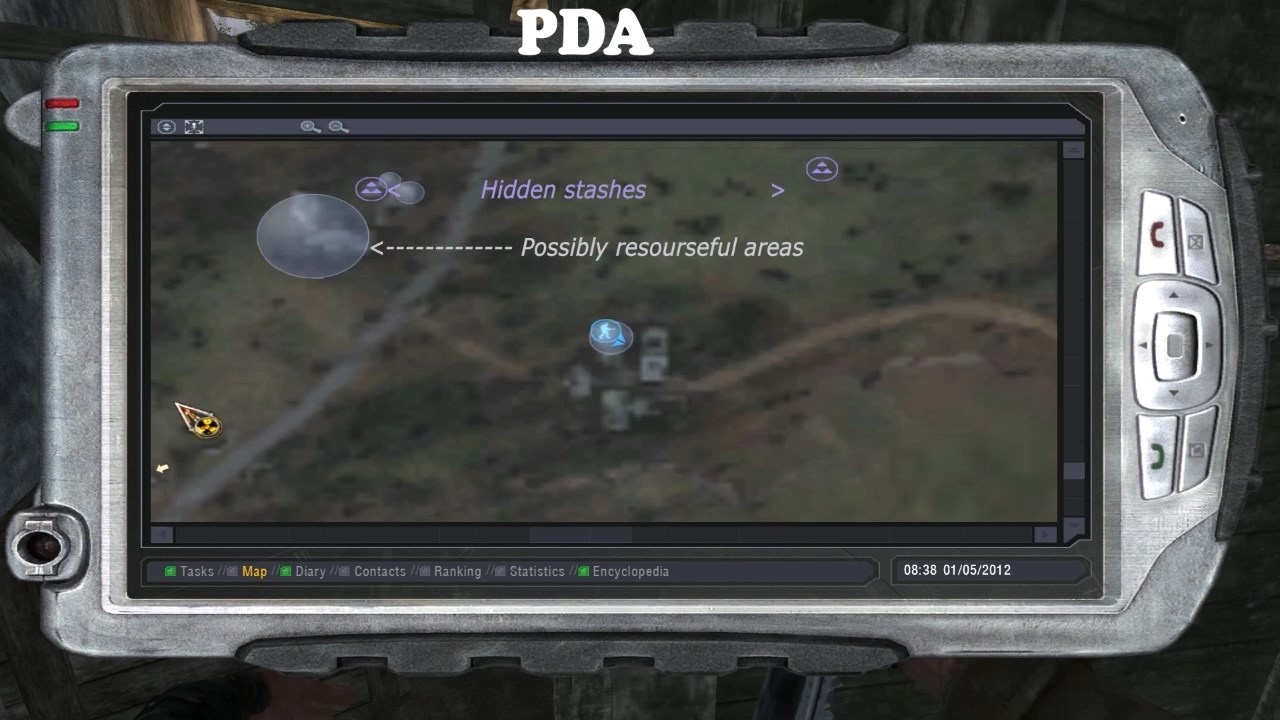
2. Hideouts are highlighted on the map during the blowout.
3. New artifacts spawn at the current location after blowout.
5. The strength of the emission depends on the distance of the location from the Chernobyl nuclear power plant.
6. When moving between locations and loading the savegame made at the time of blowout, it continues.
7. The encyclopedia article will be added after the first conversation with Sidorovich.
The first blowout occurs at approximately 8:30am (you can configure it in vars. script). The next ones will happen at approximately 36 hours intervals (also configurable).
The best way to avoid problems (Script scenes crashes and missing hideout nearby - I mean both) is to start your journey just after the blowout ends (screen turns white for a while, the hideout marks disappear, and stalkers leave the safe place mumbling their bullshit)
To speed up the time, you can go to the main menu and click NUMPAD3. To return to normal time flow, press NUMPAD2 in the main menu.
TIPS Look at you map or minimap to find the nearest place to hide, marked with light balloon. The best shelter is at ATP (under the stairway), after you clear it. If that happens at Rookie's village, you'd better not stick with other stalkers, but run to Sidorovich's bunker. Othervise, if you are not the one closest to exit, they will be tooo eager to chat with you, blocking the narrow passages. (Same for the corridor at Wild Territory entrance) Other good hideout at Cordon is nearby Fox's place.
Stealth
Stealth in the original game is quite difficult and almost impossible without thorough knowledge of the location. It is possible to get close unnoticed from behind to a lonely enemy outside his line of sight (40-60 m, 80° FOV) when he is not in fighting state. When alerted, enemies can see and hear you at much longer distance and they are usually not standing still. If you make save before being noticed and load after you alerted the enemy, you'll be considered as known danger, due to A-life logic. In spite of some changes, made in Girly SoC mod, in order to make stealth game better, it is still quite complicated.
LOOTING & TRADE
LOOTING
That is an essential part of your life in the Zone.
At first you’ll have to take everything from corpses (mutants including) and sell it to Sidorovich in order to gain your starting capital. Remember, that weapons are usually lay aside the corpses and are not visible in their inventory! Further you should take only the items you really need, due to maximum inventory weight limit.
Remember, that weight limit (+10 kg) exceeding will halt you! I do insist on playing with this limits in my mod
- The only valuable things to collect for selling are artifacts and suits, but the only traders at the start are Sidorovitch and Barkeep.
- Other NPCs never really looting in vanilla, sometimes they pick up the weapons - so you can find the same stuff you left in the body until it is trashed away.
- You can even pick up the weapons of wounded - or he could grab his gun after you cure him/her. That is bad, but it is possible and will not be punished.
- You will randonly receive the info about hidden stashes while looting.
- And don't eat from corpses (don't try to use anything while looting)! This does not concern Girly SoC, as that is just impossible
TRADE
Speak to Petrukha and then to Wolf, get some reward, and take the task for boar lair.
Than return to the trader, report your success and sell the loot.
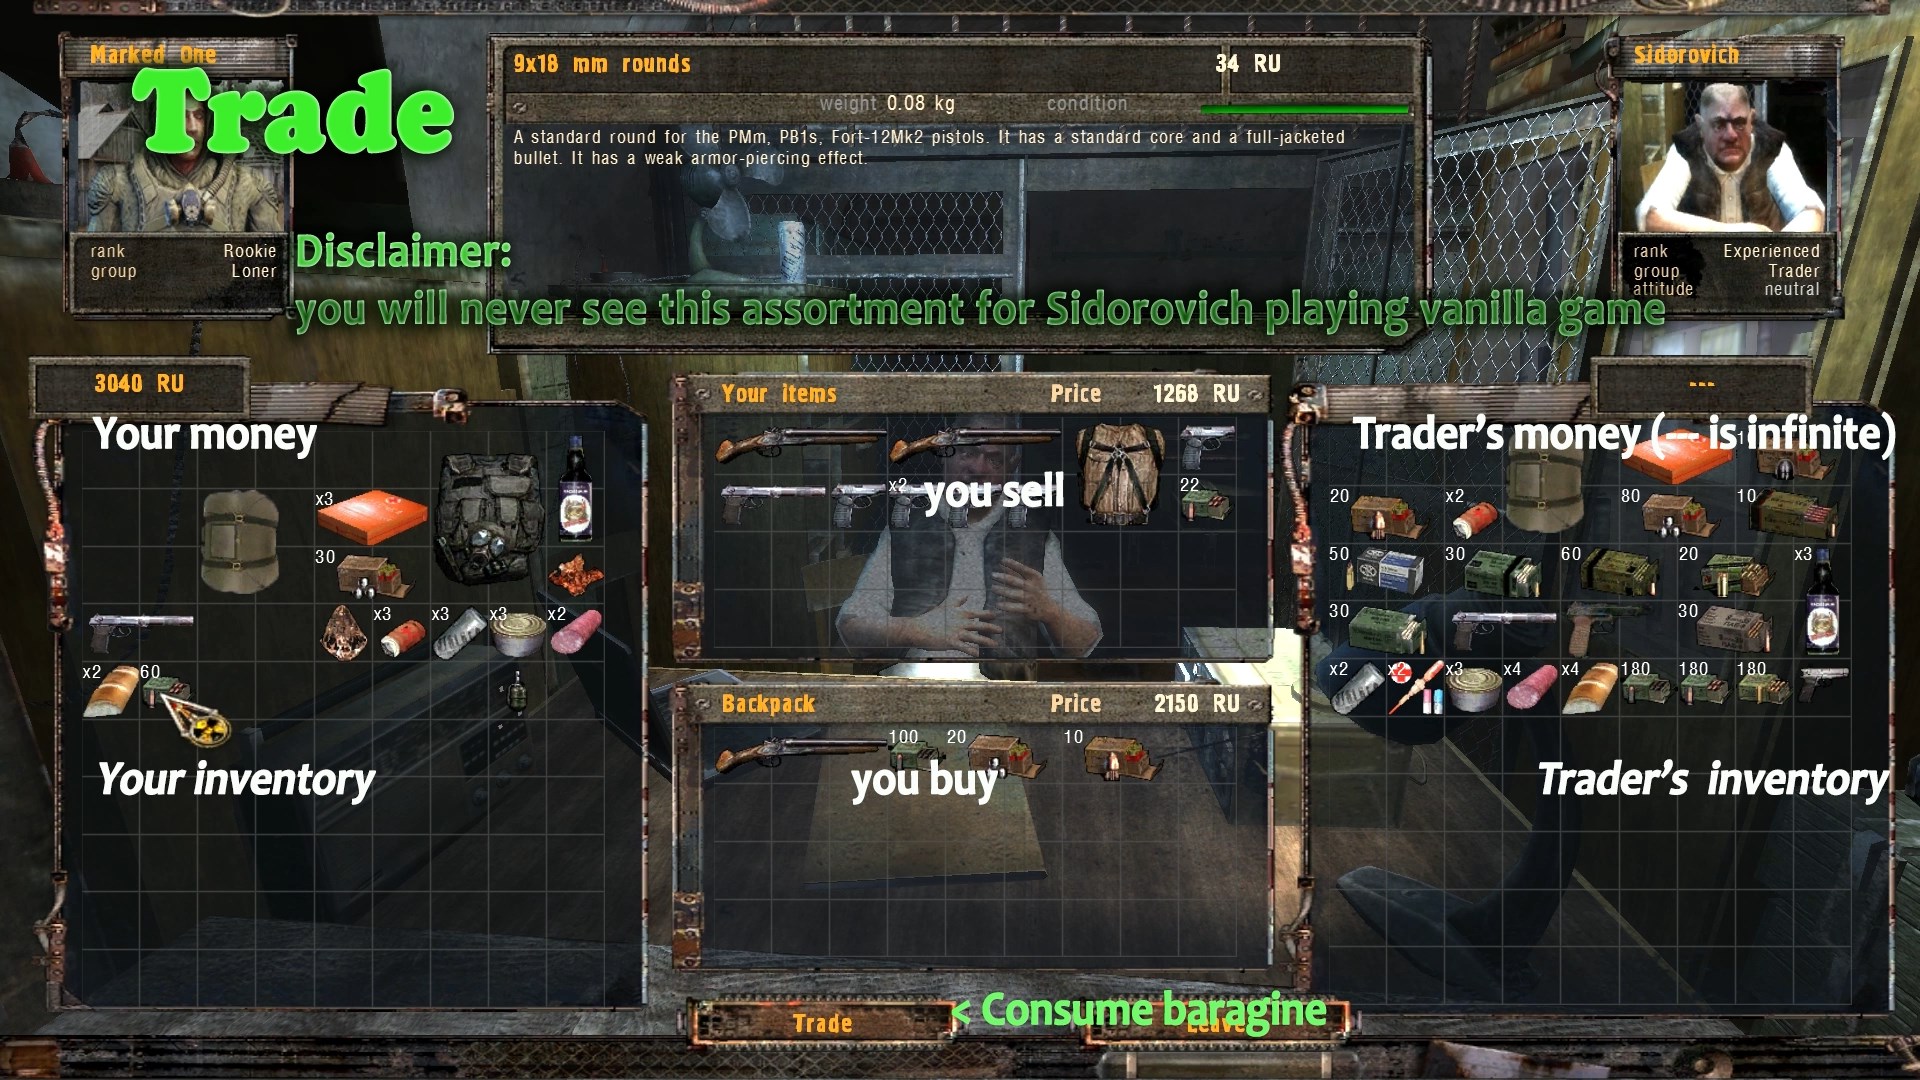
NOTE: It may be useful to unload all weapons prior to selling - use RMB menu inside your inventory.
Pay attention to the condition bar of the weapons and leave the best one for yourself.
Trade button is at the bottom of regular dialog. Drag or double click to sell and buy. Consume the baragin pressing "Trade" button. "Leave" means to go back to your dialog. To exit both trade and/or dialog, hit USE key.
All traders have random but limited specific assortment, that widens as you progress through the storyline (Did you speak to Wolf after ATP? Do it now to see first change of Sidorovich's product line). Most of them buy everything at 1/10 to 1/3 of regular price (except for suits and artifacts, that you can sell at 1/3 to 1 of it's price), and they sell items up to 300% of regular price. NPCs trade only artifacts, food/medicine and monster parts in vanilla, using the comparable rules. Playing Girly SoC, you can sell weapons to NPCs, but they will keep only one gun and throw away the guns they believe not fit them (you can make some money on it, if you are that cunning))))
Don’t sell artifacts, monster parts or modified weapons (with green arrow icon) immediately, there may be a task to deliver this item! (see TASKS section) Or they may be useful for yourself (see ARTIFACTS section)
TASKS
The storyline tasks and dialog strings are at the first line usually and have higher priority and indefinite time terms. All task targets are shown on the map and minimap (not so for "bring non-unique item" tasks). The icons are different for the ones lower or higher than your current position. White arrow shows the direction to your primary task, which could be seen by pressing TAB button (defined as 'score' in controls), and you may find the priority logic weird a bit.
The additional tasks are under "I need a job..." dialog branch
Most of this tasks have 24 hours to complete (3 days for Girly SoC)
You’ve already got the task from Wolf (purge boar lair), and there are several tasks from Sidor available now:
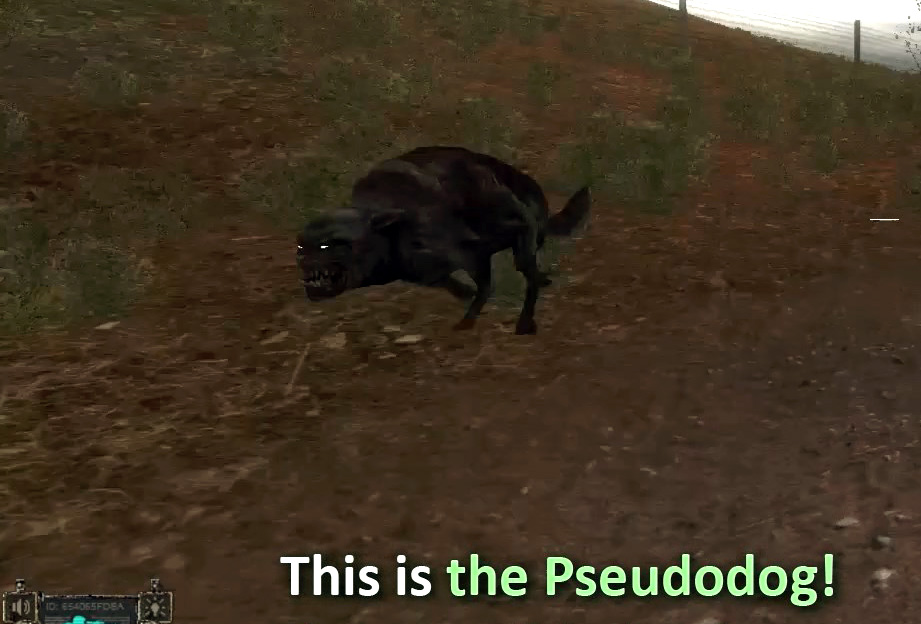
1. Tail of pseudodog (It is not the blind dog tail! Generally – just keep such a tasks in your mind
2. Kill someone (killing tasks may involve you into unwanted fight with neutral NPCs and make many of them hostile, so don’t hurry to take them)
3. Purge the area (lair, pack, camp etc. – go to the “camp” marker and kill them all, but be ready to seek for some pack (gang) members, who had run away or hidden)
4. Find artifact (As it was said for all find-and-bring tasks – better to take the task only after you've obtained the required item) Spoiler: Wolf gave you Jellyfish! You dont need it now and you will find more.
Task items like artifacts, mutant parts or food will never be marked on the map! The specific items, like "special gun" will have the marker. Nevertheless, that specific items spawns without any connection to your task - so it could be found prior to the task is given.
Besides the missions from NPCs, you will be often assigned to automated tasks, that will be displayed on your screen and usually easy to complete, but you should understand, who was the task-giver to get your reward.
For example: You will see the message "Return for award" during your first big combat with bandits at Garbage - don't stop fighting! That concerns automatic task "Kill bandit leader" only, that appeared in the center of your screen, when you've entered the Garbage. You will discover, using the PDA, that Sidorovich was a task-giver - get your reward within 3 days.
You may ignore all the side tasks, if you’re sure, that you can get enough money, items and equipment by yourself.
Take “The special mission” from Sidorovitch, as it is an essential part of storyline
WEAPONS, ARMOR and Leveling Up
STALKER is used to be defined as equipment-based RPG
There is no leveling up and there is no karma (playing vanilla, at least)
There is just "instant karma" - if you kill a neutral NPC being out of battle - all others nearby become hostile.
And there is "Reputation", that have some influence to the false endings, if it is horrible (50-100 neutrals killed) or excellent (1000+).
While moving through the story, you will find better weapons and armor (and artifacts) on your way.
The repair is impossible and really not needed, as you will not need your beloved gun soon, because it will be too weak for the next level.
See the article for details
"Understanding SoC's gunplay"
The very good advise is collecting some ammo before switching over to a better gun (5.56 and 9x39)
Weapons
All weapons and equipment are assigned to 1-6 keys by default:
1 - Knife
2 - Pistol
3 - Riffle (SMG etc.)
4 - Grenade
5 - Binocular
6 - Bolt
(Y - to change ammo type, 0 and 9 - to change shooting mode, V - switch to grenade launcher)
- Holster weapons with the same button you equip it
- Don't be bothered with start weapons and enemy "spongiousness". The first appropriate gun you gain is Viper SMG (MP5). You can get lot of good cartridges for it, just if you rise your eyes up to heavens at Vehicle Graveyard at Garbage. Pray and destroy two crates.
- Pay your definite attention to the weapon's condition bar! The shorter is the bar, the more frequently the gun will jam. Using the weapon, when the "broken gun" icon is visible - is a real mess.
- The weapon's parameters are shown in the description and will not be changed with its deterioration. But the precision is really goes worth when condition bar shortens.
- Pistols are mostly useless in the game, but. Fort is much better than PM due to bigger magazine capacity, and Volker (Walter) is even better them both, with AP bullets in particular. Further you will find or buy .45 handguns, that may be even more useful - you may prefer lightweght, damage or accuracy. Several pistols were added in Girly SoC mod, that may have sense to use, due to their automatic or high RPM, or armor-piercing bullets (APS, FN57, Glock's)
- Feel happy, that NPCs can not use any grenades (except RPG) in vanilla game . You can. Remember about safe distance (7 m for RGD, 15 m for F1) or use cover. Use zoom button to throw grenade further and more accurate. Don't shoot grenade from launcher if there are any obstacles in front or aside (1-1.5 m).
- Pump-action shotguns' reload is realistic - so you can't just change ammo type ("Y" key), but add some cartriges to the magazin, if it is not full. And you can only change shells in specific order (>buck>zhekan>dart>). There is a solution: unload the gun inside inventory and than press "Y" (or twice).
- To attach add-ons - drag-n-drop it to the weapon in the active slot. It will "stick" if compatible. RMB to dismount.
- There are several unique weapons, marked with green arrow icon, that have some specific features (like caliber modification, integrated silencer etc.). They are usually the quest items, but you can keep it, if you find it suitable for you - the reward usually not worth it. Anyway, don't sell them immediately. The rewards were changed in Girly SoC and some tasks added to Barkeep.
Armor
There are numerous Suits (outfits) in STALKER, providing protection from multiple sources (Burn, Electricity, Chemical Burn, Rapture, Radiation, Explosion, Bullets etc.) from 10 to 90%. They can be assorted by level, faction, weight and color).
- Some higher tier outfits have night-vision implemented, but only 2nd generation NV (scientific suits, for instance) is really usable. 1st generation NV (green) is "blind" and may be used in some very specific cases instead of flashlight. The "bad" NV was fixed in Girly SoC and is not so bad. Some unique suits have got "psy" NV, that is even better than 2nd gen.
- The armor's parameters could not be read if not dressed on (but you may read basic it in description). The "weared-off" armor will provide less protection, that could be seen in parameters below your prototype picture.
Exoskeleton and one of unique stalker suits will provide you with so desired carry-weight increase, but exoskeleton will prevent running. - There are several unique suits, marked with green arrow icon, that have some specific features added or advanced protection. They are usually the quest items, so don't sell them immidiately. But some of them are really usefull and not task target. All unique suits in Girly SoC will give you slight carry-weight improvement, that is about it's inventory half weight (so you will want to use it when carrying lots of stuff)
HIDDEN STASHES
You discover them while looting (you'll love that sound)). Mostly the contents of these stashes is useless, but sometimes you can find that very item you need. Stash content is much better in Girly SoC, than in vanilla.
It may be usefull to read stash's describtion (hover, before you come too close) to define its location. Or may be not.
The hidden stash containers types:
- The small brown box
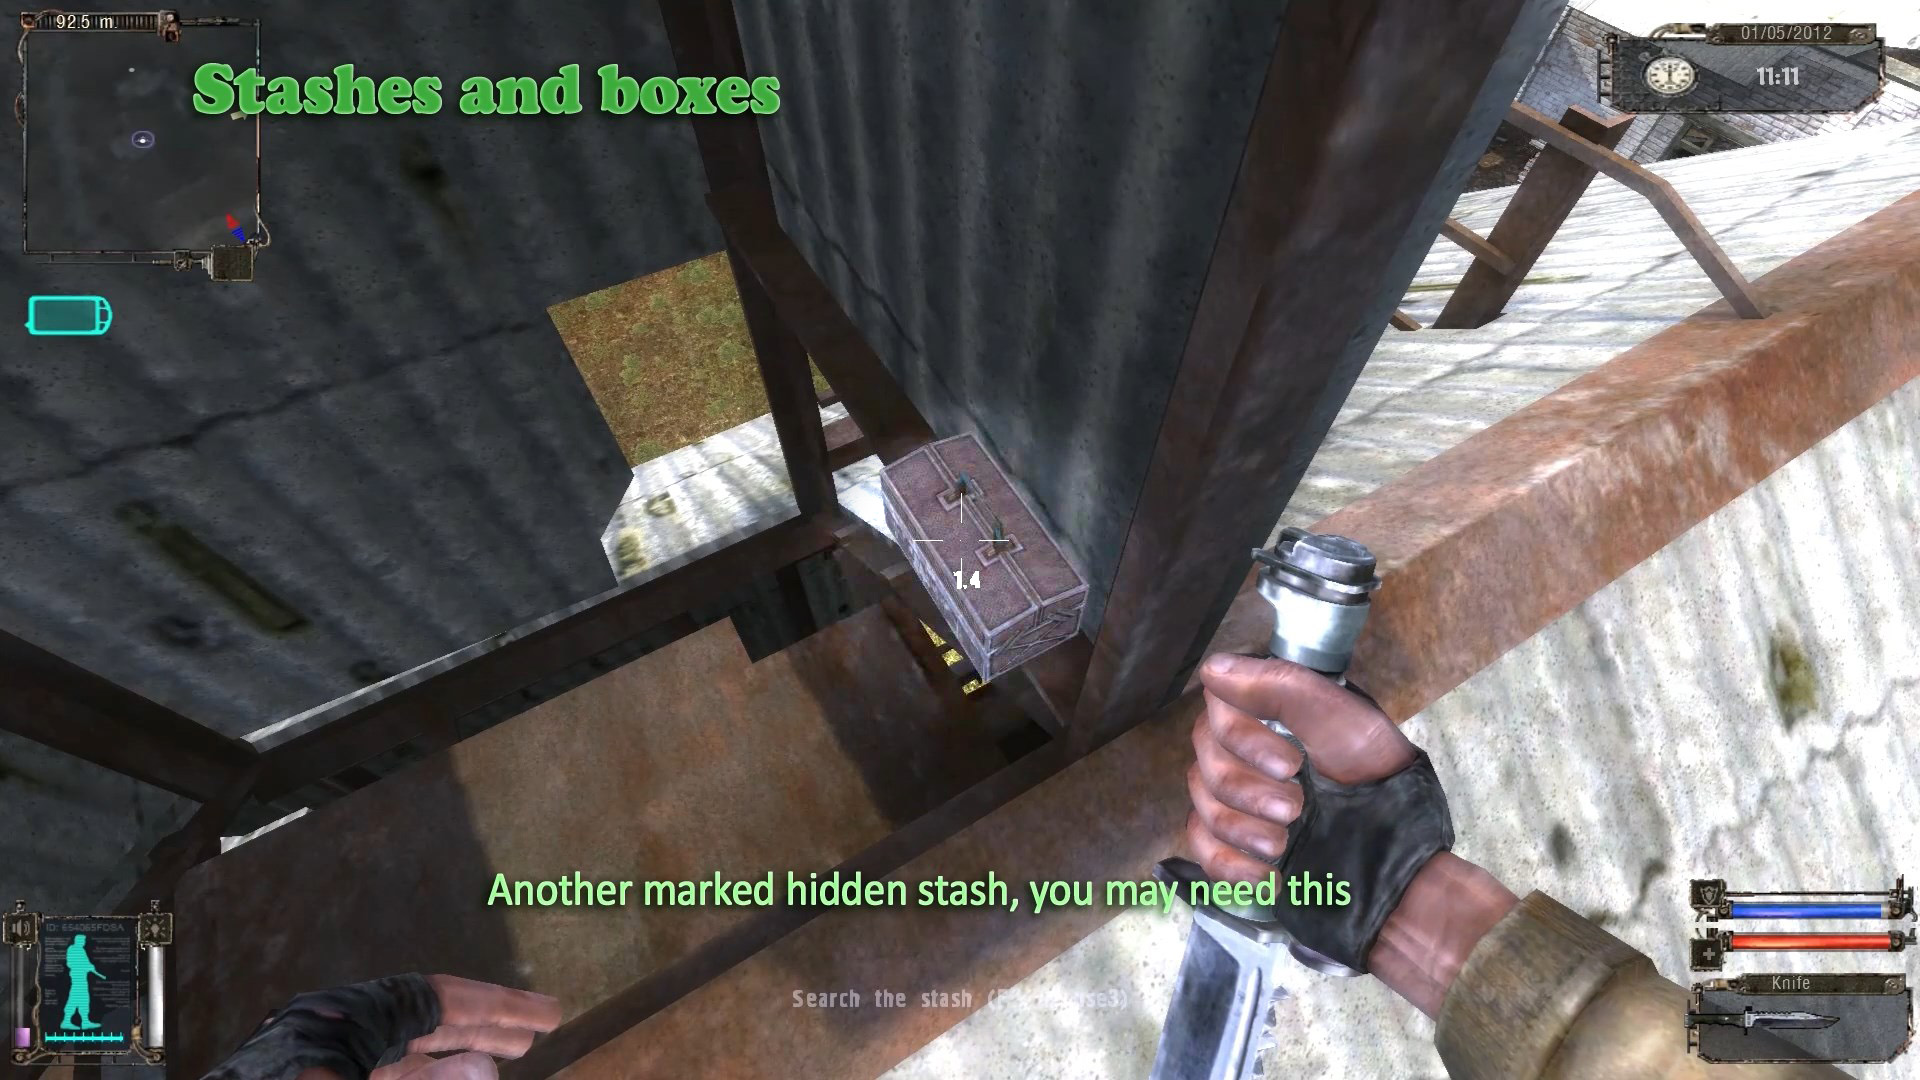
- The big green chest

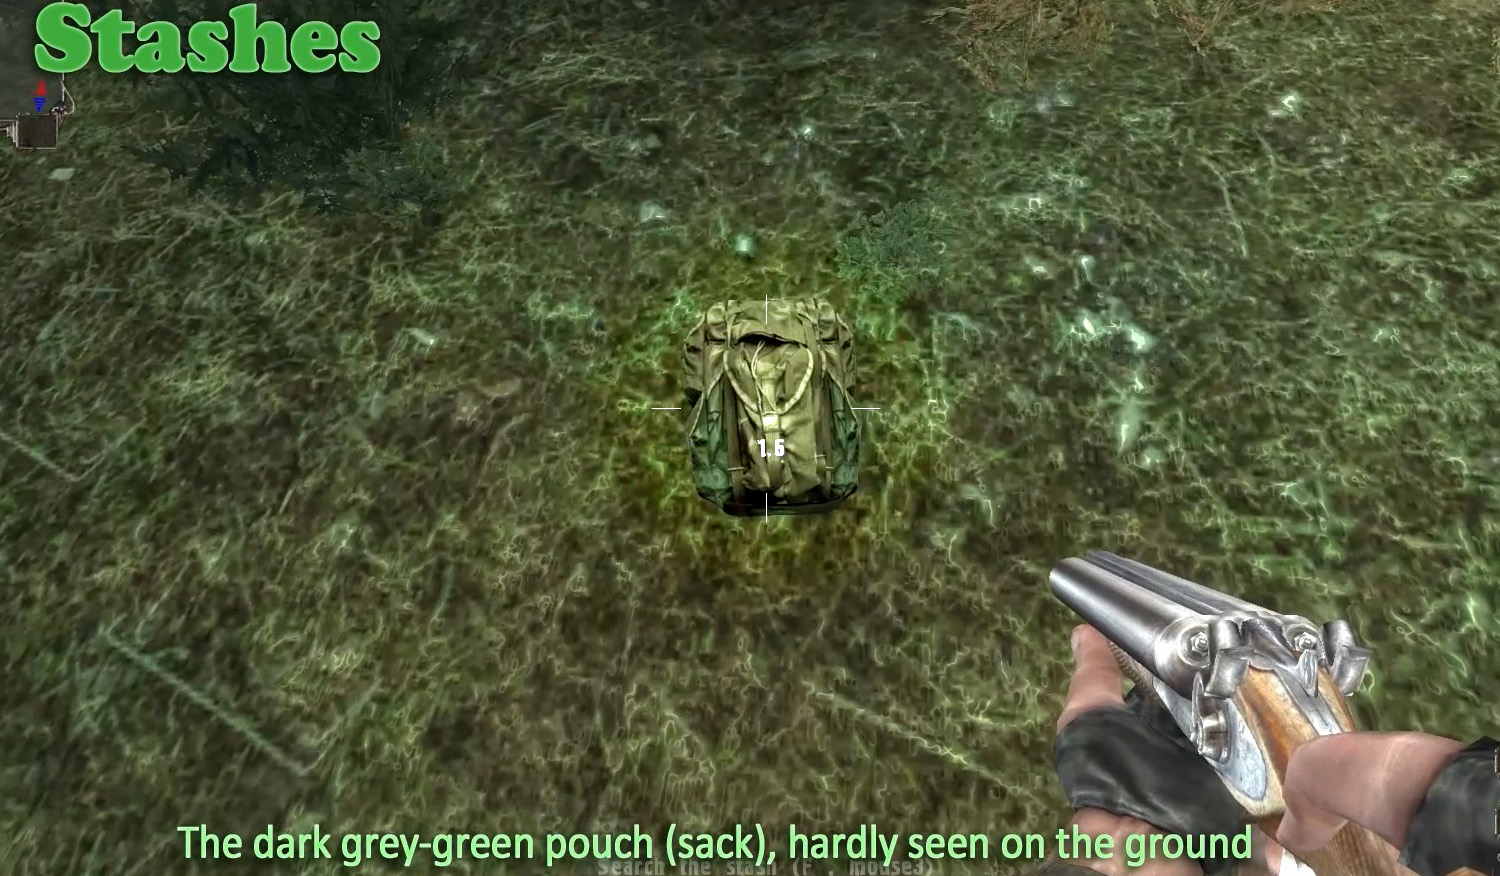
- The Grey-green pouch (sack), hardly seen on the ground
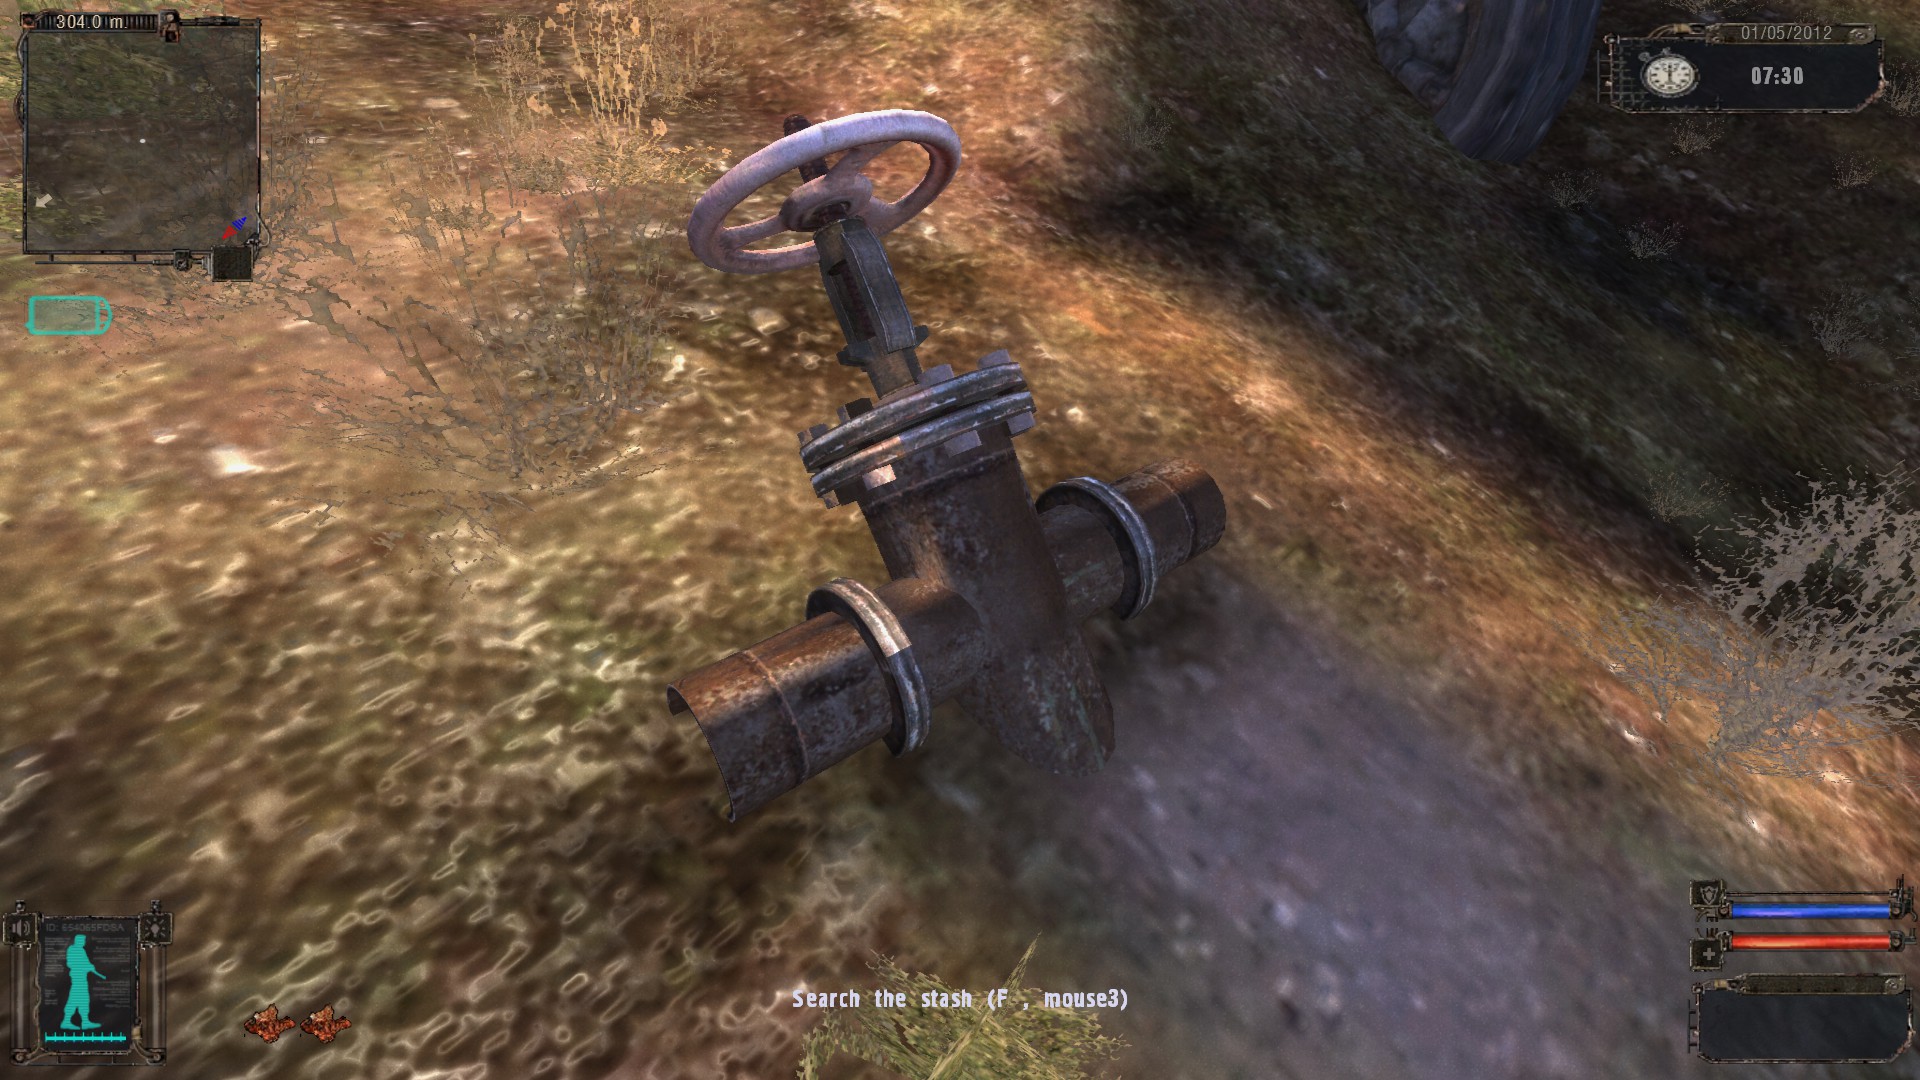
- The Rusty metal tubes and junctions
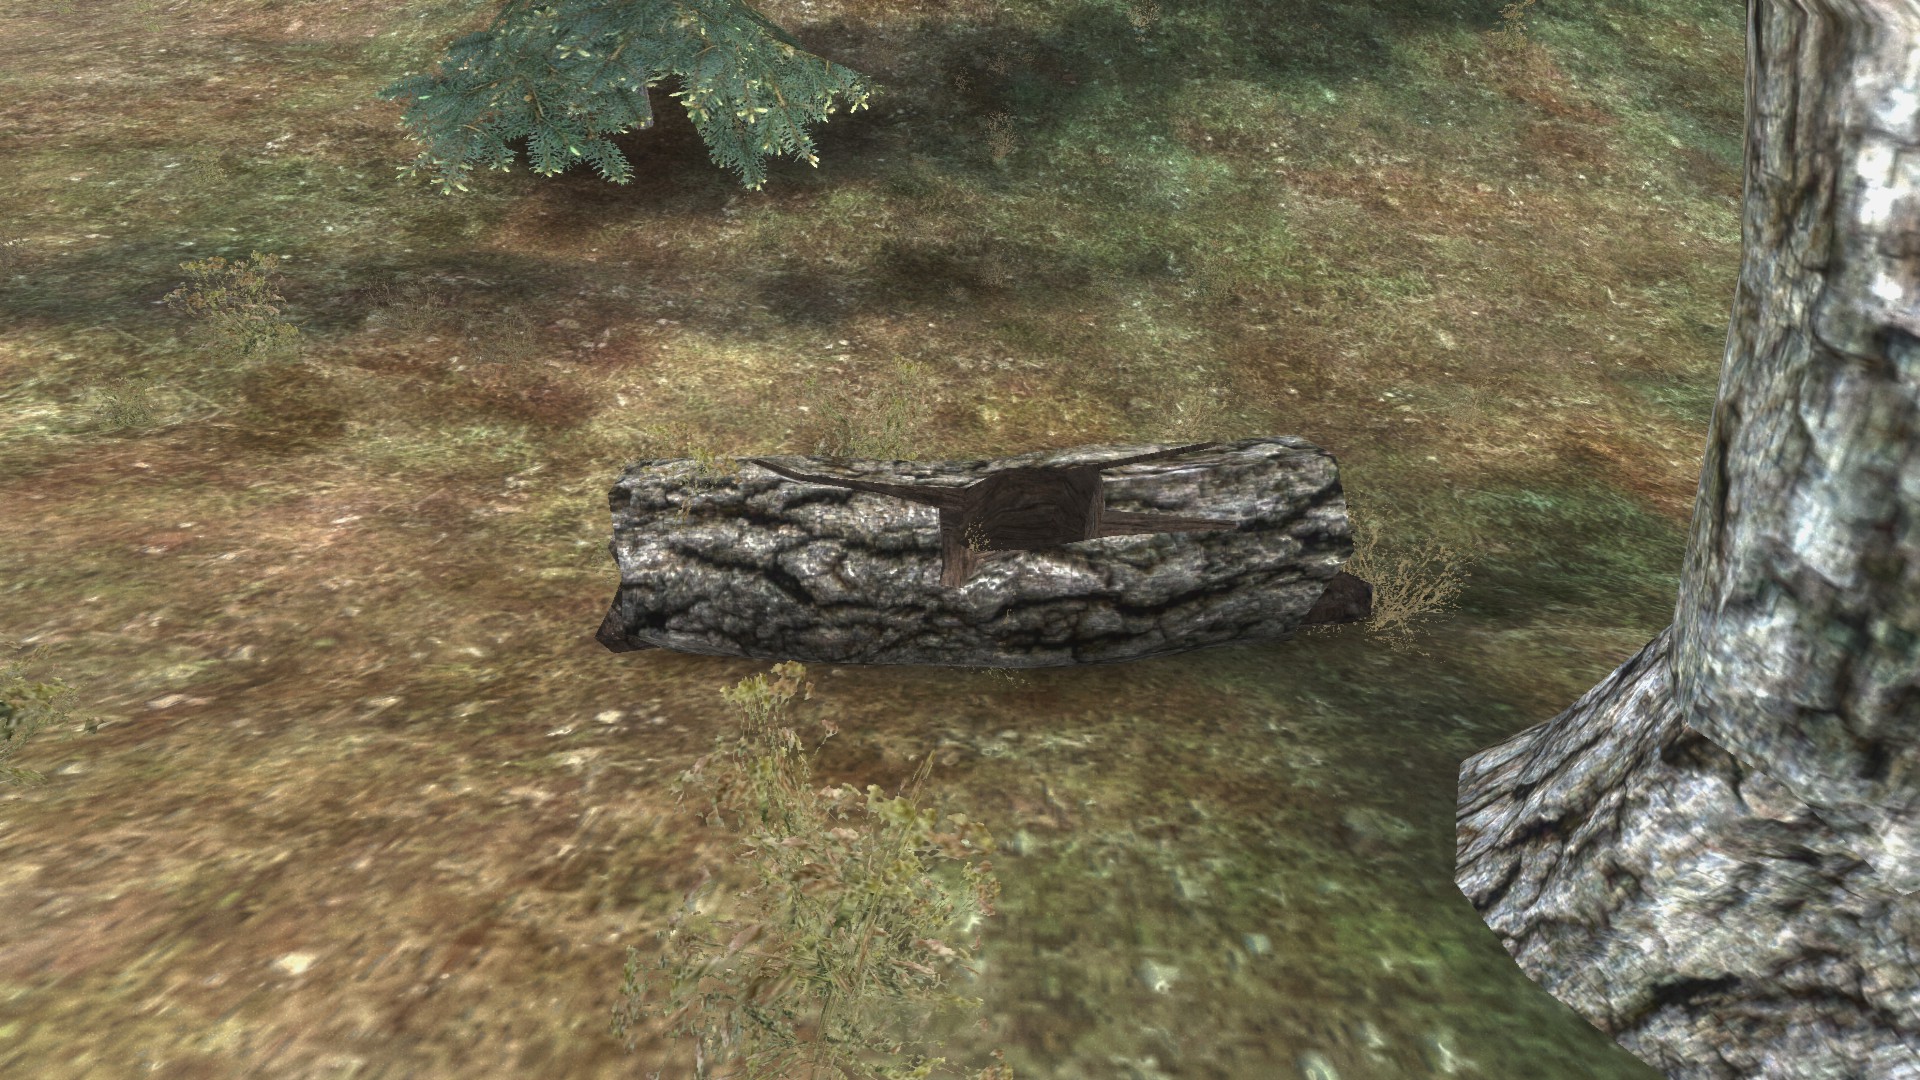
- The crack in the log or stump
- The safe cabinet

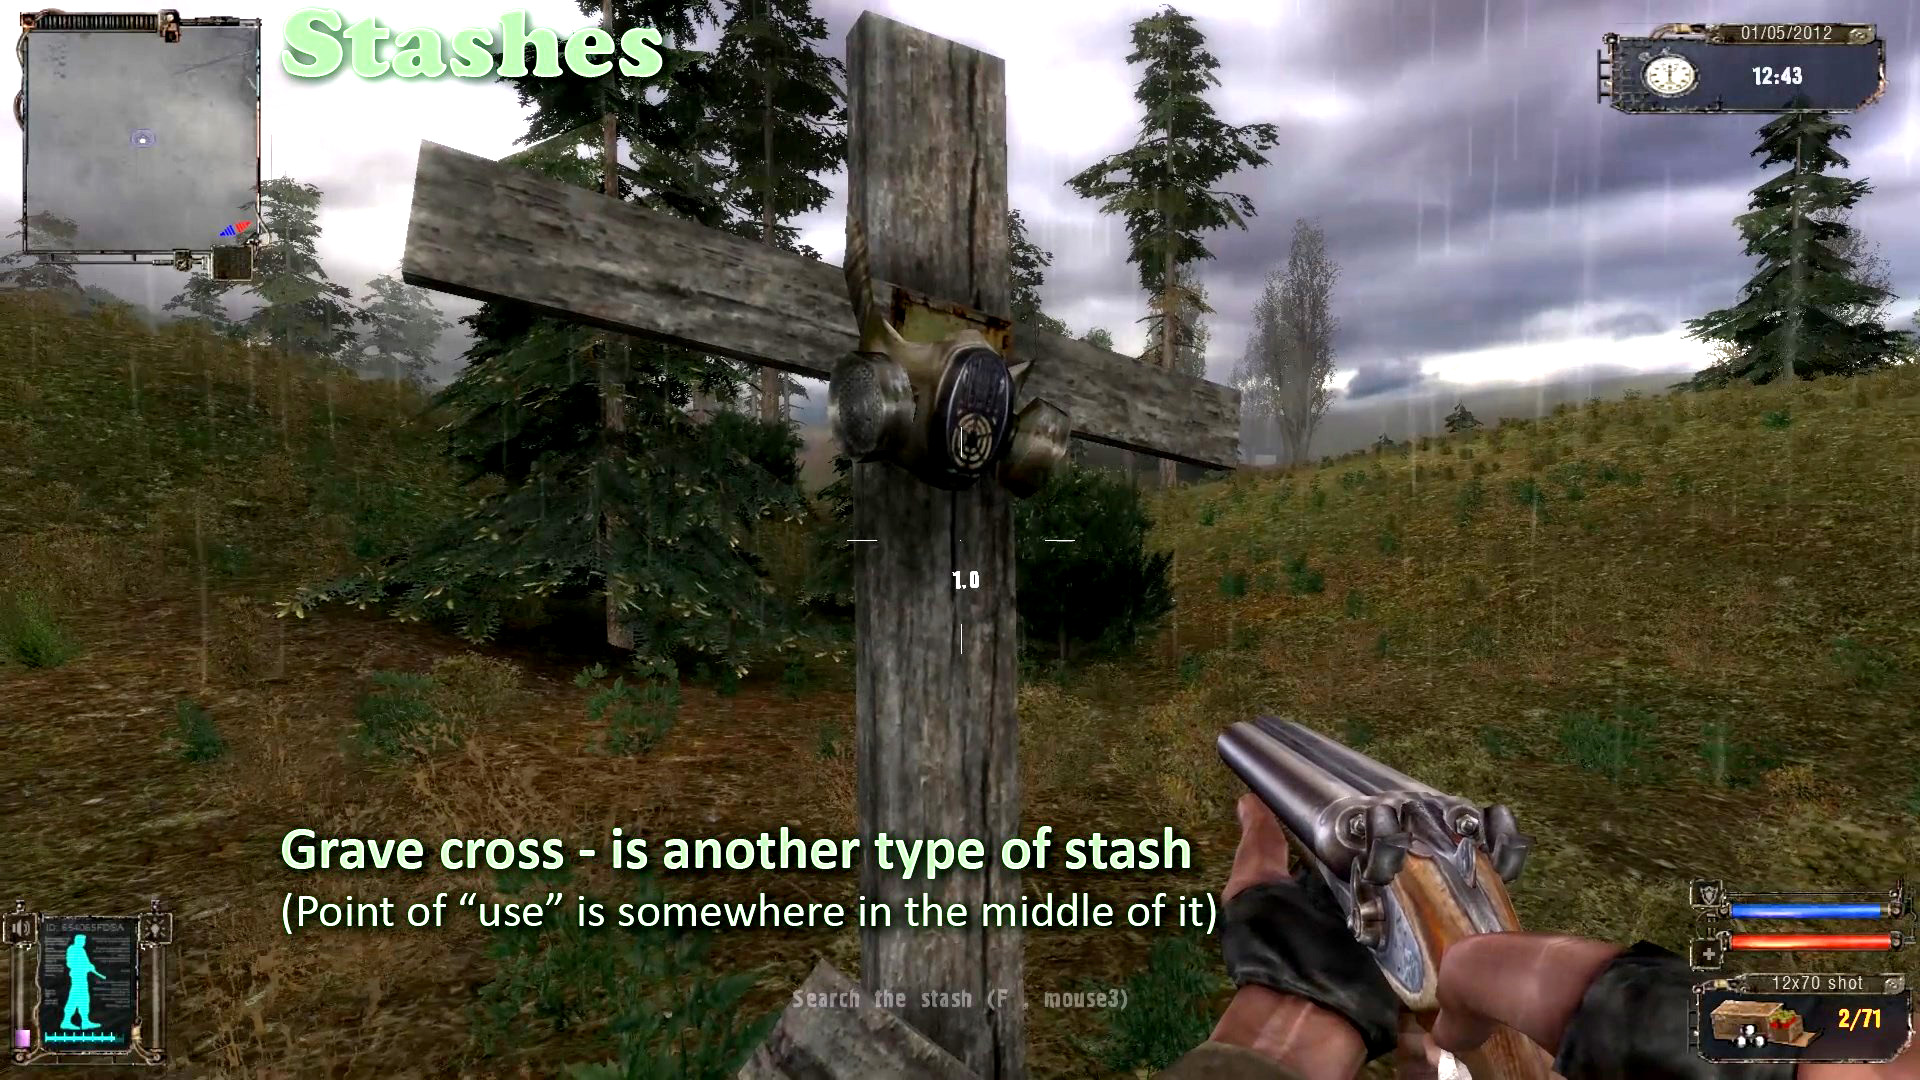
- The grave cross
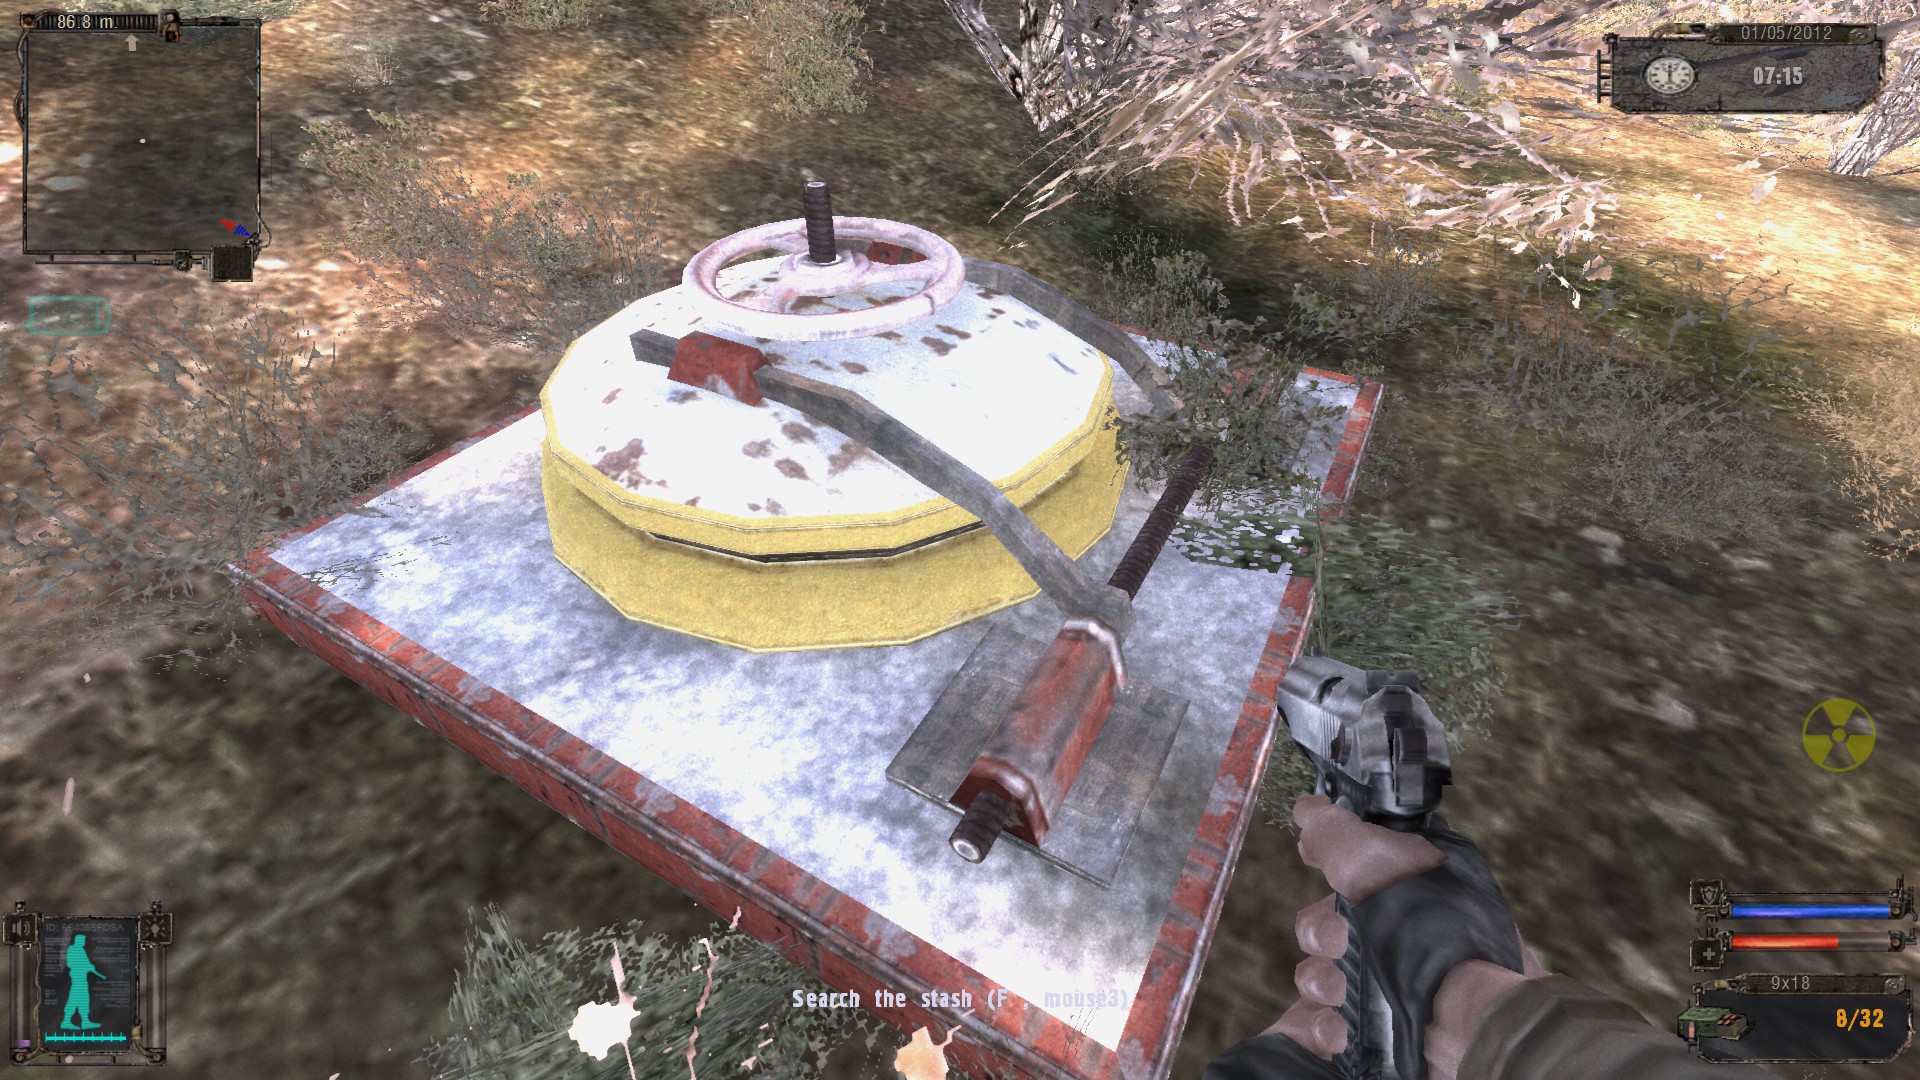
- The hatch
- Zaporozhets car trunk*
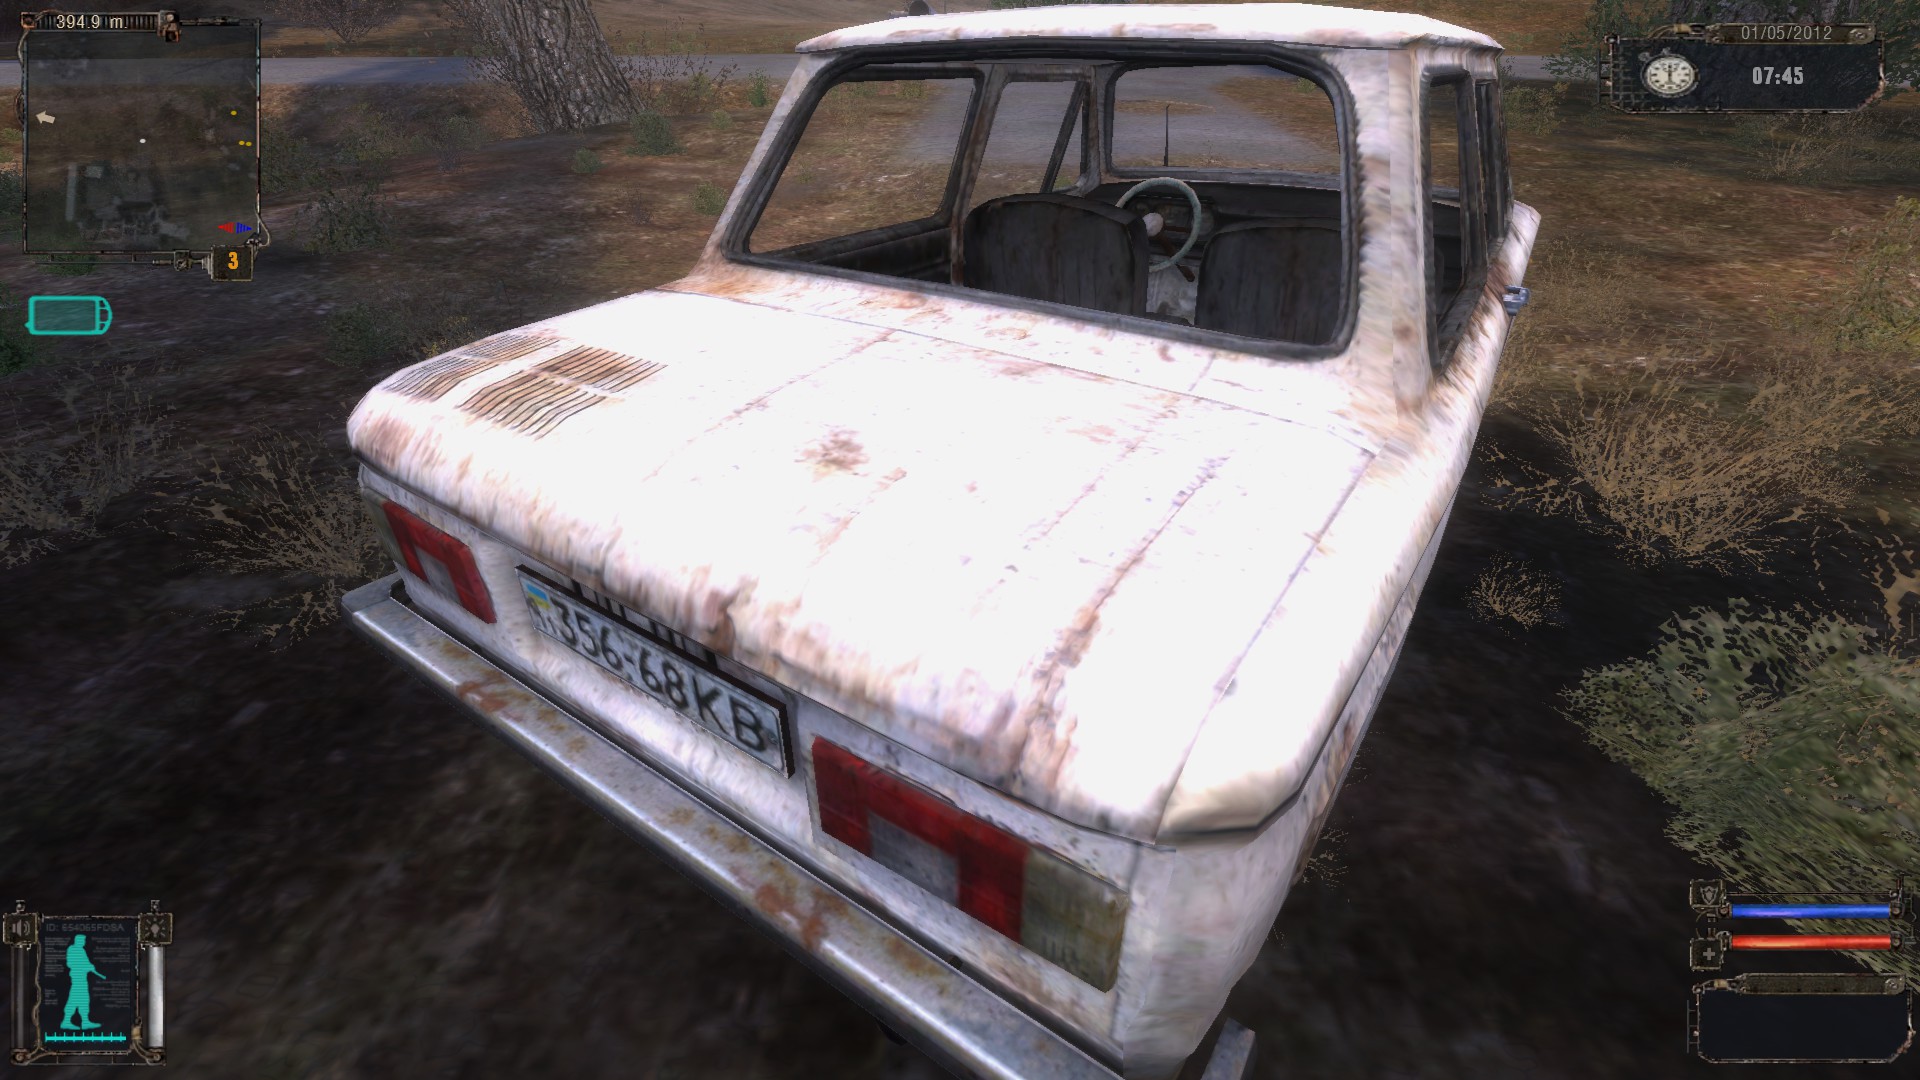
(I wonder, if the devs are not aware, that the trunk of this car is in front of it?!)
*Really, I've found only two stashes in the trunk. In most of cases, you should look for box or pouch inside the car
- The electric panel (box)
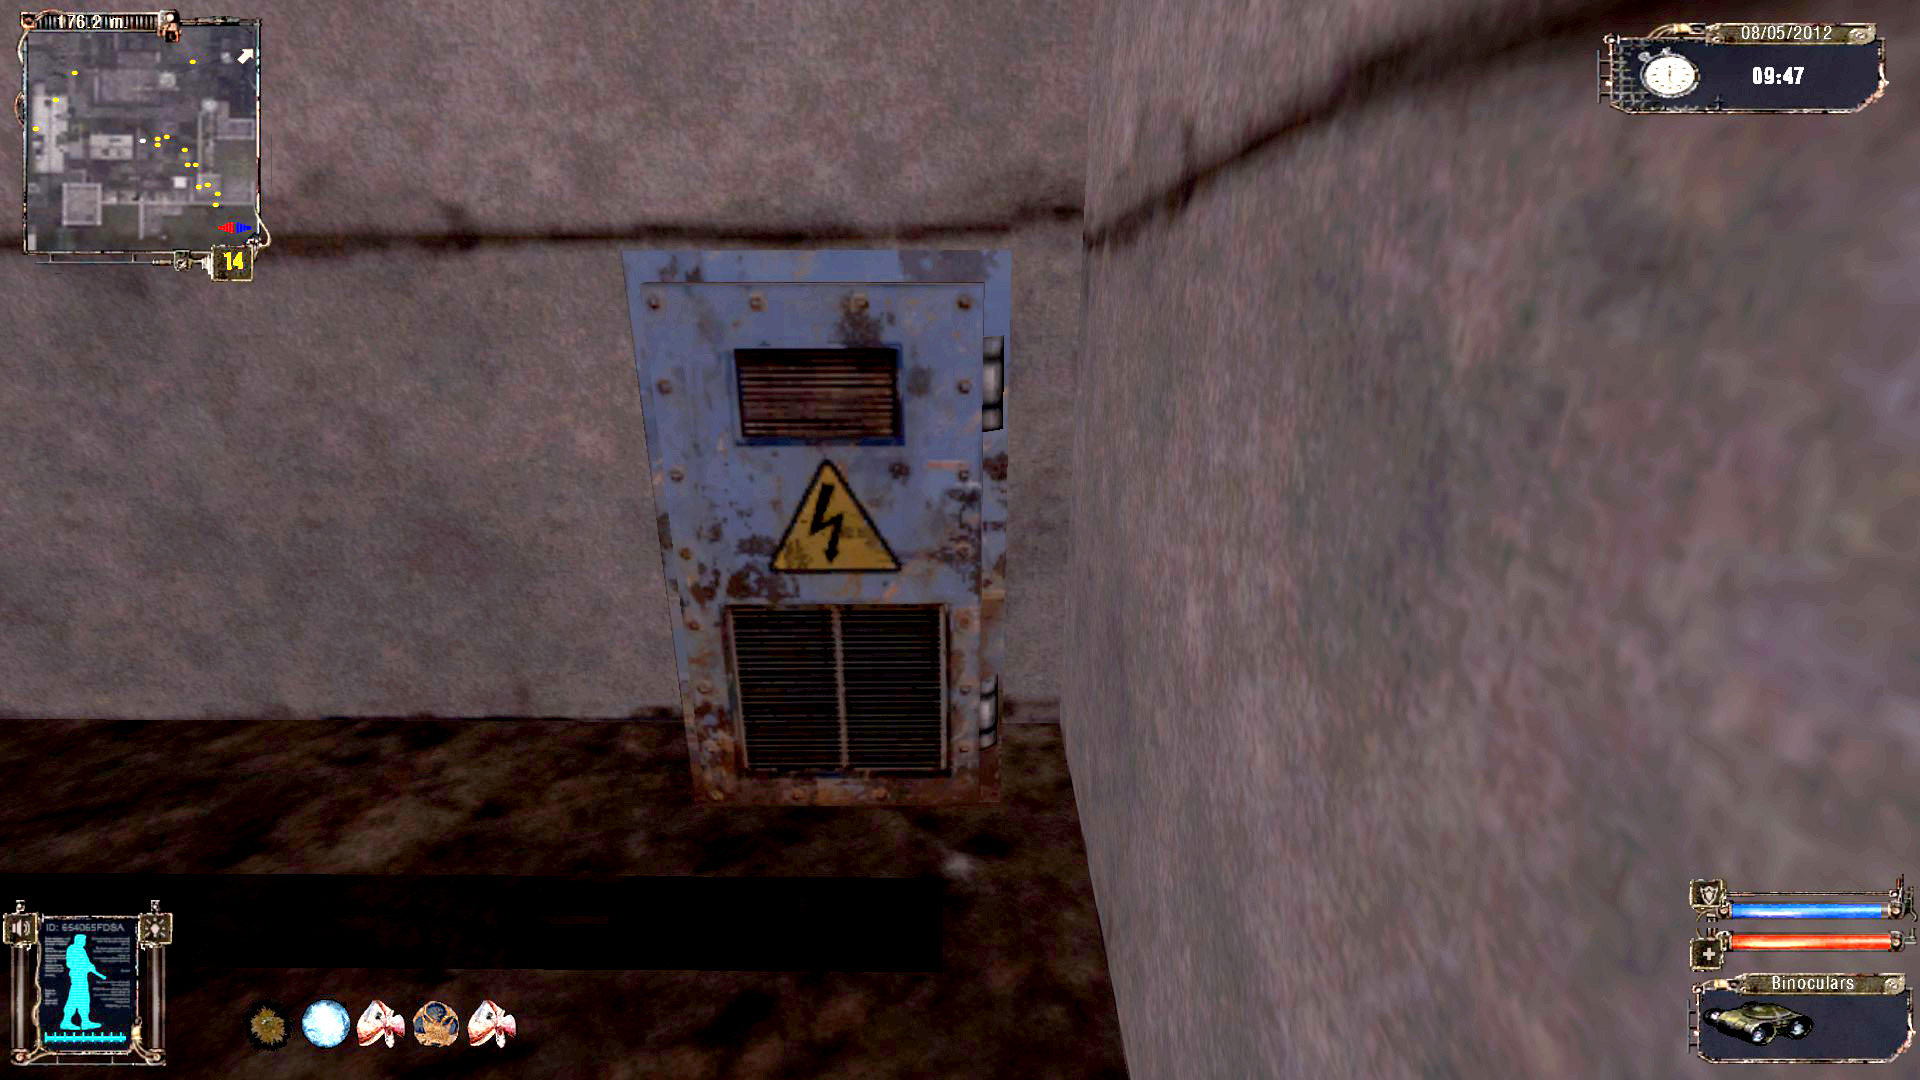
May not have the specific symbol, but it is always blue
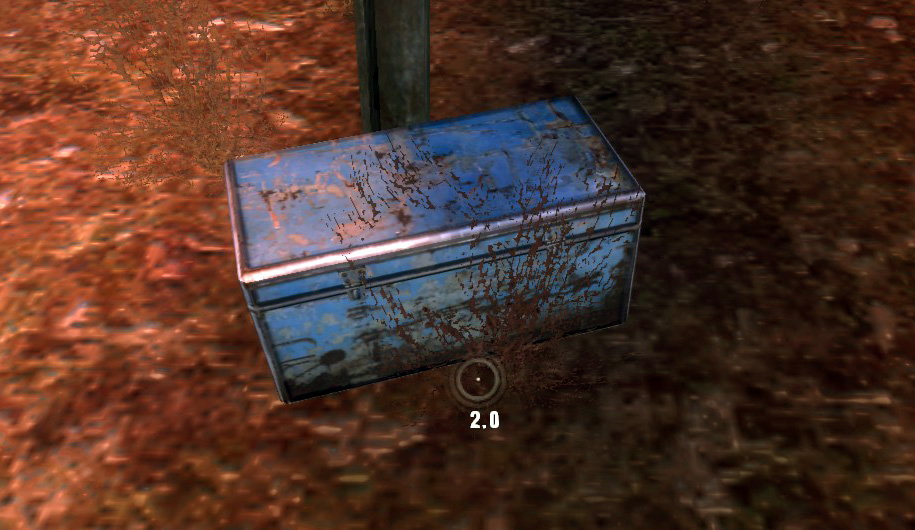
- Big blue chest
NOTE
- The stash is empty until you discover it while looting, after that it will be marked on the map and be filled. Nevertheless, you may find the discovered stash empty - by many reasons, reloading the game included. That is bug or Zone rule - just empty it as sooner as possible, after it has appeared on your minimap. Stash will be marked until you empty it (put smt to an empty stash and "Take all" to remove the marker).
- Dont ever be afraid of taking probably someone's stuff. What you can pick up - is yours. Nobody claims it.
- The permanent bodies have a bug, that allows you to get the stash locations from them repeatedly.
- There are many unmarked stashes (without any containerl) everywhere - your luck and patience will help you to discover them. For example, you will find 1 or 2 armored suites at every location (level), just laying on floor.
MUTANTS
Back to game.

Survival rules (spoilers below 3):
1. Shoot them from distance or "Dodge-n-shoot” (works good for a limited number of hogs and dogs, not for a pack). Melee mutant attacks are most deadliest.
2. Best weapon against the beasts is shotgun, but any automatic gun with high RPM works good, too (can loose up to full magazine for each mutant, as they move fast). Don't spend AP rounds, as FMJ works even better for mutants.
3. Don’t allow them to surround you (for pack) – run away and/or find something to jump on and deal with them from superior position.
4. Pseudodogs and snorks can jump, too. High position will not help you a lot - just kill on air and/or dodge.
5. Rodents (jerboa) are surprisingly dangerous, shoot at sight.
6. Pseudogigant (noisy huge chicken): jump up, when it rises its paw high - to avoid distant gravitation strike.
7. Controller has no melee attack, but it’s not so easy to come close. Grenades work better.
8. Zombies regenerate very quickly. Shoot twitching ones, or they will stand up and continue shooting (and they are rather accurate)
9. Psi-dog produces phantoms, that can severely bite you. They will not stop spawning until you kill the “motherdog” (meet it at the "Red Forest")
10. Poltergeists (the ones throwing boxes) in X18 are killable, as well as fire-throwing one at the 3-d level (Just shoot the warp, but not the flames it produces (avoid them) )
11. Bloodsuckers are invisible when attacking ;-)
Find all general information about mutants in the your PDA encyclopedia, or at STALKER Wiki[stalker.fandom.com]
Explore the place for loot (pig corpses including) and come back to Wolf for your reward. You may take another hunting task, that you can accomplish after crossing the railroad.
Soldiers
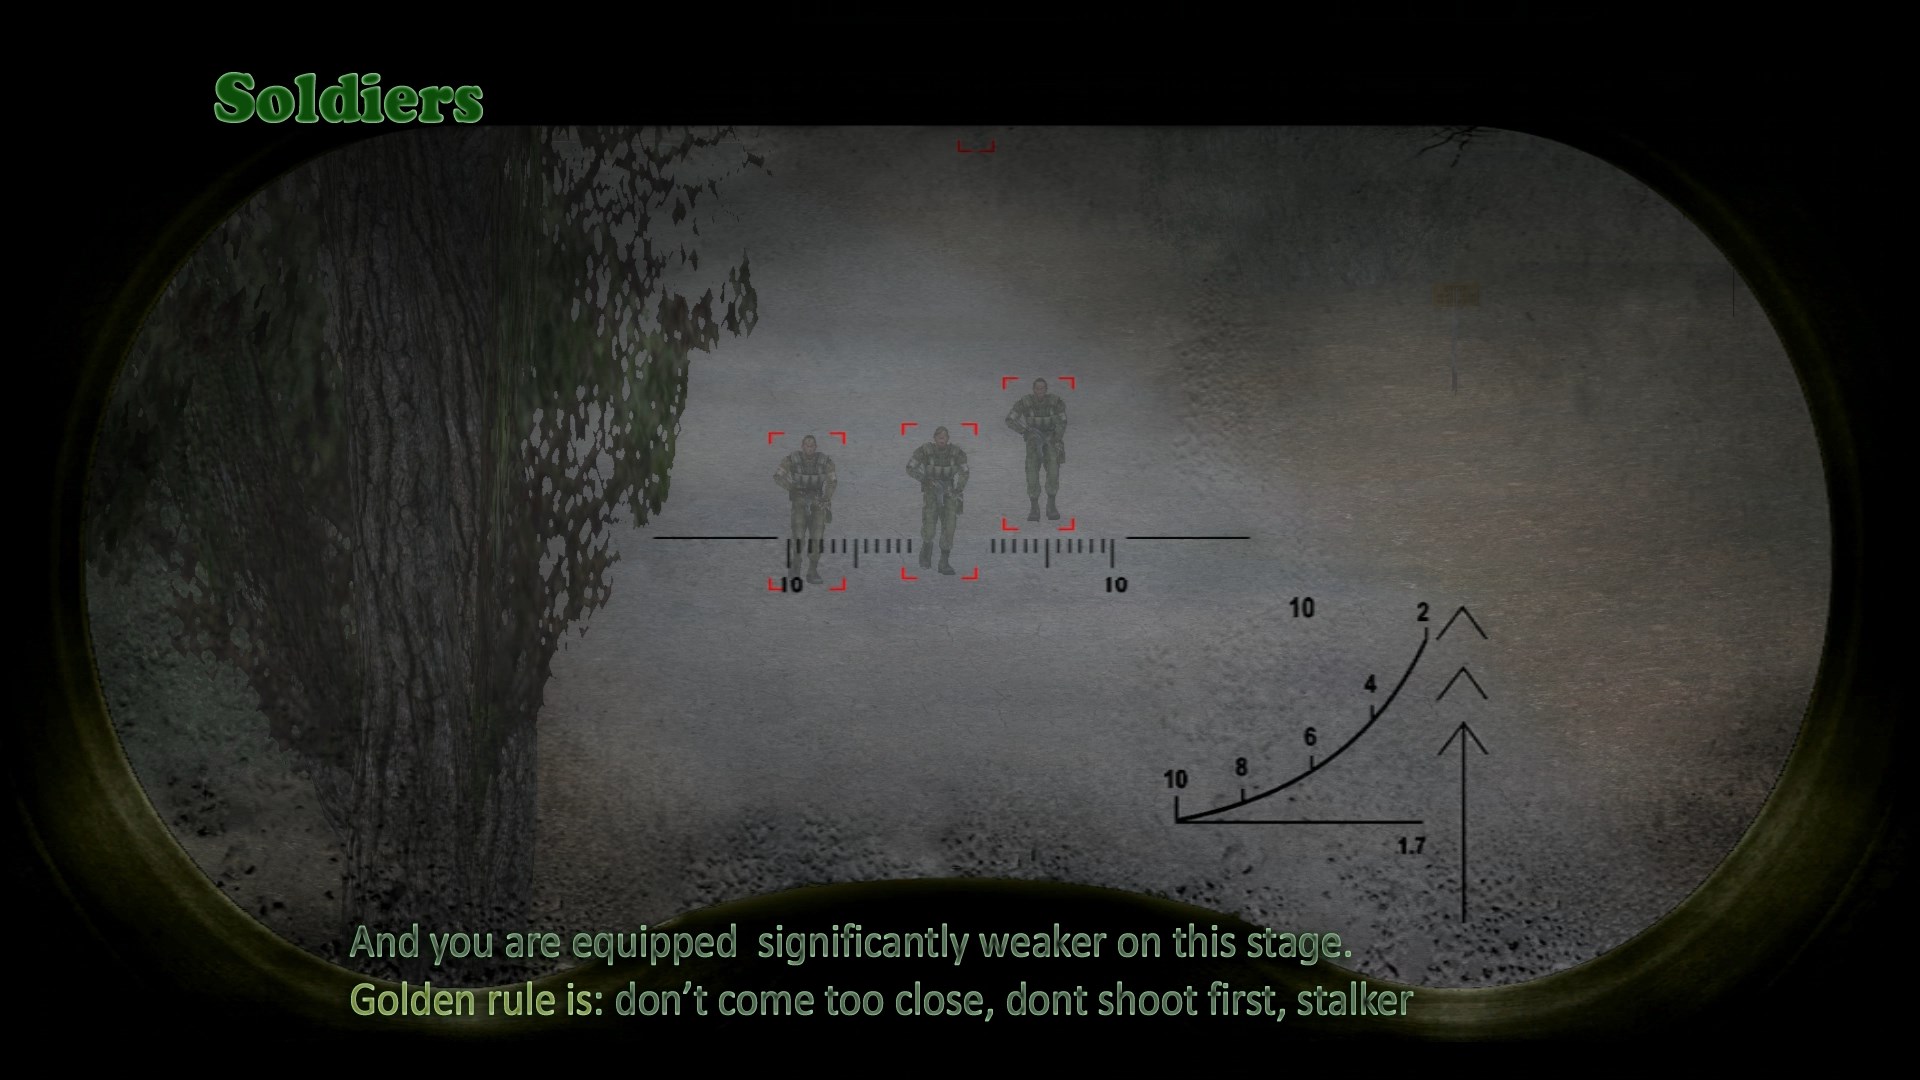
They are just young guys, doing their job...
Just don't come close to this watch patrol. Did you listen, what their commander spoke through the loudspeaker?
Yes, you may be able to kill'm-all - but, as a result - all rookies will be murdered at village and you will only get some AK-74 with few rounds. Later you will have many possibilities to fight with them.
As for checkpoint guards near railway bridge, they could be bribed with reasonable fee - until you see them red on minimap. Just speak to the nearest guy. If they become hostile (there are many possible reasons for that, killing other soldiers first of all) - they will shoot first.
ANOMALIES AND RADIATION
Luckily, you can hear and see the anomalies. The detector will beep and screen will be "enlightened".
If you are not in a battle or in a great hurry, you will never manage to step into it. All anomalies are deadly, until you find a good suit with anomaly protection (that makes anomalies not so lethal for you, but still they are). How to manage with it? Just avoid! If you need to find the safe way through anomaly field - use the bolts to distinguish anomalies (not to neutralise!). "Whirligig" and "Vortex" are catch-and-kill anomalies - death is guaranteed (maybe once you will manage to break free of it). "Springboard" and "Elektro" are only anomalies that could be discharged for half-a-second with a bolt.
Read more about anomalies in your PDA encyclopedia (or Wiki articles)[stalker.fandom.com].
Head to the north from Sidorovich's bunker to listen his comments about Whirligig and all anomalies. Optional tutorial task is to slip through the tube nearby that place and find your way out through anomaly field (+ find some stuff). The place is marked as "dry pond" on the map (see Map section).

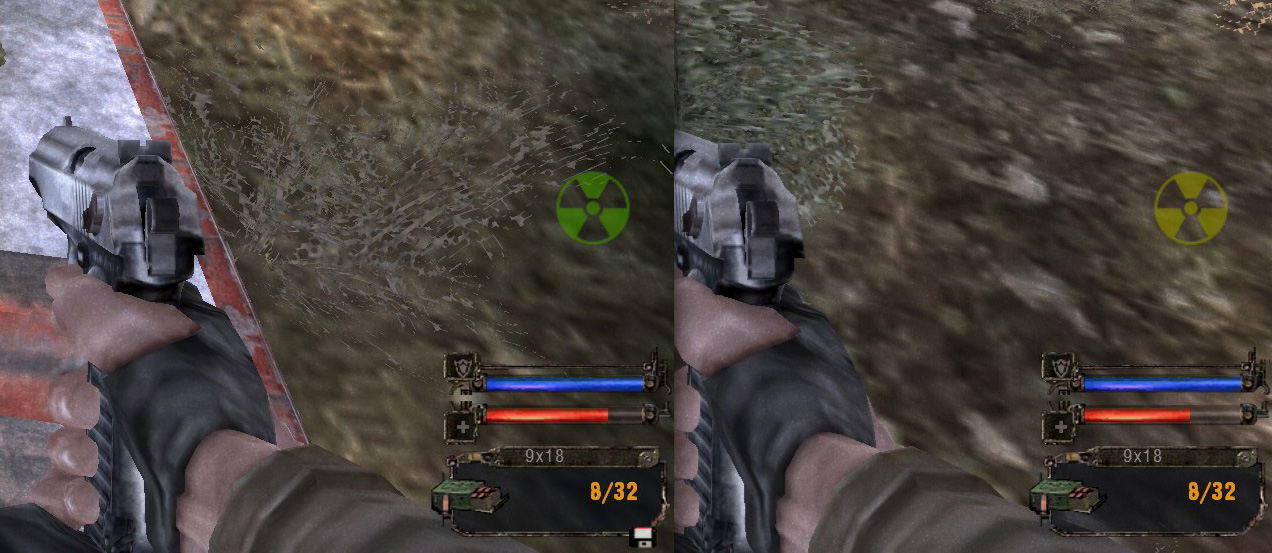
RADIATION makes the screen brighter, too. The Geiger counter crackles and the radiation mark appears on the lower right edge of the screen. While it is green or yellow - just leave that place ASAP and use antirad or vodka afterwards. The red mark means your death in less than a minute. Take anti-radiation medicine immediately and run back very quickly. Drink some vodka after that to celebrate, that you're still alive and to remove the rest of radiation.
The suit with higher radiation protection will help you to avoid such a situations.
The artifacts with radiation removal effect will help, too (see below)
NB! Any amount of radiation drains your health, slowly or quickly. Check the yellow bar in your inventory.
The radiation bar is added to HUD in Girly SoC.
ARTIFACTS
Place artifact to the belt slot to activate its abilities.
Artifacts have positive and negative effects and you will easily learn, how to combine them to compensate their drawbacks. Good news: the arts of higher tiers have the negative effects equal to that of lower tiers.
The only lethal effect of artifacts is radiation. If you ignore it, you will be dead in several minutes All artifacts, that improve your bulletproof and rupture immunity have this effect! So, don't use them until you find one of anti-radioactive artifacts. They do not prevent irradiation, but improve radiation removal. Having "Thorn" on your belt with -10 radiation, you can use two artifacts like "Jellyfish" with +5 radiation. Suit with high radiation protection will never help in this case!
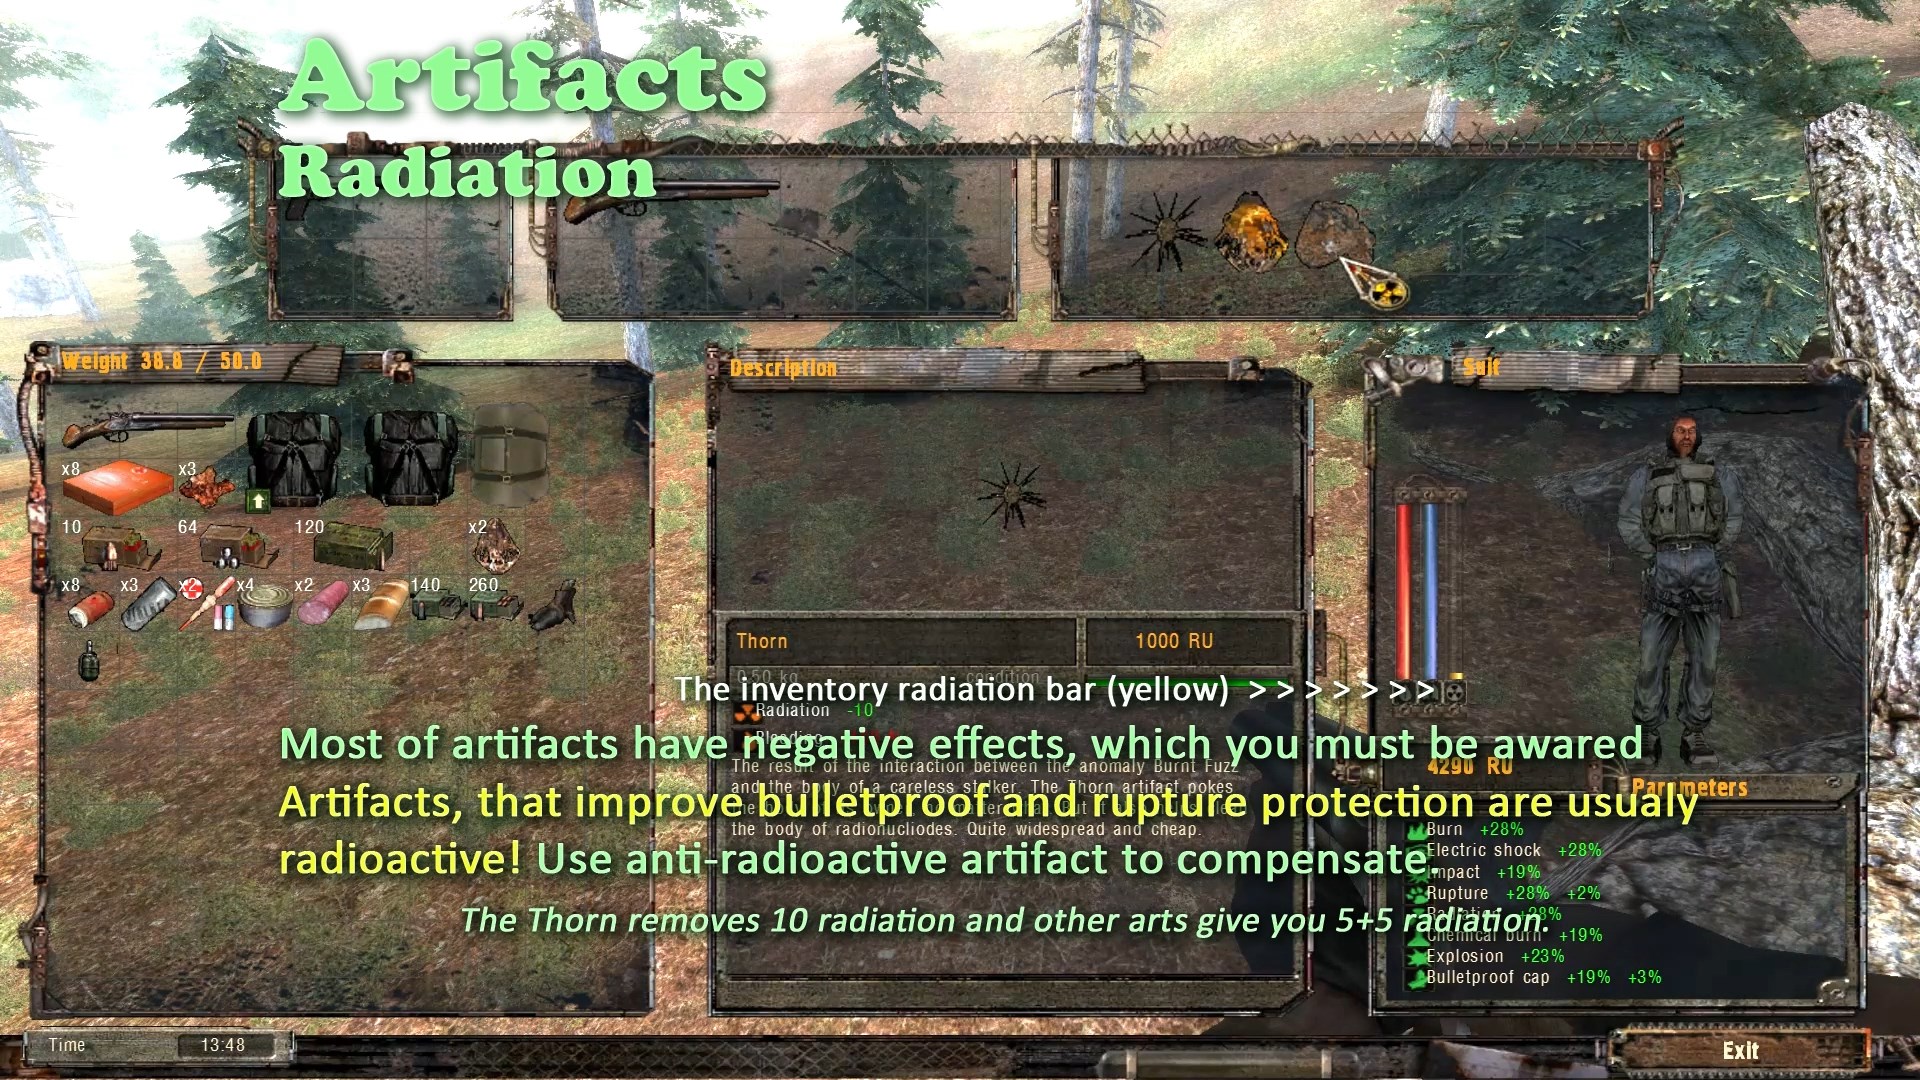
Other negative effects of artifacts are just uncomfortable (like some immunities reduction), but should be taken into consideration. For example, all health-restoring artifacts decrease bulletproof and rupture immunity - just don't use them in battle isolately.
Read more in your PDA or
Stalker Wiki article[stalker.fandom.com]
_____________
Spend some time exploring the territory, accomplishing the tasks and emptying stashes
______________
Cross the railways (spoilers)
There are at least 4 places where barbed wire fence could be crossed.
But it would be good to visit local sites first.
- You need to meet the "Journeyman", following Sidorovich's instructions, he is marked on the map - looting him will reveal the most dangerous way to the other side (both meet and use this way are not obligatory).
- There is a complex of two buildings nearby that place:
- the artifact you see there could be picked up from inside (NB: atrifacts could be moved away from anomalies by shooting them - but that hardly works for this case) or use your courage and spend some medkits)))
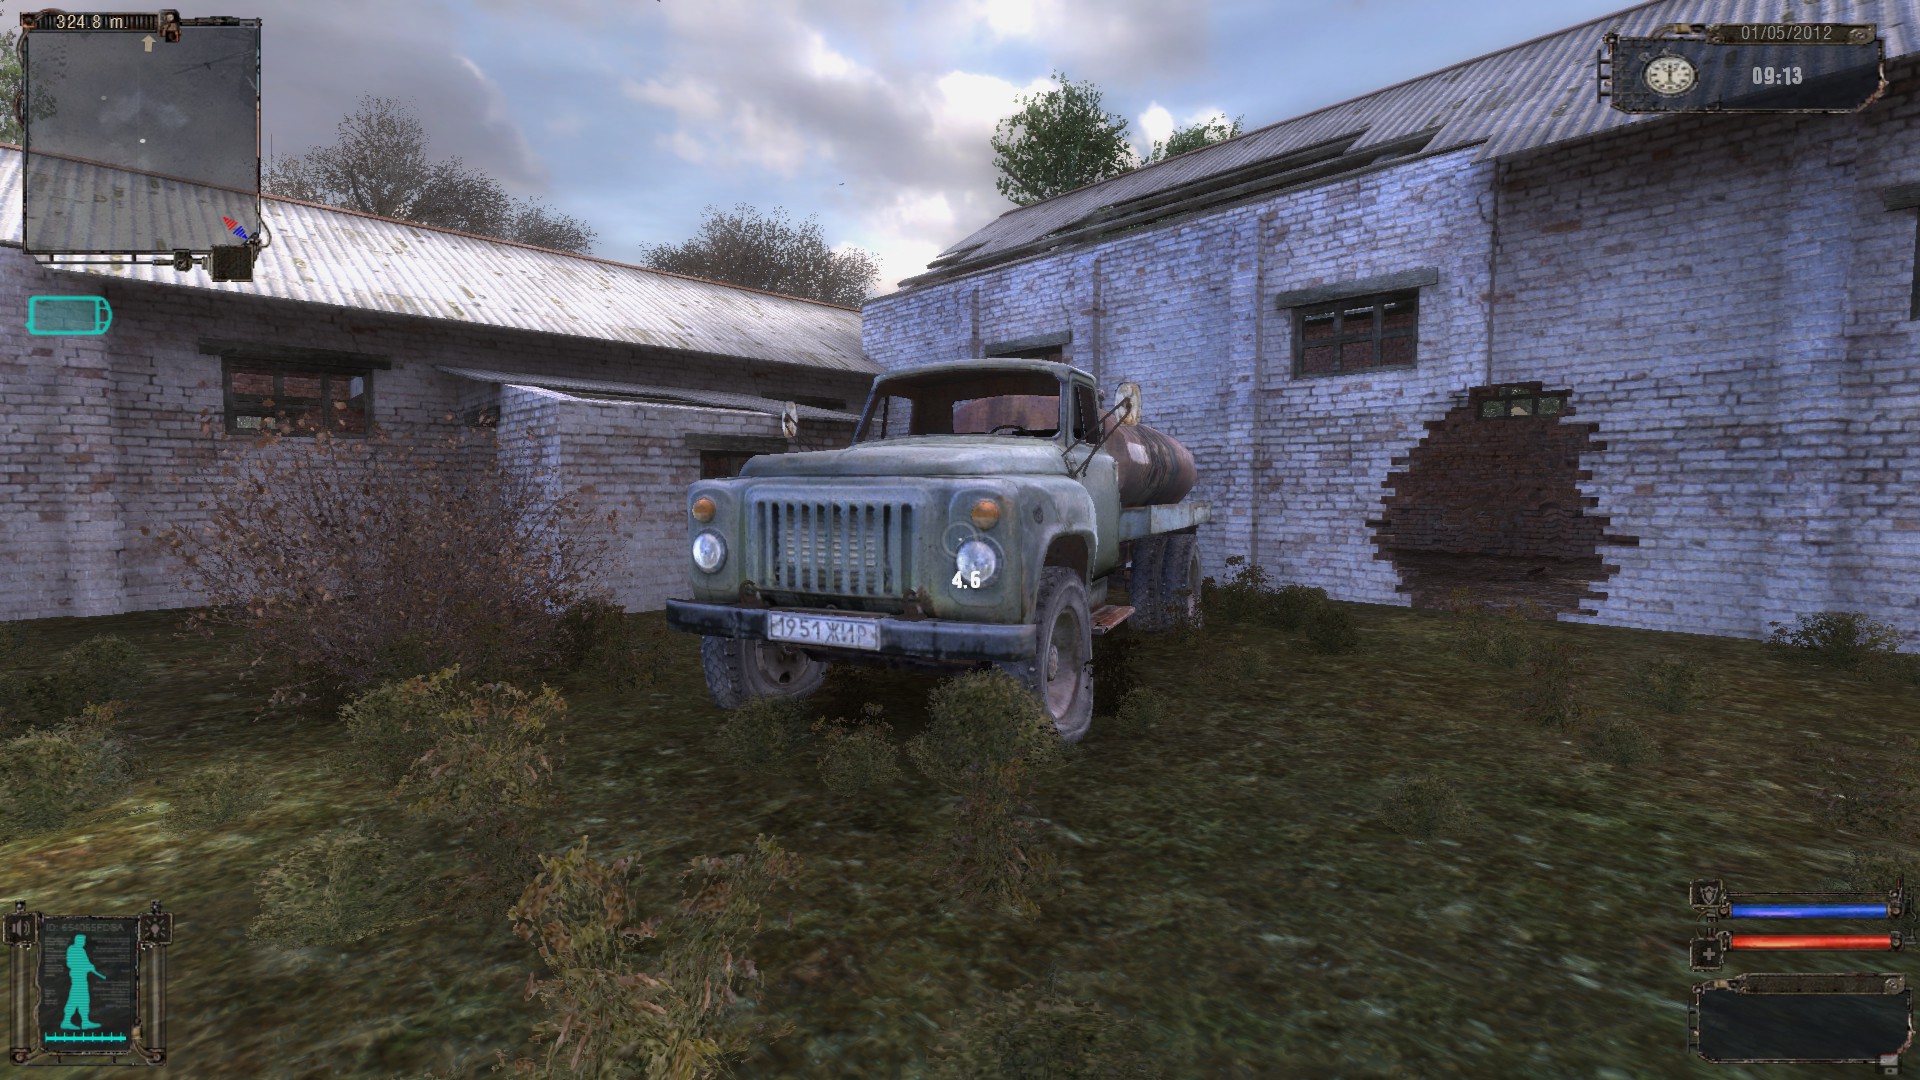
- if you climb/jump up to the milk truck and then jump to the roof, you can find the blue box, that seems to be empty - but it is not - all items are fallen through the roof to the floor inside (remember this - stuff use to fall down),
- if you've already discovered the nearby hidden stash ("little house") - you will have to make a good jump on the roof. Ability to jump was slightly increased in Girly SoC.
- don't crash fuel canister =))
There are several gaps in the barbed wire fence to the right of checkpoint in addition to elektra-tunnel. The first one is at its very beginning and other are closer to its far end. As for the closest one - try not to disturb soldiers, as for others - try not to die from radiation and packs of mutants. BTW, jump up to the derailed locomotive roof diagonally from railway and dead-end tunnel at that place to get some goods (as Nimble told you), but beware anomalies. Usually I cross embankment from the left side of this train.
If you've grasped the main rule "Follow instructions, rookie!" - you'll need no further advises.
Parting instructions
- Quicksave! Quicksave before the battle, Quicksave after you've won it, Quicksave after any progress you gain. Once you will forget this rule and you will have to replay all the level (you have autosave at location start always). So, Quicksave!
- Have at least one full save at every location (I mean exiting to the main menu by hitting ESC and making a new named save);
- Always monitor your mini-map - that may save your life or remind about stash or task target nearby. Besides, it is your only map underground ;
- Explore the location thoroughly, but carefully - you are Stalker, not soldier;
- Sell artifacts and monster parts to NPCs, they will pay the same price as traders (except scientist and Tannis), but remember that some item may occur to be a task target soon;
- The reward for task item you deliver is may not worth it (not so for suits) - so, if you find it useful for yourself - just keep it - reputation is nothing compared to your life surely ;
- Play with crosshair to distinguish neutrals and enemies (yellow / red) in order not to become hostile to your alies occasionly;
- Canisters, red barrels and gas cylinders are explosive. Shoot it from distance to terminate enemies in its range and don't ever use it as cover;
- NPC will give you important information (or you'll have a better immersion, at least). Chat with the the quest NPC even more often (they always have one name, like Wolf, Seriy, Mole, Max etc.), just every time you can, after any progress made - that can trigger some events or map spots or whatever;
- PDA contains a lot of information, that you've probably missed. You can use night time for reading it, resting near camp-fire, because mutants are more active and spawn mostly at night;
- Don't be burdened with useless loot - there are no traders between Cordon and Bar. Save artifacts and suites in blue chests and move further. Trader at Garbage appears after you help Seriy to kill bandits and speak to him about Strelok (if not - speak to Bobbie after X16). You can find trader at Radar (Red Forest), after speaking to Bobbie and Tannis, or Wolf at Military Warehouses (after X16, too);
- It would be a good idea to cover your task-giver during the fight in order to get your reward and info, but that usually has weak influence on story line;
- Poverty is not the thing to be afraid of in the Zone - if you take and make easy tasks and sell everything you don't need to traders. No need to gather all weapons you see or even use corpses as a carry-bag (But good stalkers use to place all that useless iron into the corpses - that makes the world tidy and the game smoother);
- Do not ever kill anyone/anything at Bar location (except for Arena, certainly), even if you meet an overt enemy! Almost shooting in-between the checkpoints may result you to become "excommunicado";
- Colonel Petrenko in Girly_SoC has a bad habit to leave his room and wander - so he is not a good merchant in my mod, but others have a wider assortment, and richer stashes compensate that;
- "Loners" is the only suitable faction. Joining Duty or Freedom will give you no huge benefits, but make your life harder that or another way. To avoid Duty to become enemy if you choose to help Freedom - just take more tasks from Duty (good if they become green) before going to Freedom base at Army Warehouses. Balance between Duty and Freedom may be tricky. Due to weapon and script changes, Skull would hardly be shot by sniper (I'd advise to shoot sniper, get reward for that, refuse to kill other snipers, and procced to Freedom, and they will not be hostile, wait for Duty attack, that will fail for sure - that way you activate Freedom's loudspeaker with music and save good relations with both factions);
- There are 5 endings in SoC game, that considered to be "false". If you have not met Doctor - you may not find 2 "real" endings;
- Never hurry, if you are not one of that speedrunners, who can reach C-Conscious in ten minutes after first chat with Sidor ))). Come there and back, and A-Life will provide you with more challenges;
- NumPad "-" and NumPad "+" toggle HUD for nicer screenshots, but you'll have to run Steam as admin to use its overlay.
Read another good guide by PsyWarVeteran

>>Quick STALKER SoC Guide for readers
>>My videoguide in 4 chapters is not a masterpiece, but I believe it may be useful.
FAQs
- CONTROLLER: Controller is just one of the most horrible monsters in the Zone.
- WINDOWS 10: No problems reported - game is fully compatible. It would be better to start game with administrative rights
- Using non-latin characters in Windows user name will usually lead to crash.
- Head bobbing: change cam_inert parameter to lower (even to zero) in _appdata_\user.ltx (*) or use console command 'cam_inert 0.1' (0.0 - 1.0) Fixed in Girly SoC, but you can adjust it this way.
- In order to get rid of side shadows, change setting to "1" for 'r2_sun_near_border' и 'r2_sun_focus' at file \_appdata_\user.ltx.
- CARRY WEIGHT LIMIT: This is the part of gameplay, which is to temper your greed. You can find what and where to change by yourself, but be ready for crashes.
- MODs for beginners: No. The best way is to have the first playthrough using vanilla only. Even graphic mods or ZRP ruins the real STALKER's magic. I would never recommend my mod for initial playthrough, too.
- BUGs and crushes: The current Steam version is rather stable. Grafics is very good for such an ancient game.
Some bugs are annoying, but never critical. Use ZRP (basic) to get rid of them or Girly SoC, as most (not all) bugs are fixed.
MAP
Here is a map of your training ground, named Cordon
(the best way to examine it is to open it in separate browser page)
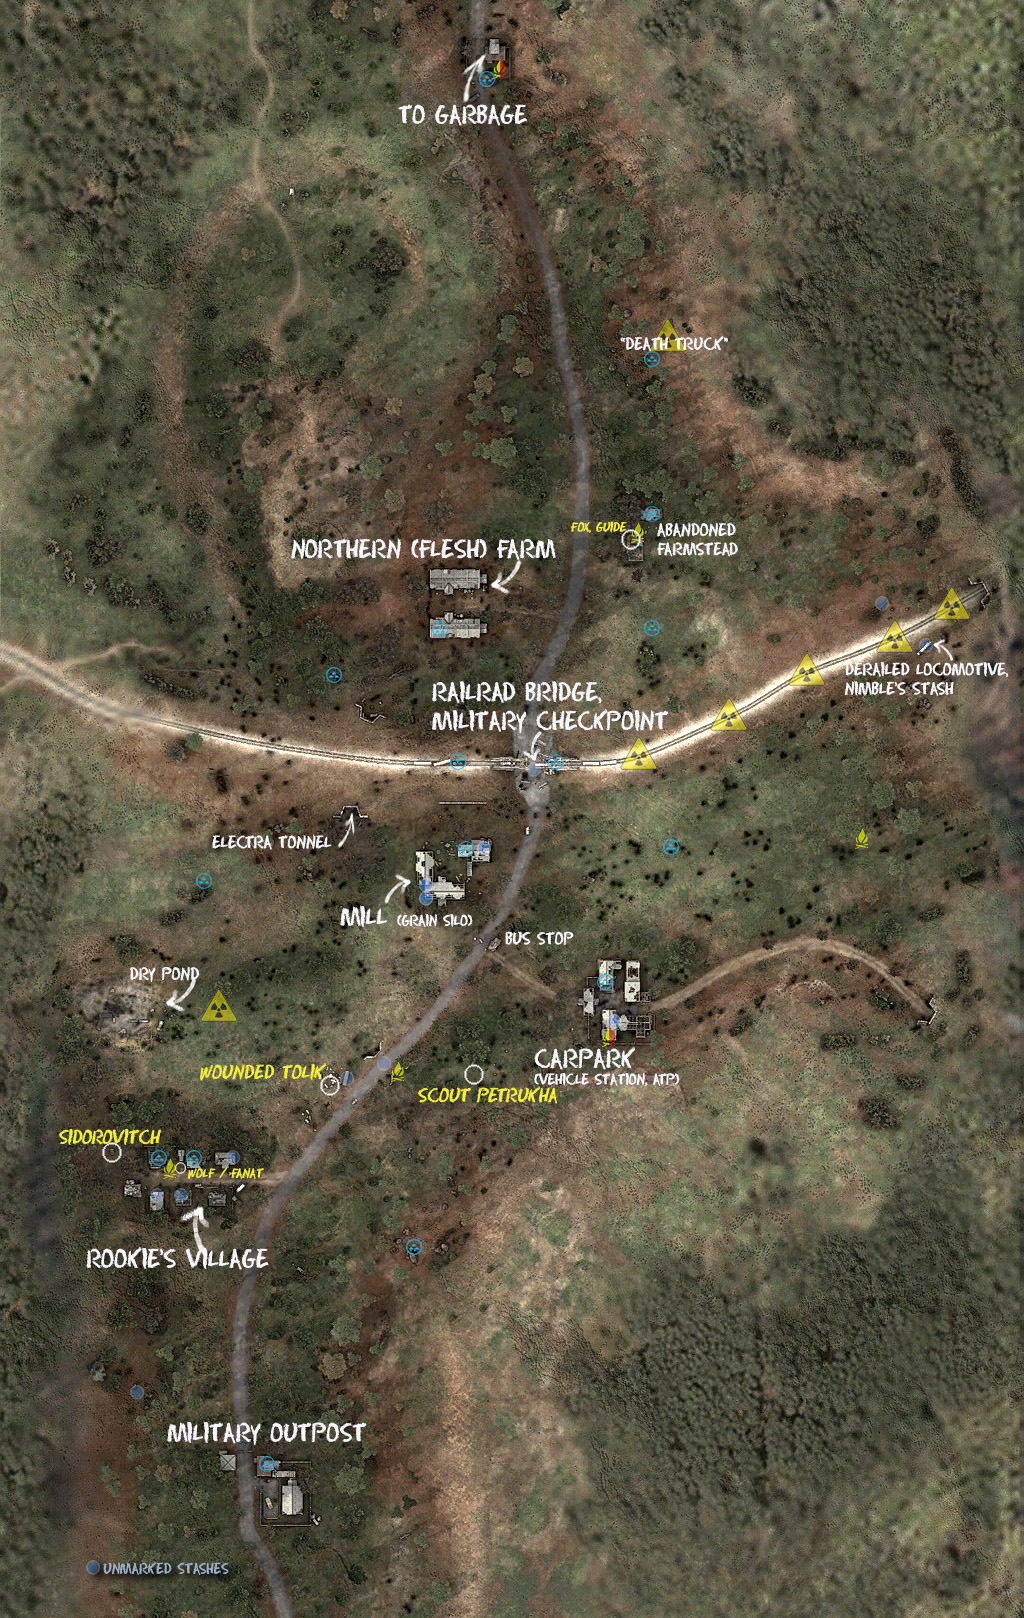
GOOD HUNTING, STALKER!
0 comments