


- Games
- Supermarket Simulator
- Mods
- Miscellaneous
- TextureReplacer
TextureReplacer
-
Endorsements
-
Unique DLs--
-
Total DLs--
-
Total views--
-
Version1.3.5
- Download:
- Manual
0 of 0

File information
Last updated
Original upload
Created by
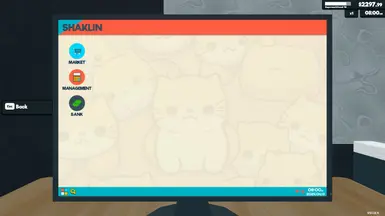
ShaklinUploaded by
ShaklinVirus scan
Some files not scanned
Tags for this mod
- Compilation
- Performance Optimization
- Gameplay
- Replacer
- Animation - New
- Animation - Modified
- Models/Meshes
- Textures
- Humour, Joke or Just for Fun
- Unrealistic
- Tutorials for Modders
- Tutorials for Players
- Related to Movies/TV/Books/Other Games
- Overhaul
- Portuguese
- ini tweak
- Bug Fixes
- Quality of Life
- Official
- Stay Home. Make Mods.
- AI-Generated Content
Current section
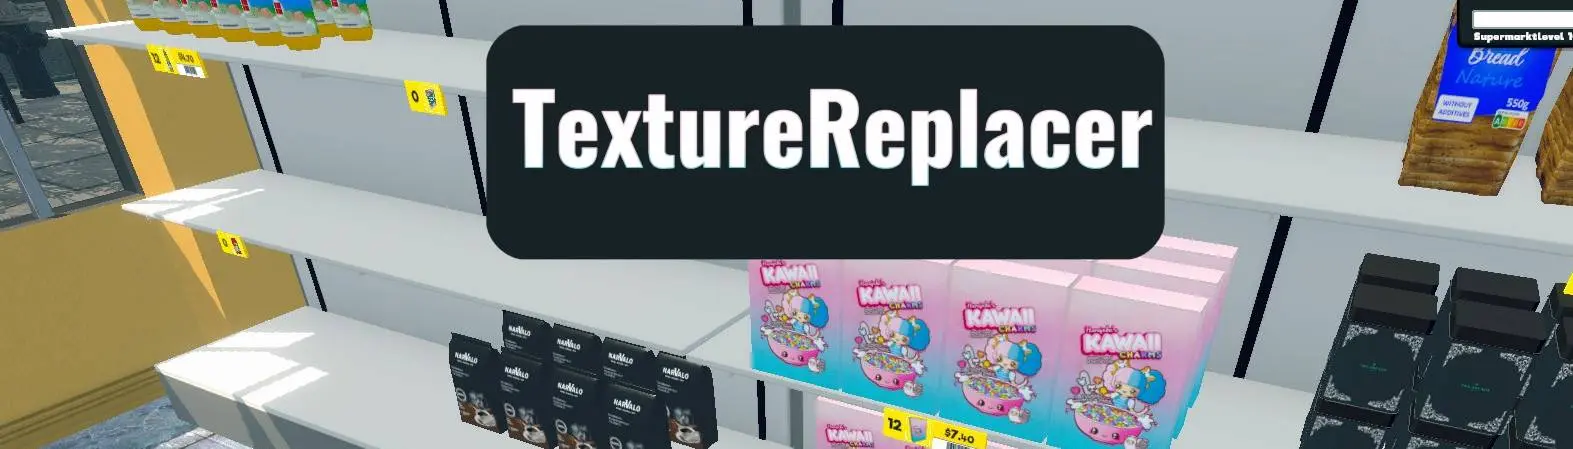
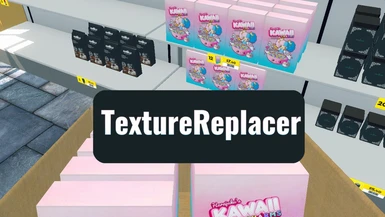
About this mod
A simple Texture, Meshes and Products Replacer. Create your own!
- Requirements
-
This mod does not have any known dependencies other than the base game.
Mods requiring this file
- Permissions and credits
-
Credits and distribution permission
- Other user's assets All the assets in this file belong to the author, or are from free-to-use modder's resources
- Upload permission You are not allowed to upload this file to other sites under any circumstances
- Modification permission You must get permission from me before you are allowed to modify my files to improve it
- Conversion permission You are not allowed to convert this file to work on other games under any circumstances
- Asset use permission You must get permission from me before you are allowed to use any of the assets in this file
- Asset use permission in mods/files that are being sold You are not allowed to use assets from this file in any mods/files that are being sold, for money, on Steam Workshop or other platforms
- Asset use permission in mods/files that earn donation points You are not allowed to earn Donation Points for your mods if they use my assets
Author notes
This author has not provided any additional notes regarding file permissions
File credits
This author has not credited anyone else in this file
Donation Points system
Please log in to find out whether this mod is receiving Donation Points
- Changelogs
-
-
Version 1.3.5
- -Fixed custom product names in other stores
- -Custom furniture (meshes) are no longer invisible (you need to edit vanilla GLB meshes to keep the vertex colors. See Description)
- -Store facades can now be replaced with custom meshes/textures
-
Version 1.3.4
- Fridge & Shelf textures fixed
-
Version 1.3.3
- price tags fixed
- product meshes reset fixed
-
Version 1.3.2
- All product textures have changed again!
- Old product mods will no longer work until they are updated.
- Icons have been fixed, but the border on the shield is missing. I'll fix it if I find out how
-
Version 1.3.1
- Custom wall (T_WallPaint_AlbedoTransparency.png) can now be painted
-
Version 1.3.0
- Fixed the vegetables stall in market
-
Version 1.2.9
- -Editing each product works again + transparent textures (if they have one) (license name + obj name.png) Example Sandwich Bread: T_licence13_alb_SM_Sandwich Bread_Ron.png T_licence13_alb_SM_Sandwich Bread_Ron_transparent.png
-
Version 1.2.8
- Fixed icons on the Scanner
-
Version 1.2.7
- Fixed: some Textures didn't load
- Fixed: License 17 works with T_License17_AlbedoTransparency.png & T_License17_AlbedoTransparency_NEW.png
-
Version 1.2.6
- Fixed: Cardboard boxes textures & font textures sometimes not loaded
-
Version 1.2.5
- Updated for new game version
- Textures and meshes are now cached at the startup
-
Version 1.2.4
- Fixed Icons on Shelfs & Packages
- Fixed Stair Textures
- Important: Some licensed textures have changed again! Therefore, some products will look strange. The texture pack modder would then have to update them
-
Version 1.2.3
- Mesh Import Fix
-
Version 1.2.2
- Icons are now also reloaded when the reload key is pressed
-
Version 1.2.1
- Main Menu can be edited
-
Version 1.2.0
- Supports icon replacements for new products
-
Version 1.1.9
- Fix for Computer Music-Player Icon
-
Version 1.1.8
- Fix for License7 (since the supermarket simulator update name changed, but this fix allows the old name to continue to be used)
-
Version 1.1.7
- Single-product texture is now possible, by writing the object name
- Wallpaper added
- Textures Reload key for modders. Hold shift and press Enter
-
Version 1.1.5
- Icons problem fixed and now load faster
-
Version 1.1.4
- Fixed issue with custom furniture
- some unnecessary code removed
-
Version 1.1.2
- Compatible with ComputerAnywhere (lags because Computer not visible)
-
Version 1.1.1
- Computer desktop textures reworked, sample is in the _templates/vanilla folder
-
Version 1.1.0
- Custom obj UV Meshes no longer flipped
- If a txt file could not be read, it will be ignored instead of aborted
-
Version 1.0.9
- Obj files can now have more than 1 group
- You can now create subfolders in objects_meshes and objects_textures for more sorting order
- You can now change the mesh of the stairs (Store_Stairs.obj)
-
Version 1.0.8
- Fixed an issue with the names when other mods access it
-
Version 1.0.7
- You can change the Desktop Wallpaper
-
Version 1.0.6
- Soda Cans Fix
-
Version 1.0.5
- If texture is replaced, color automatically set to white
- Added Store Sign Colors: Emissive_blue.txt, Emissive_red.txt
- Store Stairs can now be changed: Store_Stairs_a.png, Store_Stairs_Frame_a.png
- Veal Chop and Chicken Leg textures fix
-
Version 1.0.4
- glass shader added
-
Version 1.0.3
- The ability to change shader colors that do not have textures (e.g. drinks liquids, wallper, etc), with a .txt in the 'objects_textures' folder
-
- Donations
-
Straight donations accepted
TextureReplacer
A simple Texture, Meshes and Products Replacer.
Install:
Download BepInEx and put the mod into:
X:\Steam\steamapps\common\Supermarket Simulator\BepInEx\plugins\
Download Packs or create your own!
Folders:
Obj Meshes go to:
TextureReplacer\objects_meshes\
(you can even create subfolders for more sorting order)
Png Textures go to:
TextureReplacer\objects_textures\
(you can even create subfolders for more sorting order)
Product Icons go to:
TextureReplacer\products_icons\
Product Brands and Names go to:
TextureReplacer\products_names\
Examples are in:
TextureReplacer\_templates\
(The mod will ignore the _templates folder)
QUICK TUTORIAL
https://drive.google.com/file/d/1hs64KP7VA9KOPFUrbPM9oHVpzxqUx1hw/view?usp=sharing
For the new version of Supermarket Simulator I recommend:
AssetRipper 1.1.4 (for windows: AssetRipper_win_x64.zip)
-Start it and select File->Open Folder
Open: Supermarket Simulator\Supermarket Simulator_Data
-Then click on Export->Export All Files
(click on select Folder, choose a folder for the extracted textures and then 'Export Primary Content')
This will take a very long time..
Your textures are then in your extracted Folder Assets/Texture2D
Do you want to change the brandname, name and/or icon of a product?
For example the name for the Susu (Sugar Powdered) Product
1. Open products_list.txt in
X:\Steam\steamapps\common\Supermarket Simulator\BepInEx\plugins\TextureReplacer\_templates\
2. Search for Susu. We need the Sugar Powdered. We can see it has the ID 147
3. Close products_list.txt. We know now we need the ID 147 for Susu (Sugar Powdered)
4. Go to
X:\Steam\steamapps\common\Supermarket Simulator\BepInEx\plugins\TextureReplacer\_templates\vanilla\products_names\
and copy the files 147_Brand.txt and 147_Name.txt
paste both to
X:\Steam\steamapps\common\Supermarket Simulator\BepInEx\plugins\TextureReplacer\products_names\
5. Open your copied 147_Brand.txt and 147_Name.txt and change the brandname and name like you want
6. This step is only if you want to change the icon of a product. If not, skip this step. In our case, we change the icon:
Go to
X:\Steam\steamapps\common\Supermarket Simulator\BepInEx\plugins\TextureReplacer\_templates\vanilla\products_icons\
and copy the 147_Icon.png
paste it to
X:\Steam\steamapps\common\Supermarket Simulator\BepInEx\plugins\TextureReplacer\products_icons\
7. Open your copied 147_Icon.png with a graphics program and edit it like you want
8. Start the game and see your new Product names and/or icon
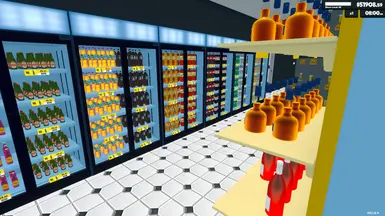
Do you want to change the texture and/or mesh of a product?
1. Download under Optional Files "TextureReplacer 1.2.1 TEMPLATES FOR MODDERS"
2. Extract it and go to the folder:
\_templates\vanilla\objects_textures\products\
3. All products of the same type share 1 png file.
For example you want to change the textures of all cereals, then go to the folder:
_templates\vanilla\objects_textures\products\T_Cereal_A_BCA\
and edit this pngs:
T_Cereal_A_BCA.png
T_Cereal_A_N.png
T_Cereal_A_RGBA.png
Note: If you want to increase the quality, then resize it to 2048x2048!
If you want to change ONLY 1 cereal, for example only Cereal_Chokipik, the go the subfolder "33"
and edit this pngs:
T_Cereal_A_BCA_Cereal_Chokipik.png
T_Cereal_A_N_Cereal_Chokipik
T_Cereal_A_RGBA_Cereal_Chokipik
4. If you want to change the mesh of a product, edit the obj file with any 3D program
5. When you are done, place the texture into:
X:\Steam\steamapps\common\Supermarket Simulator\BepInEx\plugins\TextureReplacer\objects_textures\
and meshes (obj files):
X:\Steam\steamapps\common\Supermarket Simulator\BepInEx\plugins\TextureReplacer\objects_meshes\
6. Start the game and see your edited product
Do you want to change the mesh of a Shelf, Fridge or Freezer?
This it's a little bit complex.
First, you need the .glb file of the original mesh from the game because only the .glb files have the vertex color informations.
If you use AssetRipper, it's essential to use Export Primary Content to obtain .glb files.
Import the .glb mesh into Blender.
There you can see the vertex colors:
https://i.imgur.com/MUhC0DD.png
red = always visible
black = game can switch to visible/invisible
blue = for the product icon
green = for price tag
Edit the mesh as you want.
Then export it as .obj.
BUT in the export window, select 'Colors' and 'Object Groups'
https://i.imgur.com/I96f7bg.png
Do you want to change the texture of non-Product 3D Object?
For example the texture of the trash bin.
1. Open AssetStudio
2. Open the gamefile sharedassets0.assets in
X:\Steam\steamapps\common\Supermarket Simulator\Supermarket Simulator_Data\
3. After the long loading you will see a List with all Objects.
In our Case we search for trash bin:

and we mark it:

4. Click on 'Model' 'Export selected objects (split)', and choose any folder (maybe create one on the Desktop)

5. The extracted Folder will open automatically after exporting
6. You will see a png file (in our case Dumpster_A.png), edit it with a graphic program like you want
7. Then place your Dumpster_A.png into the mod folder:
X:\Steam\steamapps\common\Supermarket Simulator\BepInEx\plugins\TextureReplacer\objects_textures\
8. Start the game and see your new texture
Note: Sometimes objects share the same texture, so be careful!
Do you want to change the texture of the floor?
1. Download the modder pack under Files
2. Extract it and go to the folder:
_templates\vanilla\objects_textures\floor\
3. You can see all 13 types. Edit one or more as you want with a graphics program and when you done place the pngs into:
X:\Steam\steamapps\common\Supermarket Simulator\BepInEx\plugins\TextureReplacer\objects_textures\
4. Start the game and see your new floor
Do you want to change the texture of the ceiling?
1. Download the modder pack under Files
2. Extract it and go to the folder:
_templates\vanilla\objects_textures\ceiling\
3. Edit the pngs as you want and when you are done place them into:
X:\Steam\steamapps\common\Supermarket Simulator\BepInEx\plugins\TextureReplacer\objects_textures\
4. Start the game and see your new ceiling
Do you want to change the Store Sign?
1. Download the modder pack under Files
2. Extract it and go to the folder:
_templates\vanilla\objects_textures\shop_sign\
3. Open Emissive_blue.txt and Emissive_red.txt with notepad
The first line is for the color hex code: more info here: https://www.color-hex.com/color/00ffff
The second line is for the intensity (default 10)
4. When you done place both txt files into:
X:\Steam\steamapps\common\Supermarket Simulator\BepInEx\plugins\TextureReplacer\objects_textures\
Do you want to change the Store Stairs Textures?
1. Download the modder pack under Files
2. Extract it and go to the folder:
_templates\sample\objects_textures\stairs
3. Edit the 3 pngs as you want and place into:
X:\Steam\steamapps\common\Supermarket Simulator\BepInEx\plugins\TextureReplacer\objects_textures\
Textures with patterns look a bit strange because the UV map of the 3d object was not done correctly. Unfortunately I can't change that!
Optional you can place a Bumpmap (Place a Store_Stairs_n.png) and MetallicGlossMap (Place a Store_Stairs_m.png).
Same for the frame: Store_Stairs_Frame_n.png and Store_Stairs_Frame_m.png
Do you want to change the Store Stairs Meshes?
1. Download the modder pack under Files
2. Extract it and go to the folder:
_templates\vanilla\objects_meshes\
3. Edit Store_Stairs.obj as you want with any 3d program and place into:
X:\Steam\steamapps\common\Supermarket Simulator\BepInEx\plugins\TextureReplacer\objects_meshes\
Do you want to change the checkouts?
T_Cashregister_AlbedoTransparency.png
T_Checkout_1_AlbedoTransparency.png
T_Checkout_2_AlbedoTransparency.png
T_PosTerminal_alb.png
T_SelfCheckout_alb.png
T_SelfCheckout_alb_mirrored.png
Do you want to change the Computer Desktop ingame?
1. Download the modder pack under Files
2. Extract it and go to the folder:
_templates\vanilla\objects_textures\computer\
3. Edit the files as you want and place the whole folder into:
X:\Steam\steamapps\common\Supermarket Simulator\BepInEx\plugins\TextureReplacer\objects_textures\
Does your custom mesh look weird ingame?
Maybe it's because of the _OcclusionMap (png with _o at the end) or MetallicGlossMap (png with _m at the end).
Open it with a graphics program and fill the _o.png completely with white and/or _m.png transparent 50% black, then the mesh should look normal again.
Note:
The more textures, the longer it takes to start the game because everything has to be loaded.
It is best to leave out _BumpMap, MetallicGlossMap and _OcclusionMap if they are the same as the original or have changed little.
The mod uses Runtime OBJ Importer:
https://assetstore.unity.com/packages/tools/modeling/runtime-obj-importer-49547