Required Apps:
UAssetGUI by atenfyr.
https://github.com/atenfyr/UAssetGUI/releases
UnrealPak by FluffyQuack.
http://modderbase.com/showthread.php?tid=834
Unreal Engine 4.15.
https://www.unrealengine.com/en-US/download
https://docs.unrealengine.com/4.27/en-US/Basics/InstallingUnrealEngine/
Image Editing software.
Gimp https://www.gimp.org/downloads/
UE Viewer.
https://www.gildor.org/downloads
Folder Setup:
Create a folder named MODS in the root of of your HDD.
This will be your working folder for all mods. Extract UAssetGUI and UnrealPak in the MODS folder.
Create a folder named UEOUTPUT
Setting up Unreal Engine:
Once UE is installed navigate to Config folder "Epic Games\UE_4.15\Engine\Config" open BaseEngine.ini
Make sure the below entries are set to true.
[Core.System]
UseSeperateBulkDataFiles=True
[/Script/Engine.StreamingSettings]
s.EventDrivenLoaderEnabled=True
Close BaseEngine.ini and save your changes.
Open Unreal Engine, once it has loaded click New Project.
Under Blueprint select Blank.
Settings: Desktop / Console - Maximum Quality - No Starter Content.
Location: X:\MODS\PROJECTS\UnrealEngine4
Name: Leave default or rename it to your choosing TextureMods
https://imgur.com/oLbdkq9
Once your project has loaded click File (top left corner) Package Project > Packaging Settings.
Build Configuration = Shipping.
Untick Use Pak Files.
Click the X top right corner to close the settings tab.
https://imgur.com/mXeSZcb
In the Content Browser next to Search Folder click the icon beside it.
Right click Content then select New Folder.
Name it Packages.
Do the same with all other folders. You want the folder tree to look the same as the extracted game folders.
See image for details. https://imgur.com/sKBurNE
Save your project. You can close UE or leave it open as we will come back to it later.
Unpacking Pak Files:
Copy AVGame-WindowsNoEditor-GameA.pak to unrealpak folder.
Drag and drop AVGame-WindowsNoEditor-GameA.pak onto UnrealUnpak.bat.
While waiting for the files to extract create a folder (this can be named whatever you like with a _P on the end) for the tutorial we will name it Flashback_Coat_Mod_P.
Inside this folder create a folder structure as so AVGame\Content\Packages\Character\CH_Hero_Vampyr\
In CH_Hero_Vampyr folder create three folders named Materials, Model and Textures.
Extracting Textures:
Open UE Viewer click the 3 little dots and navigate to the Paks folder of you Vampyr install location, click Select Folder then click OK.
https://imgur.com/yivuD9i
navigate to Packages > Character > CH_Hero_Vampyr > Materials select CH_MT_Hero_Coat_Flashback.uasset
Click Tools > Options.
Make sure your settings are the same as in the pic. https://imgur.com/tObSkQG
Click Tools > Open Export Folder to find the exported files.
Image Editing:
I'm no image editing expert so I will show you the basics of recoloring the Flashback coat.
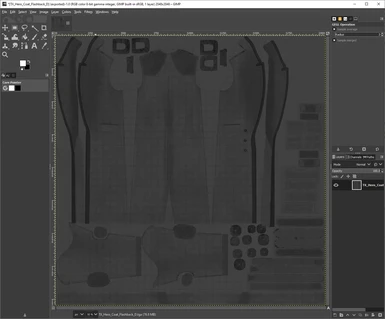
Open TX_Hero_Coat_Flashback_D.tga with Gimp.
Select Colors > Hue-Saturation
Adjust the sliders to your liking. If you want a black coat Hue = -180.0 Lightness = -100.0 Saturation = -100.0
https://imgur.com/MAvS3oF
Once done click File > Export As... Select a folder to save your file then click Export, another popup will appear click Export again.
Back to Unreal Engine:
Make sure Textures folder is the main open folder.
Go to where you saved your edited TGA file.
Drag and drop it on UE's Content Browser.
Select TX_Hero_Coat_Flashback_D press F2 on your keyboard and rename the file to TX_Hero_Coat_Flashback_Mod_D
Double click TX_Hero_Coat_Flashback_Mod_D
Under Level Of Detail click the drop down menu of Texture Group and select Character. Now click Save Current.
Click File > Package Project > Windows > Windows (64-bit)
Navigate to your MODS folder then UEOUTPUT, select OK.
Once that is done open UEOUTPUT folder and locate the Package folder and copy that to the the folder we created earlier Flashback_Coat_Mod_P.
Make sure to place it into the Content folder. MODS\unrealpak\Flashback_Coat_Mod_P\AVGame\Content\
UassestGUI:
Navigate through AVGame-WindowsNoEditor-GameA folder that was extracted before to the below folders and copy .uasset and .uexp
Mods\unrealpak\AVGame-WindowsNoEditor-GameA\AVGame\Content\Packages\Character\CH_Hero_Vampyr\Materials
CH_MT_Hero_Coat_Flashback.uasset
CH_MT_Hero_Coat_Flashback.uexp
Mods\unrealpak\AVGame-WindowsNoEditor-GameA\AVGame\Content\Packages\Character\CH_Hero_Vampyr\Model
CH_Hero_Vampyr.uasset
CH_Hero_Vampyr.uexp
Place those files in the corresponding folders in Flashback_Coat_Mod_P.
Rename CH_MT_Hero_Coat_Flashback.uasset and .uexp to CH_MT_Hero_Coat_Flashback_Mod
Open UassetGUI.In the top right corner in the drop down menu select 4.15.Navigate to
Mods\unrealpak\Flashback_Coat_Mod_P\AVGame\Content\Packages\Character\CH_Hero_Vampyr\Materials
Open CH_MT_Hero_Coat_Flashback_Mod.uasset
Click Name Map
Right click the first entry /Game/Packages/Character/CH_Hero_Vampyr/Materials/CH_MT_Hero_Coat_Flashback
Select Replace all references...
In the new popup enter /Game/Packages/Character/CH_Hero_Vampyr/Materials/CH_MT_Hero_Coat_Flashback_Mod
Right click the second entry /Game/Packages/Character/CH_Hero_Vampyr/Textures/TX_Hero_Coat_Flashback_D
In the popup enter /Game/Packages/Character/CH_Hero_Vampyr/Textures/TX_Hero_Coat_Flashback_Mod_D
Go to entry 15 CH_MT_Hero_Coat_Flashback
Do the same as before replace reference with CH_MT_Hero_Coat_Flashback_Mod
Go to entry 73 TX_Hero_Coat_Flashback_D
Do the same again replace reference with TX_Hero_Coat_Flashback_Mod_D
Once done click File > Save
Now open CH_Hero_Vampyr.uasset in Mods\unrealpak\Flashback_Coat_Mod_P\AVGame\Content\Packages\Character\CH_Hero_Vampyr\Model
Click Name Map
Same as with CH_MT_Hero_Coat_Flashback_Mod.uasset
Right Click /Game/Packages/Character/CH_Hero_Vampyr/Materials/CH_MT_Hero_Coat_Flashback
Replace reference with /Game/Packages/Character/CH_Hero_Vampyr/Materials/CH_MT_Hero_Coat_Flashback_Mod
Go to entry 69 CH_MT_Hero_Coat_Flashback
Replace reference with CH_MT_Hero_Coat_Flashback_Mod
Once done click File > Save
Now go to CH_Hero_Vampyr\Model and CH_Hero_Vampyr\Materials folder delete any file ending with .bak
https://imgur.com/gdY1fDQ
https://imgur.com/upJ1lZC
UnrealPak:
Drag and drop Flashback_Coat_Mod_P on to UnrealPak-With-Compression.bat
Copy Flashback_Coat_Mod_P.pak to the ~Mods folder (create this folder if you already haven't) in your Vampyr Paks folder.
\Vampyr\AVGame\Content\Paks\~Mods
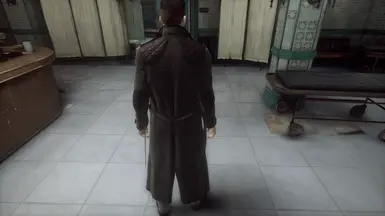
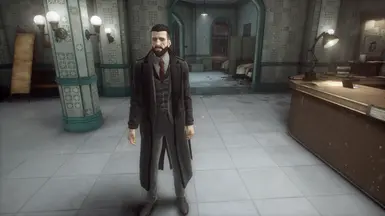
After all this you should have a recolored Flashback coat in-game.
I have Upload my files if you wish to compare them with your own.


