


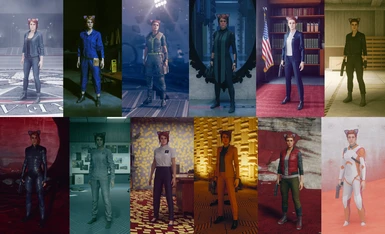
19 items


Documentation
Readme
View as plain text
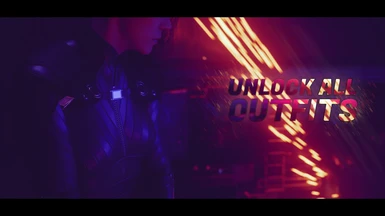
UNLOCK ALL OUTFITS
- Unlock all 12 outfits by transferring them from this save game onto your save game.
INSTRUCTIONS READ CAREFULLY
Purpose of these save files:
A. Transfer outfits from this save onto your save game.
B. Play just the DLCs.
C. Start New Game + (Have all abilities from the start) ONLY IF YOU'RE READY FOR A ROLLER COASTER BUD. YOU'VE BEEN WARNED. I removed the C. New Game + download file but if you know how save files work in Control you'll dig them right out from the available ones. Requires further testing. Do it on your own risk.
D. Load this save game completely with all its files just because.
The save files location will vary depending on the version of the game that you own.
C:\Users\%UserName%\AppData\Local\Remedy\Control\Default-Epic-User\
OR
%SteamInstallFolder%\userdata\%SteamID%\870780\remote\
OR
Documents\My Games\Control\
Cloud saves may interfere with these methods.
You'll be working with just 00 suffix files and folders!
Download the files that match your purpose! Contents will be different.
Let's start already.
-----------------------------------------------------------------------------------------------------------------------
############# ########### ### #### ######## ######### ########### ###
#### ## ## #### #### ######## ## ## ## ## ###
#### ## ## ### ## #### ### ## ### ## ## ###
#### ## ## ### ## #### ### ########### ## ## ###
#### ## ## ### ## #### ### ## ## ## ## ###
############# ########### ### ## ### ### ## ## ########### #############
############# ########### #### #### ### ## ## ########### #################
-----------------------------------------------------------------------------------------------------------------------
CHOOSE THE PURPOSE AND FOLLOW THE INSTRUCTIONS BELOW
A. Transfer outfits from this save onto your save game
Keep all your progress and just obtain all outfits.
1. BACKUP the entire save folder to make sure you don't lose your original save files if something goes wrong.
2. Download "A. Save Game Outfits" file and extract it.
3. Use the "Control Save Editor" created by Reg2k.
- All credit for the here mentioned "Control Save Editor" goes to REG2K. His work makes this option possible.
Save Editor Tool
4. Click on the SELECT SAVE FILE field, navigate to your save file - it will be named either "savegame-slot-00_persistent" OR it will be in a FOLDER named "savegame-slot-00" and the FILE will be called "persistent.chunk"!
5. On this next page click SAVE TRANSFER then press SELECT SOURCE SAVE, navigate to the downloaded 100% save file - it will be named "savegame-slot-00_persistent".
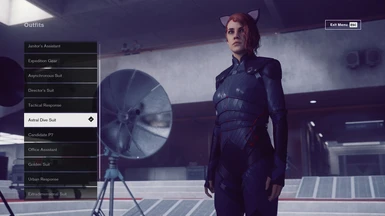
6. Underneath TRANSFER OPTIONS all transfers will be selected, if you want outfits, select Outfits. Select ONLY the ones that you want.
7. Click TRANSFER. New file will now download.
8. Place this transferred downloaded save file in game's save folder, overwrite your current "savegame-slot-00_persistent" OR "persistent.chunk" file.¹
9. Run the game.
You need to have the DLCs in order to have their respective outfits appear.
¹ Downloaded save file from the Control Save Editor is by default named "savegame-slot-00_persistent", if your files have ".chunk" extension, rename the downloaded file to "persistent.chunk" then overwrite.
-----------------------------------------------------------------------------------------------------------------------
B. Play just the DLCs
Now this bad boy is here only if you've played the base game before, and now you don't want to play the entire game again just to play the DLCs. This save file is not 100%, but all abilities and outfits are available.
1. BACKUP the entire save folder to make sure you don't lose your original save files if something goes wrong.
2. Download "B. Save Game DLCs & Outfits" file.
3. Choose the save files that match with your game. After you have backed up your saves, or not, place these save files in the game's save folder, only these files should be in the save folder.
4. Launch the game.
5. Once you're in the game press G and go to Missions, two new missions should be available: "A Dark Place" and "The Foundations". You will also have a jukebox token lying on the big gray toolbox right next to the control point, these are for the Expeditions DLC.
6. It's worth mentioning that you'll need to own these DLCs in order for them to even be available.
7. Go and play the game.
------------------------------------------------------------------------------------------------------------------------
C. Start a New Game +
This method is for more experienced players that want to experiment a little and can take a bit of frustration.
If not, then use a safe New Game + method [url=https://www.nexusmods.com/control/mods/26]NG+[/url], that Reg2k explained.
[spoiler]
Control doesn't officially support New Game + but here's a workaround.
This is the method for a "real New Game +" which lets you play with all abilities and weapons from the start. I suggest this for players who played Control before, if you're on your first playthrough, skip this, because you're missing out.
Also, you may, or may not be able to play the DLCs with this one.
Let's start.
1. BACKUP the entire save folder to make sure you don't lose your original save files if something goes wrong.
2. Download C. New Game +
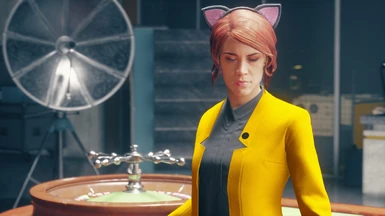
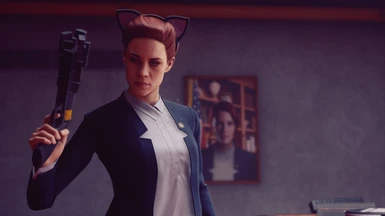
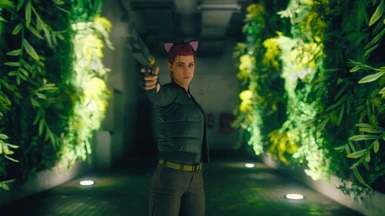
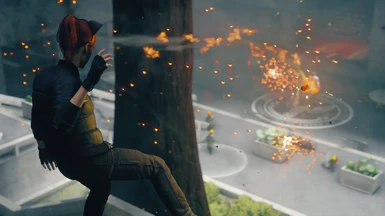
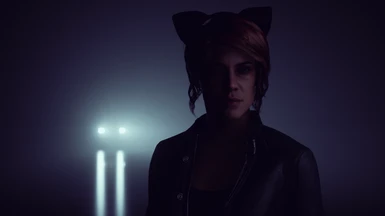
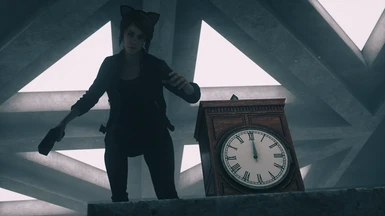
3. If you want to wear Cat Ears² during your entire² gameplay choose the "C. Cat Ears" folder, if not then choose the "C. No Cat Ears" folder from the downloaded file. Choose carefully.
3. I recommend that "Saves" folder or "savegame-slot-00" folder remains empty.
4. Start a fresh New game from the main menu.
5. Play until you get to the FIRST control point, it's in the Executive Sector.
6. Cleanse that control point.
7. EXIT the game.
8. Place JUST the downloaded "savegame-slot-00_persistent" OR "persistent.chunk" file in game's save folder, overwrite the current "savegame-slot-00_persistent" file from the "Saves" folder OR "persistent.chunk" file which must be from the "savegame-slot-00 folder"!
9. Run the game. You will spawn at the same control point.
10. IMPORTANT - The current mission will not have pointers anymore, here's what you need to do!
11. Go to the Safe room next to you and speak on the intercom.
12. After the cutscene conversation, turn around and cleanse the highlighted floating agent.
13. After that look around and go to the big white stairs with BOARD ROOM letters above the doors, you will speak with a workaholic woman right there.
14. Go back to the control point and Fast Travel to Mail Room, located under EXECUTIVE, this is important.
15. Claim it and Fast Travel back to the Central Executive control point, the mission objectives will now be visible and you can continue playing your game.
PS: This mission will now lead you to the next control point. It has a combat gate, meaning you'll have to kill all the enemies in the room to be able to cleanse the control point. Also, there's a trigger below this control point so if you just walk under the control point more enemies will spawn and after you kill them you can cleanse the CP.
- I HIGHLY recommend that you do not use Fast Travel on any control points that you have not yet been to. Travel between claimed ones.
- As for mission objectives, walk to them! Don't fast travel unless it's to a claimed cp. The game has story/mission triggers, which means you HAVE to pass through certain areas in order for the missions to work correctly.
- Before doing anything that might seem sketchy, backup the entire save folder.
- There will be more enemies this time around.
- Sometimes you'll have to work harder to progress through missions, we're literally playing with the game this time, things will be a bit unusual, think of it as if the game has been possessed by Hisssssssssss.
- Like I wrote, this is all far-fetched so attempt this method only if you're up for it. There's all this info for a reason. I'm still playtesting all this.
² Cat ears are obtained after completing the Cat puzzle in the Foundation DLC, using this save file as a template for New Game + will make them unremovable during the game. Choose carefully.
³ The game doesn't officially support New Game +, this is a workaround that I've found while testing this whole thing. Will this monkeying around have some undesired effects is yet to be seen, but probably will.
Known Issues:
1. Pitch black atmosphere in Maintenance sector when using sector elevator. FIX - Go to MAINTENANCE SECTOR ACCESS POINT, to continue the story, after the first two missions. This is during the mission Directorial Override.
2. No puzzle missions, for example, no TVs found for the Eternal fire puzzle. In this save game you already have the rewards from these anyway.
3. Some Hiss gates have 2-3 chunks of Red Blocks as an addition to regular enemies, this is normal, they are there to be shot to lift the Hiss gate. Putting this here so you can see it.
4. Some control points might get you trapped. Possible Fix - find a way to escape or kill enemies that spawn to enable claim or reload the game from main menu.
5. Mission objectives not showing. FIX - Fast travel to a claimed cp and back. Or reload the game from the main menu.
6. Some or all side missions might not work. - No fix. Play it for the main story.
[/spoiler]
[lifespoiler]
Remember, going through these obstacles is a lot like picking up women. You may have a blast getting
through one after another, leaving them behind broken on a back street in a
dangerous neighborhood, but sooner or later you will get to one that will be so well constructed
that it will stop you dead in your tracks and take all of your money when it busts you down to size.
Just make sure to use protection. And by that I mean backup your saves.
Or not.
.erac yllaer t'nod I.
[/lifespoiler]
------------------------------------------------------------------------------------------------------------------------
D. Load this save game completely with all its files just because
1. BACKUP the entire save folder to make sure you don't lose your original save files if something goes wrong.
2. Download the "D. Full Save Game Cat Ears" file.
3. After you have backed up your saves, place ALL the save files in the game's corresponding save folder, only these files should be in the save folder.
4. Run the game.
---------------------------------------------------------------------------------------------------------
INFORMATION ABOUT THE SAVE GAMES
Played them myself, and are 100% Save Games except "DLCs & Outfits" one, I played this one before the DLCs got out. Surprisingly I kept it all this time.
- All base missions complete.
- All base side missions complete.
- All base Hidden Locations found.
- The Foundation DLC complete.
- All Foundation side missions complete.
- AWE DLC complete.
- All AWE side missions complete.
- All hidden puzzles completed.
- 340+ collectibles found.⁴
- All abilities unlocked and fully upgraded.
- All outfits unlocked in-game except Astral Dive, Tactical Response and Urban Response, for which I had to edit the hex values in the executable files.⁵
- All weapons constructed and upgraded. Only the Grip and Shatter have the best weapon mods because they're my favorite.
- Total of 46 missions done + 4 puzzles = 50. You can use them as a checklist to do all the missions yourself.
⁴ 347 to be exact, but 120 are needed for the achievement.
⁵ Bottom of this page will help you with that.
------------------------------------------------------------------------------------------------------------------------------
CONTROL MISSIONS CHECKLIST
This is here for you if you want to make sure you did all missions in Control.
1. Welcome to the oldest house
2. Unknown caller
3. Directorial override
4. Take control
5. Polaris
6. Finnish tango
7. The face of the enemy
8. My brother's keeper
9. Threshold
10. Old boys' club
11. A captive audience
12. Fridge duty
13. Langston's runaways
14. Old growth
15. Mold removal
16. Put a record on
17. Old friends
18. What a mess: clear the clog
19. WAM: clear the mold
20. WAM: talk to tha plantz
21. Self-reflection
22. A good defense
23. A dark place AWE DLC
24. WAM: even more mold
25. WAM: take a break
26. Another fine mess: nourish tha plantz
27. AFM: clear the mold
28. AFM: burn the dark
29. Shüm
30. The third thing
31. Return to sender
32. Gerbil took the top head
33. Dead in its tracks
34. It's happening again
35. WAM: burn the trash
36. A merry chase
37. The foundation FOUNDATION DLC
38. The nail
39. Pope's collection
40. The pyramid
41. Found footage
42. A matter of time
43. The enemy within
44. Mr. tommasi aka boringassi
45. Jesse Faden starring in "swift platform"
46. Dr. Yoshimi Tokui's guided imagery experience - #fingerpain - For this mission, hex editing the .exe files is required.
47. Eternal fire puzzle
48. Self reflection mirror puzzle
49. Luck & probability puzzle
50. Foundation cat puzzle
Order is a bit messed up, but I bet my neighbor's cat that that's all of 'em.
If you need/want to edit hex values of .exe files to unlock outfits that way or an extra mission refer HERE for the comment section of the "Unlock DLC plus FPS fix" mod, created by VladCorvi.
HAVE FUN!