About this mod
Aims to enable full player character customization of models, textures and armor without affecting NPCs.
- Permissions and credits
- Changelogs
- Donations
The original intent was to make the player character look different from npc's when mods were installed. Since well.. you are the SOLE survivor after all. The vanilla game tries to do that by making everyone dirty but when mods are involved that illusion of uniqueness falls flat on its face.
There are a few other mods that try to do the same with varying efficiency but while making this mod I wanted some more flexibility with controlling how my character looked by playing around with how races work and be able to choose the files you used. And in the end maybe people could use this too for their own things I thought. Although right now it's not there yet. For now it's pretty basic.
Current Version [1.2.0]
What the mod does:
- Adds a custom race to the player character (same stats as Human)
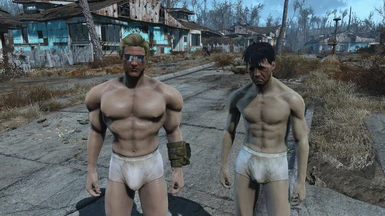
- Body, Head and Hand models of player are different from npc's
- Textures of body, hands and face will only affect the player character
- Armor models are unique to the character while still being the same armorpieces found in the vanilla game (no need for workbench)
- All the above works for both genders
- Assigns a skeleton only for the player character (optional)
This all works if you've installed it in the correct way of course but let's first talk about the compatibility.
Compatibility:
Since it's a custom race mod it's not compatible with anything changing player values (although I might try to fix that) and armor values.
For the rest it technically works with every other mod but since it's a custom race it might not affect it at all. That's where the Compatibility Patches come in. They're in the Miscellaneous section of the download tab. You install them after installing the original mod they're named after. The body replacer patches are meant for the body you install in the way described in the installation section.
Bottom line: 90% of the mods don't work.
Look in the Miscellaneous downloads or ask me to make a patch for it. Or if you have a favorite mod and you patched it yourself I could always upload it on this page and put your name next to it. I'll even say thanks. (On a serious note: I'd rather have it on this page rather than flood the nexus with a million patches that maybe have one or two lines changed. And also it's a matter of quality control)
Note: This mod is not yet compatible with DLC as I don't have them yet. Please bear with.
So how the mod works is it's half DIY. But don't worry it's not too complicated. You just need to know how to drag and drop folders.
Main Module:
Step 1:
Download the mod via Vortex or manually. How you prefer. The mod adds a few extra folders with dummy vanilla files so that not everything is invisible when you apply it to your game without doing anything extra. The new folder are the ones with "Player-" in front of their usual name. The new folder paths are as follows:
~Data/meshes/PlayerActors/
~Data/meshes/PlayerArmor/
~Data/meshes/PlayerClothes/
~Data/textures/PlayerActors/
And in those there are the usual folders you would find on a vanilla game.
Step 2:
Download other mods you want to use manually (not via Vortex). Body replacer, armor converter, body texture edit, etc. and unzip them. Now normally you would drop those files in the vanilla folders (Actors, Armor, Clothes) but instead you'll need to place them in the new "Player-" folders. So all the armors you found in the mod you downloaded go into the PlayerArmor folder instead of the Armor folder. This applies to the other folders. Just make sure you don't confuse "~textures/PlayerActors/" with "~meshes/PlayerActors/".
Step 3:
No worries almost there. Now after you put all the necessary files in the new folders you need to look in the optional downloads of this modpage to see if there is a compatibility patch for the mod you just manually installed. The patches are good to go as is so just download them through vortex and install them like that. Usually the body replacers will need a patch and armor mods will need a patch if they add something new or change values for whatever reason.
Bonus tip:
If you have BodySlide (and the body you're using is compatible) you can batch build in another folder to be more efficient. Just open BodySlide > go to Settings > click on Advanced and change the Output path to an empty folder you can dump stuff into (and also easy for you to access). Then do a batch build and go into that folder I just mentioned. Now you can copy and paste all the files into the 'Player' folders without doing a batch build into your vanilla folders. After that don't forget to go into BodySlide settings again and remove the Output path if you don't need it any longer or if you want to batch build for npc clothing.
Step 4:
If the mod you wanted on your character is in the 'Player' folders and you installed the patch (if needed) then you just need to play the game. If you start a new game there is nothing to do. You'll start as the custom race. If you have an existing save you'll have to change your race with the console command: player.setrace playerrace . And boom, everything explod- I mean you're done. If you did everything correctly you'll have a different body than npc's or maybe you just installed armor that will look different even if it's the same armor the npc is wearing. Or you just didn't install anything and just wanted to be unique which is kind of odd because the mod is pretty barebones without other stuff...
Skeleton Module:
With a fresh character:
It's a pretty easy installation. You only need to download and install the module with Vortex or manually and put the skeleton you want to use for your character in:
~Data/Meshes/Actors/Character/CharacterAssets/
If you want to use another skeleton for humanoid NPC's then put that one in:
~Data/Meshes/NPCActors/Character/CharacterAssets/
With an existing character:
Before installing the skeleton module you will need to go in the game and make sure your character is the custom playerrace. Type in console:
player.setrace playerrace
Once you've changed your race or you've already done that before be sure to save then quit the game. After that install the skeleton module normally through Vortex. Then the same applies: put the skeleton you want to use for your character in ~Data/Meshes/Actors/Character/CharacterAssets
Uninstallation:
Before uninstalling you'll need to use a console command in the game: player.setrace human then uninstall via Vortex.
Warning: If you've installed the skeleton module you will need to first deactivate the skeleton module plugin in Vortex and only then should you use the setrace command in the game to turn back human.
Known issues:
- When selecting female at the start of the game and selecting a preset other than preset 1, the game will revert you face options to a default when confirming your character. I'm unsure why that is. Just staying on preset 1 and customizing that face works like intended however. This bug also applies only to the start of the game. When you change appearance through the slm command the presets won't revert your changes.
- When changing your eye colour with the slm command (except when the game starts) your eyes will want to escape in or out of your skull depending on gender. To fix the eyes simply confirm your character changes, quicksave and load your game again.
- When using 2K face textures you will need to install those on the player AND NPCs to avoid the brown face bug. This isn't really the fault of this mod but more how the game and LooksMenu works. They don't need to be the same textures but they'll both need to be 2K. (And make sure you read info about LooksMenu before attempting to install 2K face textures)
Planned Updates:
-
And there you have it folks. Hopefully you like it even though it includes dirty DIY. Please leave mod suggestions and bug reports and whatnot. Screenshots are coming I'm just... shy


