


6 items
Documentation
Readme
View as plain text
GTA IV/EFLC Los Santos Weather, created by T-ru a.k.a. feelptimiz.
-----------------------------------------------------------------------------------------------------------------------------------------------------------------------------
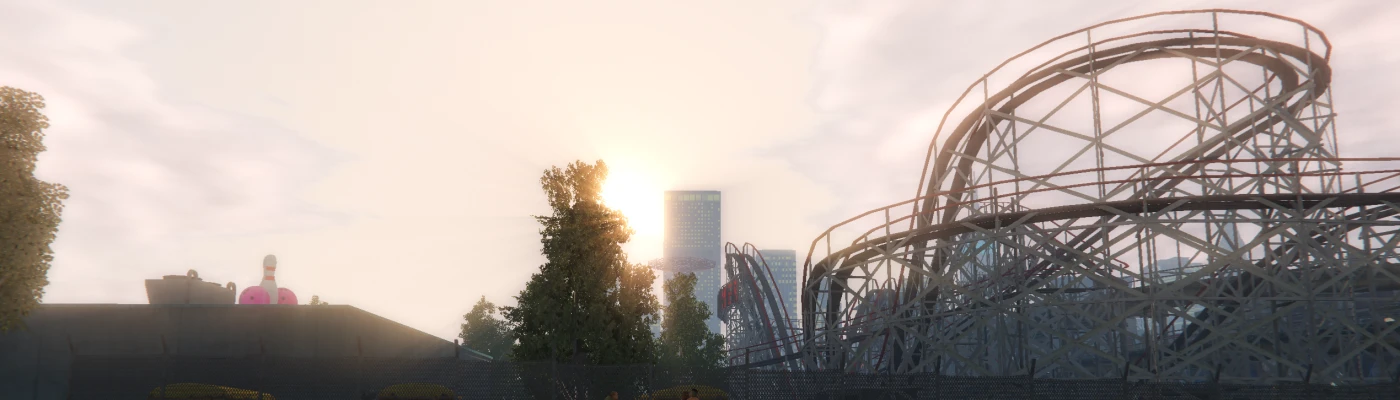
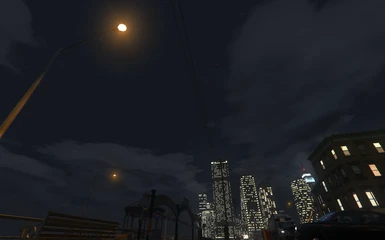
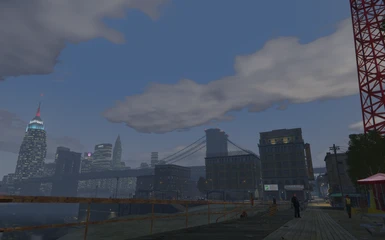
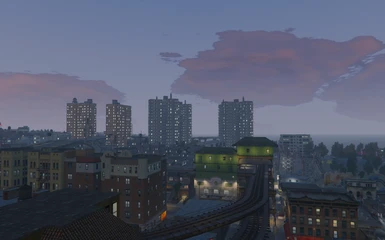
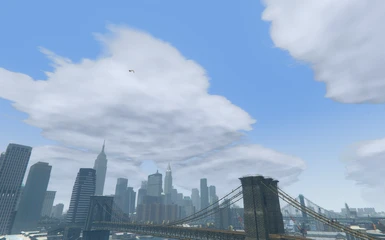
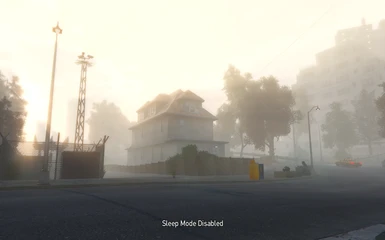
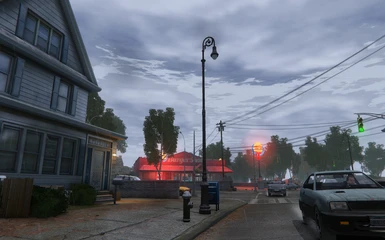
-Liberty City now has the summer weathers and visuality of Los Santos from GTA V.
-UPDATES: 1.0.7.0; 1.0.8.0 - IV, 1.1.2.0; 1.1.3.0 - EFLC
____________________________________________________________________________________________________________________________________
IMPORTANT:
DO NOT HURRY, READ CAREFULLY!!!
DON'T PAY ATTENTION TO THE DATE OF THE FOLDERS, THE FILES INSIDE ARE UPDATED!!!
DON'T CHANGE ANY FILES!!!!!
EFFECTS AND TEXTURES DOESN'T WORK SEPARATELY TO ANY OTHER ENB/ICEnHANCER SET!!!
AND AGAIN - ALL FILES SHOULD BE USED!!!!
--------------------------------------------------------------------------------------------------------------------------------------------------------------------------------
_____________________________________________________________________________________________________________
CONTENTS
__________________________________________________________________________________________________________________
1) IMPORTANT FOR THE LAST UPDATES 1.0.8.0 - IV; 1.1.3.0 - EFLC
2) Folders descriptions
3) INSTALLATION INSTRUCTIONS
4) Reshade INSTALLATION INSTRUCTIONS
5) NOTES
6) Credits/Special Thanks
______________________________________________________________________________________________________________________
1) IMPORTANT FOR THE LAST UPDATES 1.0.8.0 - IV; 1.1.3.0 - EFLC:
If your games are with the last updates/patches (1.0.8.0 - IV; 1.1.3.0 - EFLC),
the first thing that you need to do is to open 'FixFor1.0.8.0 IV1.1.3.0 EFLC'
folder, then copy shaders folder from common and replaced it with the original shaders folder!
- DON'T USE THE shaders folder from the "Basic_Files"!!!
- In "Basic_Files" open "common" and copy only "data" folder then the other files and folders outside the "common" folder!
----------------------------------------------------------------------------------------------------------------------------
-----------------------------------------------------------------------------------------------------------------------------
2) Folders descriptions:
After the downloading of the mod you'll find 5 folders, read to know what they are meant for:
-Basic_Files: This is the core of the mod, after you install/replace the files from this folder,
you can play the games but without Reshade effects MXAO (ambient occlusion) and ChromaticAberration.
-FixFor1.0.7.0AndOlderPatches: Inside this folder there is a ReAD.txt, read it to know what is about!?
-FixFor1.0.8.0 IV1.1.3.0 EFLC: This is for the last patches/updates of the games, read above No 1)!
-ReshadeChromaticAberrationOnly: This folder contain Reshade files and only Chromatic Aberration effect is turned on,
this effect is edited to looks like GTA V Chromatic Aberration, this effect puts colorful nuance on the edges of the graphic, also has a small
Anti-Aliasing effect.
This effect takes 2 - 3 fps of the performance!!!
Read below No 4) How to install it!
-ReshadeMXAO+ChromaticAberration: This folder contain Reshade files, MXAO (ambient occlusion) and Chromatic Aberration effect are turned on,
MXAO is edited to looks like GTA V ambient occlusion.
This effect takes 6 - 10 fps of the performance!!!
Read below No 4) How to install it!
_______________________________________________________________________________________________________________________________________________________
-------------------------------------------------------------------------------------------------------------------------------------------------------
3) INSTALLATION INSTRUCTIONS:
- REMEMBER TO BACK UP YOUR FILES and FOLDERS!!!
- First of all your games must be clean, this means no other enb or visual mods,
you can use modded textures, 3d models, cars... etc but without any other enb or visual mods!!!
Patch 1.0.7.0 IV and 1.1.2.0 EFLC, VERY IMPORTANT!!!:
- At fisrt start with common/shaders FROM "Basic_Files", for Patches 1.0.7.0 IV and 1.1.2.0 EFLC
the shaders folder need to be PLACED without REPLACING,
to do that go in the main folders of IV and EFLC and in common folder DELETE ONLY shaders folder (MAKE A BACK UP)
then copy the whole common folder from the "Basic_Files" and put it in IV/EFLC main folders,
everything will be placed and replaced!!!!!! - THIS IS FOR 1.0.7.0 IV and 1.1.2.0 EFLC!!!!!!!!!!!!!
-Copy and replace all other files and folders FROM "Basic_Files" in the main installed folders (.exe location) of the games IV and EFLC,
don't put TBoGT and TLAD folders into IV!
- "FixFor1.0.7.0AndOlderPatches" This is fix for the last mission of IV when you need to jump on the helicopter and commandline.txt for
the graphics settings, THIS IS FOR 1.0.7.0 IV and previous patches!
PATCH 1.0.8.0 IV and 1.1.3.0 EFLC:
- Firstly don't delete nothing! Open "FixFor1.0.8.0 IV1.1.3.0 EFLC" folder then copy shaders folder from common
and replaced it with the original shaders folder!
- DON'T USE THE shaders folder from the "Basic_Files"!!!
- In "Basic_Files" open "common" and copy only "data" folder then the other files and folders outside the "common" folder!
***********************************************************************************************************************************************
FROM NOW ON YOU CAN PLAY THE GAMES, BUT IF YOU WANT Reshade MXAO and Reshade ChromaticAberration then
READ BELOW!!!
*******************************************************************************************************************************************************************************
4) Reshade INSTALLATION INSTRUCTIONS:
This is the last ReShade version '4.3'.
I've tried all reshade effects and only these two (MXAO and ChromaticAberration-prism) fit well with this mod.
Chose what effects you want to use, ReshadeChromaticAberrationOnly or ReshadeMXAO+ChromaticAberration folder!
Copy the files and the folder (ReShade.dll, ReShade.ini, tru.ini and reshade-shaders-master) and put them
in the main folders of the games!
Open ReShade.ini with notepad or some other text editor and find these lines:
EffectSearchPaths=hard drive\game folder path\game .exe path\reshade-shaders-master\Shaders
TextureSearchPaths=hard drive\game folder path\game .exe path\reshade-shaders-master\Textures
PresetFiles=hard drive\game folder path\game .exe path\tru.ini
ScreenshotPath=hard drive\your screens path -This's for the Screenshots by pressing - (negative button) from num numbers of the keyboard!
You must find your game .exe path or where on your PC "reshade-shaders-master"; "ReShade.dll"; "ReShade.ini" and "tru.ini" files and folder are puted/located!!!
For example, my gtaIV is located on D partition of my hard drive in gta4 folder so the lines in ReShade.ini must be like that:
EffectSearchPaths=D:\gta4\Grand Theft Auto IV\reshade-shaders-master\Shaders
TextureSearchPaths=D:\gta4\Grand Theft Auto IV\reshade-shaders-master\Textures
PresetFiles=D:\gta4\Grand Theft Auto IV\tru.ini
Also open ReShade.ini in EFLC(episodes from liberty city) and find and write the paths too!!!
DON'T USE THESE LINES, ON YOUR PC THE PATHS ARE DIFFERENT!!!
IF YOU DON'T DO THAT ReShade WILL NOT WORK!!!!!!!!!!!!!!!!!!!!!!
***************************************************************************************************************************************************************************************
IF you have MXAO BUG!
You done everything and if your game looks like the "MXAO_BUG_EXAMPLE.png" this means that you have ambient
occlusion bug to fix it open ReShade.ini again and find these line:
PreprocessorDefinitions=RESHADE_DEPTH_LINEARIZATION_FAR_PLANE=1000.0,RESHADE_DEPTH_INPUT_IS_UPSIDE_DOWN=0,RESHADE_DEPTH_INPUT_IS_REVERSED=0,RESHADE_DEPTH_INPUT_IS_LOGARITHMIC=0
and make RESHADE_DEPTH_INPUT_IS_REVERSED=0 to RESHADE_DEPTH_INPUT_IS_REVERSED=1 change 0 to 1!!!
if your game is normal then don't touch these line!!!!!
**************************************************************************************************************************************************************************************************
5) NOTES:
- In graphics settings Texture quality must be High and anisotropic filtering must be 16 (I recommend you everything to be maxed out, especially the textures, reflection quality
and Shadows) otherwise the clouds and the stars will not look so good, also turn off Definition if you want motion blur!!!
-If you want the games(IV, EFLC) to looks like the current Gen you need to maxed out the graphics settings!!!
-For the best experience I recommend you to use any DSR resolution with 33% of smoothness, this is
the best anti-aliasing for these games!!!!
- With the original stipple.wtd file the textures and everything is much better, more detailed, especially the vegetation
and less z-fighting on everything!!!
- Use the original vegetation texture or you can use the Bison sales vegetation (Google it) but you must adjust Trees quality in enbseries.ini!
-If you have some graphics gliches, bugs, missing minimap, phone, ...etc then disable all kind of Anti Aliasing from
the control panel of your video card!!!
- DON'T mix this mod with other visuality or ENB mods, you must to put and replace ALL FILES!!!
******************************************************************************************************************************************************************************************************
6) Credits/Special Thanks:
-Rockstar Games!!!
-Boris, and ICEleGlace: For ENB Series/ICEnhancer!!!
-Crosire, Marty McFly and all Reshade Team: For the great Reshade shaders!!!
-MysTer92: For the Amazing Edit IV tool!!!
-nkjellman: For fixing of traffic lights, TBoGT car lights!!!
---------------------------------------------------------------------------------------------------------------------------------------------------------------------------------
------------------------------------------------------------------------------------------------------------------------------------------------------------------------------------