Documentation
Readme
View as plain text
== BOOM TO THE MOON - UPDATED COMPLETE WALKTHROUGH ==
By Jokerine
====== UPDATE YOUR MOD VERSION TO THE LATEST AVAILABLE, OR THINGS MENTIONED HERE WILL NOT BE AVAILABLE IN YOUR GAME! ======
Due to the branching options this mod has, the walkthrough may be a bit hard to follow. I am not very good with English and tend to get a bit wordy so hopefully this will make sense. Apologies in advance for any confusion!
Despite my wordiness I will try to give instructions only for the most important steps. A big part of the mod is exploring, reading and snooping around!
The "misc bits and bobs" section has some extra interesting things you can find in the mod, all spoiler-free. Feel free to read them first to make sure you don't miss anything while on the moon, because you will not get to go back (unless you use the console...). It also points out some unique clutter from the new interiors added by the mod.
All containers in the mod are safe for storage and will not respawn. I went all out and made copies of everything, with unique IDs, to make sure they are not affected by mods that make containers respawn, as I'm sure I've seen some around somewhere.
If you're not interested in the extra information, just jump straight to the actual walkthrough and the spoilers, starting with "Boom to the Moon!".
==== TABLE OF CONTENTS ====
>> 00 - Misc Bits and Bobs
-> In-Game Mod Configuration Menu
-> Reputation System
-> Holotape Hound
-> New Radio Station
-> Exploring the Mod
---> Anaximander's Home
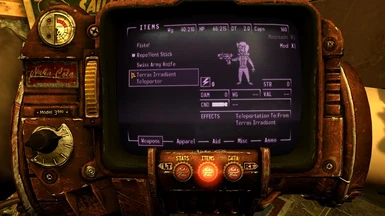
---> Terras Irradient
----> Station Main Facilities
----> Greenhouse
----> Rover Garage
----> Comm Relay
---> Foggy Bottom Cave
---> Vault 138
---> Abandoned Office
>> 01 - "Boom to the Moon!"
>> 02 - "The Search for Class"
>> 03 - "Mr. Pokeylope's Quest For Love"
>> 04 - Unmarked Quest - "Boolean's Big Rescue"
>> 05 - "Operation Snellen"
>> 06 - "Follow Your Dreams!" (Wild Wasteland only)
>> 07 - "Truck Pick-Up"
>> 08 - Unmarked Quest - "Chip Tampering"
>> 09 - "Back to Vault 138"
>> 10 - "A Decent Proposal"
==== MISC BITS AND BOBS ====
-> In-Game Mod Configuration Menu
A meterbox/terminal has been placed behind Anaximander's home. At the beginning there won't be much, but choices will show up as you make progress on the mod. Here you can enable or disable developer commentary (this will activate some terminals in my new cells with my insane ramblings), remove perks and notes, manage the quest item status of certain items that may cause trouble, and some more useful options. You will be able to set Anaximander's essential or killable status here as well, once you've completed "A Decent Proposal".
-> Reputation System
The mod adds a new reputation faction, "Anaximander and O'Toole". Several dialogue options throughout the mod will let you increase or decrease your reputation, and this will also be affected by the regular evil player actions such as stealing. Greetings will change depending on your rep and a couple of quests will only be available if Anaximander and O'Toole like you enough. You will keep the merchant discount when trading with Anaximander and O'Toole no matter what your reputation with them is.
If you are desperate for rep once the quests are done, you can donate caps through the little piggy bank by the door (or steal them). You can also give Anaximander different Nuka-Cola drinks, iguana bits and iguanas on a stick through his "Have you got a minute?" dialogue option, which will also net you a tiny amout of positive karma.
-> Holotape Hound
There is a grand total of 15 (!) audio holotapes added by this mod. There is a small hidden challenge that will grant you a bonus +5 to speech if you collect the 12 holotapes that have dialogue/speech recordings. All of these have a custom mesh and faintly-glowing texture so they are easy to distinguish from vanilla holotapes. Their locations are below.
01. "Wedding Vows": Anaximander's home, on top of the nightstand.
02. "Cheesenium Trials": Station Main Facilities, on the lab, near Lisa's terminal.
03. "Replicator Woes": Station Main Facilities, by the Experimental Food Replicator.
04. "Flavor Report": Station Main Facilities, on top of the coffee brewer in the galley.
05. "Friday Jam": Station Main Facilities, on the music stand in the common room.
06. "Dinner Talk": Greenhouse, on the dinner table.
07. "Delayed Breakfast": Rover Garage, on top of a small barrel.
08. "Final Confrontation": Communication Relay, Second Floor, on the ground by the overturned chairs.
09. "Daily Routine": Communication Relay, Second Floor, on top of the Central Mainframe.
10. "Workplace Accidents": Vault 138, on top of Borrelly's end table.
11. "A Message to My Son": Vault 138, in a sealed briefcase by the lower level entrance.
12. "Simple Lessons": Vault 138, on top of some crates in the diner.
The three music-only holotapes ("lil tune fr agnesa," "Harmonica Lesson #6" and "I Love Paula") are not required for this to trigger.
-> New Radio Station
When you first load up the mod, a new radio station (aptly named "Terras Irradient Radio") will be added to your Pip-Boy device. At the beginning, it will simply loop Agnessa's emergency broadcast, and once you talk to Anaximander and introduce yourself, the radio will only play static. In order to listen to the fine selection of music I chose for it, tune your Pip-Boy to the new radio frequency through the Terras Irradient Radio Control terminal on the second floor of the Communication Relay. If you do this, the radios around the moon base and Anaximander's wired long-distance radio back on Earth will play the new songs when turned on, too.
-> Exploring the Mod
There are many unique little doodads scattered around the new cells I added. There's a breakdown of some interesting things below, although this is by no means a guide of everything you can find. There's a lot more!
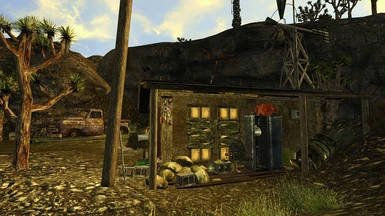
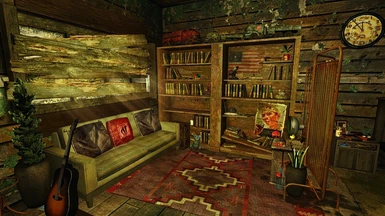
---> Anaximander's Home:
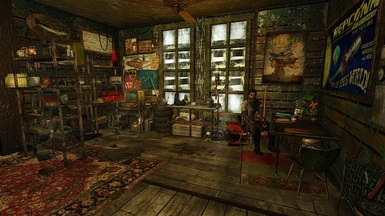
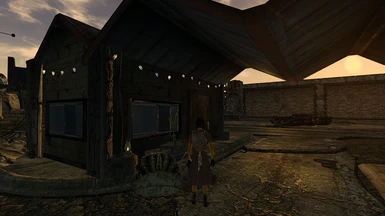
Outside you can find a unique melee weapon - "Blunt Stick" -, a pair of binoculars and the unique Survival magazine "Stargazing Secrets". Inside, two unique teddy bears can be found: Business Daredevil in the bathroom, and Vault Adventurer if Anaximander is still around. Other new items are Boolean, a Grimy Rubik's Cube, a Nuka-Cola Bomb Paperweight, a grimy postcard, an Old Bible Volume (which may or may not be a reference to another mod I made in collab with Anaximander's voice actor) and a recording of a little guitar tune that you can pick up or just listen to. Unique food available include a Box of Chocolates, cans of Rattlesnake Meat, Pet Food, Coffee Flakes, Creamed Possum, Anaximander's Fantoma Potatoes, Iguana Burrito and Iguana Bannocks. You can grab an iguana recipe book from the clipboard by the oven. In the kitchen you will also find a Nuka-Cola Quantum, a water purifier and a Coffee Brewer that will give you a Mug of Instant Coffee if you have a coffee mug, or a Cup of Cold Nuka-Cola if you have a cup.
A broken Jude the Singing Trout is mounted on the wall by the workshop area. If you have over 20 Repair skill and a fission battery, you can fix it at any point - no specific quests required. This will give you a small amount of experience and some good rep with Anaximander and O'Toole. You can also find some book transcripts on one of the shelves in the workshop area. These are just notes that you can add to your Pipboy to read.
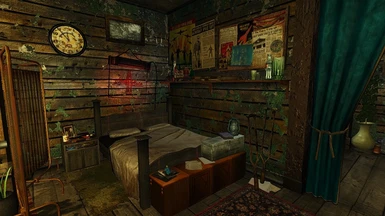
The nightstand by the bed will be locked at the beginning. Here Anaximander stores the headwraps he likes to collect. And as you progress through quests new unique headwraps will be added. Once you complete "Boom to the Moon!" it will unlock, although the contents will still belong to Anaximander, so if you want them you will have to steal them - at least, until completion of "A Decent Proposal". And, even then, you will only be able to take them if you have a good rep with him. There is a very, very small chance (5%) that he may have one of these for sale, as well.
You can grab hygiene supplies from the bathroom and lots of reading material; one Big Book of Science, a Nikola Tesla and You, a Dean's Electronics, a Future Weapons Today, a The Pocket Dictionary (unique Speech skill book), a Pioneers of Heavy Haulage (unique Repair skill book), a The Case of the Dancing Dinosaur (unique Sneak skill book), a Beauties #25 (unique Speech magazine), a Fixin' Things and a Lad's Life.
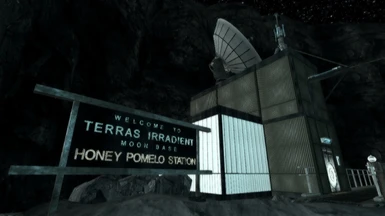
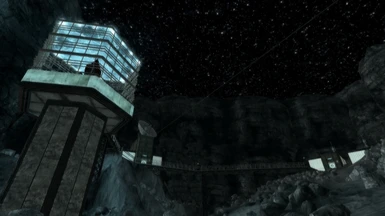
---> Terras Irradient:
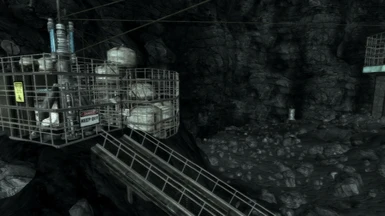
Some small and large moon rocks can be taken as souvenirs. These are just misc items. Grab some Cheesenium while you're out - this is an edible mineral that will satisfy a good amount of hunger for a small amount of rads. Keep in mind the generator room cannot be entered, and you WILL die if you try to break in, even after overriding the security lockdown. Heed the high-voltage poster warnings!
----> Station Main Facilities:
This is the place with the highest volume of unique clutter. I will try to follow the building's structure to point out some new things, but listing everything would take too long so check everything out while you're there. Make sure to read all the journals and documents around! You may find something interesting...
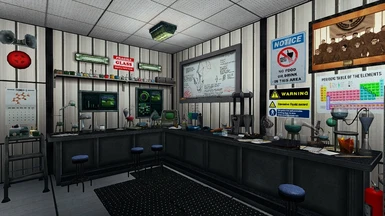
For starters, in the lab area you can collect several samples of Xylitol Crystals, which are actually edible. There are a series of chemicals on a shelf that are all misc items (you cannot drink them, sorry!). You can also find seed packets and bags you can eat to restore a very, very small amount of hunger. Lab junk such as pencils, surgical masks, scientist goggles, beakers, Mentats, calculators and paper planes can also be taken. You'll find a copy of Dean's Electronics and the unique Cook Book for Boys and Girls (Survival skill magazine) here as well.
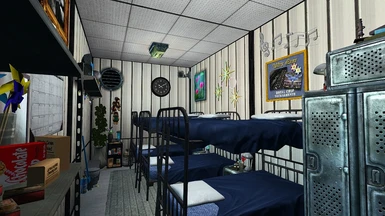
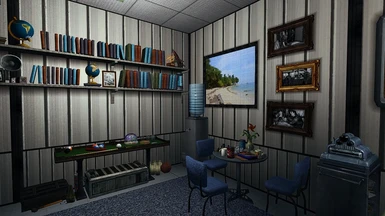
Moving on to the sleeping quarters, the female room has the unique Euro Goodies toy truck, Miniature Giddyup Buttercup, some Party Time Mentats, Lisa's Love Glasses and a certain teddy bear. You can also grab a copy of (or just listen to) a harmonica lesson. There's a copy of Big Book of Science, and a silly little WIP for a text-based, choose-your-own-adventure game someone on the base has been working on. The male room has a holotape of a violin lesson ("I Love Paula") that you can play or grab, a misc violin, a copy of Computers for Everybody (a new Science skill book), one Big Book of Nature (new Survival skill book), one Nikola Tesla and You, one Big Book of Science and a new Feathered Sombrero, which is a copy of Raul's hat with a proper world model.
Onto the hallway. You will find the experimental food replicator attached to a wall. Give it a try and see if you're lucky! The storage room nearby has a lot of assorted stuff and junk inside that may be of interest, including a copy of Meeting People. You can find Beep-Beep, a unique space-themed dinosaur toy, on the chair next to the sealed container.
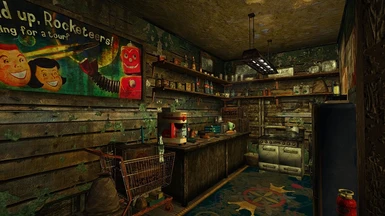
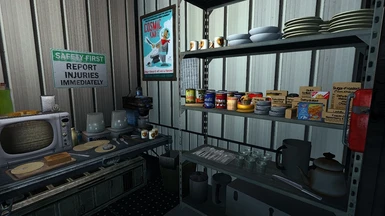
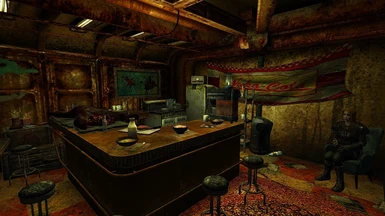
Next we have the galley. There is A LOT of food here on display and in containers. In the metal shelf you can find a sample of every single new food you will find around the moon base. Grab as much as you want/can carry - nothing will give you rads! Take the macadamia nut cookies from the jar in the lowest tier of the shelf and use the microwave to cook food, as you would do with any campfire. You will also have access to a water purifier (you will need purified water to cook the dehydrated food) and a revigator, a special machine that will irradiate purified water. Because why not? Revigators are real, look them up! Take the oven mitt here as well - it's a unique unarmed weapon - and the Pristine Cosmic Knife from the shelf. This particular knife has a very high durability, so stab away!
The bathrooms have some interesting stuff, too - consumable shampoo, soap and toothpaste that boost charisma, rubber duckies, newspapers and more. You can find a Science skill magazine in the females' bathroom, on top of the cabinet, and some Berry Mentats in the males' bathroom.
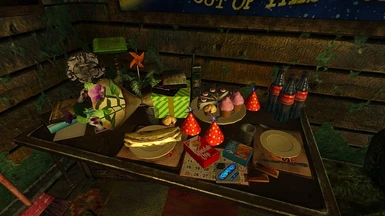
You can access the tiny clinic through the common room, where the scientists relax. On the table with the presents you can find a misc accordion, a sample of Mac 'n' Cheese Lasagna and some more food. Open the presents and you'll get a unique piece of apparel, the Beachcomber Outfit, a matching hat, and a copy of Lying, Congressional Style. On the couch (that you can sleep on, but you won't get the Well-Rested buff) you can find a misc board game and three skill magazines; a copy of True Police Stories, a copy of Featherweek #6 (new magazine that increases Speech), and a BEAK #3 (new magazine that increases Critical Chance). Pick up Rocks from Space from the round table, too - this is a new Energy Weapons skill book. Grab the chess set if you'd like. The water cooler here will give you a bottle of purified water when activated. On the pool table you can find a misc Pristine Snow Globe - The Strip, which is a simple copy of the vanilla Strip snowglobe and not a quest item. The metal crate under the pool table has a copy of Programmer's Digest and Boxing Times.
Enter the clinic and you'll see a bunch of new healing items on the shelves. You'll also find one Motivational Secrets of the Stars and one Paradise Lost (two new Speech skill books). The copy of Cien A�os de Soledad is just a misc item. On top of the desk you can find one The Firmament (new Survival skill book) and a copy of Today's Physician; inside you can collect one D.C. Journal of Internal Medicine. It's possible to sleep on the gurney (you will not get the well-rested perk because gurneys ARE NOT comfortable...) and grab the cake from the plate. Should you eat it, however...?
----> Greenhouse:
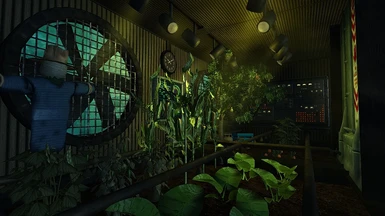
The most important bit here will, of course, be all of the harvestables you can find. You will have to unlock the plantarium door to access them. You can do it through Terminal #342 if you have a Science skill of 55 or higher, or more than 8 Luck skill. Otherwise, the door will unlock automatically once you override the security lockdown. Once inside the plantarium you can collect potatoes, jalape�os, maize, apples, pinto beans, pears and carrots.
Here you will also find a watermelon on a crate, seed packets, mentats, some more lab junk and a Fire Axe. The cabinet has a misc rake and a shovel weapon; the barrel and sack have some more food, too. The bathroom, among some more hygiene supplies and clutter, has a copy of the unique The Credible Hulk #2 (new Science magazine) and the unique Buddy Block misc. The accommodations have a good amount of food on the table and on the box underneath. Remember to grab the copy of Look Swing #2, a unique skill magazine that will increase your Agility.
----> Rover Garage:
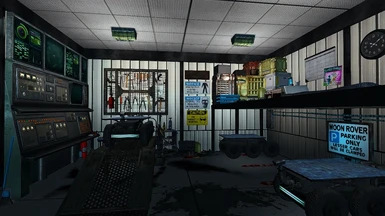
On the small cart by Freeman you will find a small Workbench Vice (works as a regular workbench), a copy of Dean's Electronics, a copy of Fixin' Things and a Programmer's Digest. Look near the pressurized door for a two unique weapons; the Uhlman Build-Matic Wrench, with the same Electromagnetic Pulse effect as the Zap Glove, and a Screwdriver that, while equipped, will increase your Lockpick skill by 5.
You can find three Nuka-Cola Quantums and several bits of food on a tray by the bedroll. There is one Sunset Sarsaparilla Star Bottle Cap near the pillow and one Rover Engineer Jumpsuit in the small metal trunk. Several pieces of scrap metal and spare electronics are around. Grab the 9 Iron by the bathroom door, and pick up the Mentats on top of the toilet. Some more shampoo, soap and toothpaste are around here as well.
----> Comm Relay:
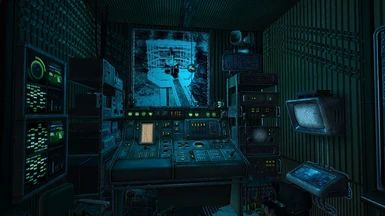
The first floor has the empty administration office. Enter it and turn on the lights. Mess around with the Kleiner-Vance Teleport Experiment if you'd like. Rummage through the filing cabinets, pick up the food, the clutter, and grab the Tales of a Junktown Jerky Vendor in the corner, on top of a Pre-War Book. Collect the unique Old Space Helmet as well. The water cooler here will, just as before, give you a bottle of Purified Water when activated. Outside the administration office, there are some magazine skills on the end tables: True Police Stories, Meeting People, Fixin' Things and �La Fantoma!. In the guest quarters you can find some more food and the unique (and, if I may say so myself, darn awesome-looking!) Pristine Snow Globe - Terras Irradient. A box of Mentats can be found on top of the lockers, and a copy of Milsurp Review on the table. The very cramped bathroom has some hygiene supplies.
The second floor does not have that many things. Loot the filing cabinets for assorted junk. Grab the Big Book of Science and Programmer's Digest from the end table; you can find some scrap electronics and scrap metal there too. Another Programmer's Digest and some Energy Cells are on top of the Central Mainframe.
---> Foggy Bottom Cave
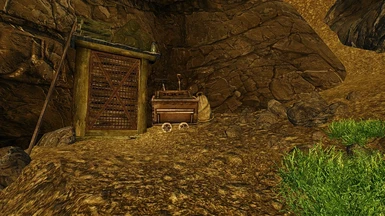
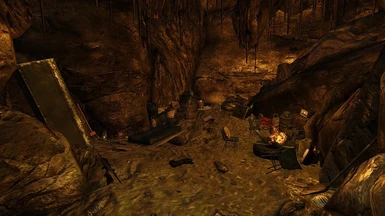
This is a very small cave so there isn't much. Collect the Fire Axe and unique misc banjo by the campfire. You'll find the Endangered Traveler teddy bear on the bedroll. A wooden crate will have some bottles of the unique Snowberry Milk drink. The metal cabinet, crates and sacks will have assorted contents of varying value, and the locked safe is guaranteed to have a good amount of caps, a Power Fist and some Whiskey. There's a Tumblers Today on top of it, too.
---> Vault 138
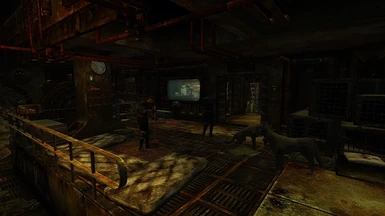
Plenty of goodies here, so I'll just list some of them. All of the NPCs except for Borrelly will trade with you. They will all have at least one bottle of Peyote Coyote Brew and some unique food that will give you a Strength boost if you have the Cannibal perk. Zhivko will be able to heal your injuries through dialogue like a regular doctor, and will also sell the special antidote that will cure Peyote Coyote Brew addiction. You will be able to buy the recipe for the Peyote Coyote Brew (and the antidote), Pinyon's Cannibal Cookbook and a recipe for edible dog treats from Pinyon at the diner.
Starting from the entrance, you'll find 5 barrel cactus plants. You can find the unique Sneaky Plunderer teddy bear inside one of the dog crates. There is an armory of sorts by the stairs with a workbench, a reloading bench, and varied weapons and ammo on shelves and crates. On to Borrelly's room, there is a Assault Carbine alongside boxes of ammo and crates of food. The locked cabinet in the corner has booze, a Bullet Puller, some more Coyote Peyote Brew and three Vault 138 jumpsuits. You'll also find a Patriot's Cookbook, a Raiding for Dummies (unique Guns magazine), a Fixin' Things, a Blood Bag, some Human Flesh and the unique misc Water Chip.
Moving on to the diner, besides all the food and booze, you can pick up a Boxing Times, a Milsurp Review, a Lying, Congressional Style, a copy of ABCs for Barbarians and a copy of One, Two, Cock-a-Doodle-Doo (two new Speech skill books). There is a Chainsaw in the corner by the entrance, and a Fire Axe behind the cage with the female prisoners. Check the flooded area for some extra stuff including scrap metal.
---> Abandoned Office
Another small cell so there isn't much. Two bottles of wine, a Tuxedo Hat and a repair kit can be found by the locker near the entrance. The wooden shelf next to it has the unique Speech magazine "Ridiculous Ties", a metal trunk with some Sunset Sarsaparilla, a Carton of Cigarettes and a small cardboard box containing a collection of 6 miniature booze bottles for collectors. There is a unique Black Mesa mug, a copy of Salesman Weekly and a unique misc Flower Bouquet on the desk, and a Fixin' Things and some Spare Electronics on top of the filing cabinets.
The small rest/bathroom area has some food and two unique Speech magazines, Young Romance #7 and Young Romance #4. Behind the bathroom door you can find a Miniature Giddyup Buttercup, a Fornax magazine and a cigarette pack. The Tabletop Stove can be used for cooking. The wooden crate on top of the refrigerator has 6 bottles of the unique Corn-a-Cola drink. If you pick them up, from then on Anaximander and O'Toole will have a very, very small chance of selling some. The box will NOT respawn but you will get a bottlecap and an empty Corn-a-Cola bottle when you drink them, so you can keep them as a souvenir.
==== ACTUAL WALKTHROUGH STARTS HERE ====
>> 01 - "Boom to the Moon!"
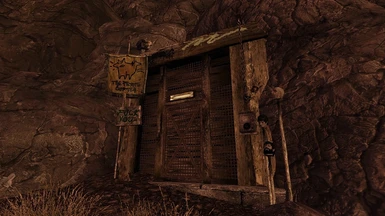
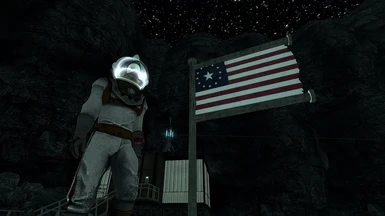
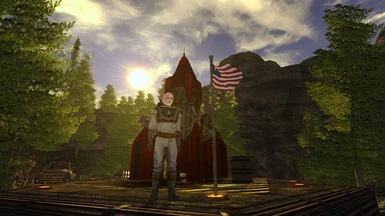
When the mod is loaded into your save for the first time, you will see a notification about a new radio broadcast your Pip-Boy device has picked up. This signal will lead you to the old bungalow where Anaximander lives. His bungalow is located northwest of No-bark's shack, in the outskirts of Novac. As soon as you enter the house, Anaximander will talk to you. If he does not approach you, simply talk to him and things will proceed as intended.
You will need over 3 Intelligence to access the initial conversation. If you have less than 3, you will get a special dialogue option, a small unique reward, and the quest will fail. No more quests will be available after this, so go read a book or something unless you are happy downloading over 1 GB for almost nothing, haha! To continue with the quest I strongly recommend you get your Science skill up so you can hack at least average locks (around 50 skill is mandatory to proceed through the objectives, but 75 or higher is recommended). You will need to do quite a bit of hacking, although there will be some Science-boosting consumables and items around the moon base.
After you talk with Anaximander, your new objective will be to find 15 Nuka-Colas, 10 mentats and one pot. For convenience, you can find all of the materials needed in a cave above the cliffs behind Anaximander's home. Take them back to him and he will give you a home-made rocket booster, his old password, and instructions to head for the moon base while he stays behind to handle the rocket.
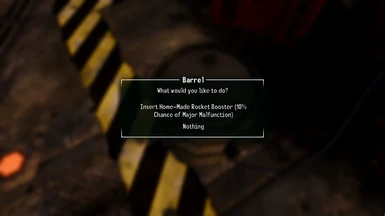
Insert this booster into the barrel by the rocket outside. There is a 10% chance that it will explode, so make a save beforehand if you'd rather not risk it. Grab your space equipment from the locker in the porch (helmet, gloves and suit) and, if you decide to bring followers, get them equipment as well. Keep in mind the mod was designed with only the player going up there in mind, but it's your choice. You will not be able to enter the rocket unless you're fully suited up.
Remember to grab the supplies from the sack next to the locker, and if you feel like it, go back inside to ask Anaximander what he thinks of the suit you're wearing. When you're ready, get into the rocket and you will be shipped off to Terras Irradient. The trip will take 5 hours.
When you land, open the sealed radio case attached to the rocket and activate the radio to inform Anaximander you have arrived. The rocket will be out of fuel at this point, and the facility will be under a security lockdown, so you cannot leave.
Now it is time to find Agnessa. Head to the station's main facilities and enter Anaximander's old password into the card reader. The door will unlock, so go inside and find the (tiny) clinic, which is connected to the common room.
FAILSAFE #1: If the doors in the interior cells at Terras Irradient play the opening animation but do not actually open, so you are not able to pass, use the "Force Doors Open" switches in the Main Facilities and Greenhouse, depending on which cell you're having trouble with.
Investigate the terminal on the desk (you will need 50 Science to activate it) and read the emergency message broadcast. You will be prompted to meet Agnessa and ask her about the black box and the override card so you can return to Earth. In order for the branching ending options to appear later, you will need to hack into Agnessa's personal logs (75 Science skill required) and read the journal entry titled "turn for the better". Feel free to quit the terminal afterwards and move on.
The desk will now be openable. Pick up Agnessa's High-Level Security Card so you can access the rest of the buildings. Grab the crutch by the gurney while you're here, and head out to the Comm Relay. Take the elevator to the second floor and Vincent will talk to you. He will start combat no matter what you choose, so kill him and investigate Agnessa' body for some strands of her hair. Your new objective will be to find the black box and the override card so you can return to Earth.
The black box can be found outside, by the generators. Entering the fenced-off area will kill you immediately, so don't. The briefcase is out of reach, but since you grabbed a crutch earlier you can drag it towards you safely. You can also use a rake, a shovel, a 9 iron or a pool cue, all of which can be found in the moon base. Activate the briefcase so it recognizes Agnessa's biosignature and hack into the average-difficulty digital lock to grab the black box.
The Central Mainframe Override Card can be found in the garage, on top of the crates in the platform. Just as before, activate the briefcase so it recognizes Agnessa's biosignature and the hack into the average-difficulty digital lock to grab the card. Grab a hammer while you're here. Once you have them both, the quest objective will update and it will be time to override the security lockdown.
Return to the second floor of the comm relay and activate the Central Mainframe. Insert all of the items required (Agnessa's hair strands, her pass card, the black box and the override card) and the lockdown will be lifted. The mineral refiner in the main facilities will also be turned on.
FAILSAFE #2: If you go to the Central Mainframe with all items in your inventory (Agnessa's hair strands, the black box, the mainframe override card and Agnessa's pass card) and the option to insert the items disappears, activate the computer rack between the mainframe and the computer terminal. This will progress things forward; just as before, the lockdown will be lifted, and the mineral refiner in the main facilities will be activated.
Since the rocket is out of fuel, you will need to turn 7 perodite ores into a refined igniting agent to kickstart it. Look for perodite ore veins around Terras Irradient and collect them with the hammer you took earlier. There are 8 samples available so you can take one with you as a souvenir. One of them will be inside the overturned rover near the garage, and another one in a jar in the main facilities.
Stick 7 perodite ores, an empty glass jar and a jug of hydrochloric acid into the refiner and activate it so it starts working. The refining process will take 24 hours, so go take a nap or something and come back. Activate the refiner to get a brand-spanking-new jar of refined igniting agent. Take this to the rocket, pour it in, and enter the rocket to head back home.
When you arrive, Anaximander will be outside waiting for you. Explain what happened and eventually you will arrive at the point where the branching endings start ("There's something I need to tell you first..."). These will only appear if you hacked into Agnessa's personal logs to read the note where she talks about the cheating, or if you investigate Jimothy's PDA (you will need 25 Science skill to activate it) in the garage and read his entries as well. If you didn't, the only option you will have will be "I guess this is where we part ways." All choices will give you the Moon Dust Exposure perk (crippled limbs regenerate when you suffer from Advanced Radiation Poisoning, just like that one perk in Fallout 3).
FAILSAFE #3: If you did read Agnessa and Jimothy's journals but went back to Earth only to find Anaximander did not have the extra branching options, load the hard save that is automatically made when you step out of the rocket, activate the cardboard box on top of the space suit dispenser and follow the instructions there. Then talk to Anaximander, go through the dialogue options and you'll eventually get to "There's something I need to tell you first...". Alternatively, if it's still not showing up, load the hard save mentioned before and try using the console to add the hidden perk ("Player.AddPerk XX06CA93") and the notes ("Player.AddNote XX0A425B" and "Player.AddNote XX0A425D"). Replace XX with the mod's load order number. After you do this, talk to Anaximander and see if that gets it working.
If you choose "I guess this is where we part ways" or "actually, nevermind. I really need to get going" the default ending will kick in. Anaximander will give you some items for you to place on the tray by the rocket as a way to remember Agnessa before heading inside. The door will be locked, so activate the tray to place the cushion, and put the rest of the items on top. Then go back into the bungalow. Anaximander will have left you a note by the bed, schematics for a new weapon (the Rocket Grenade - there will also be one ready for you to check out) and caps in a small bag. The quest will end and the bungalow will now belong to you. No more quests will be available. Thank you for playing!
If you choose "I need to tell you... Your wife was cheating. She got into a relationship with the rover mechanic..." Anaximander will be outraged and will not believe you. He will give you some caps, a new unique plasma rifle (the Fizzy Shredifier), 75 points of positive karma, and very specific instructions not to ever come by his place again. The bungalow will no longer be accessible and no more quests will be available. You will be granted the unique Heart Crusher perk as well (critical hit chance on you is reduced by 50%). Thank you for playing!
If you choose to lie to Anaximander and tell him "Oh, I'm just impressed at how much you guys loved each other..." he will be pleased and decide to stay and open a small repair shop. You will get 75 points of negative karma, some caps, and the bungalow will be renamed to Max's Emporium o' Stuff. He will now offer repair and merchant services, play caravan, and the rest of the mod's quests will be available. You will be able to sleep on his couch, but you won't get the Well-Rested buff.
Select "have you got a minute?" when talking to Anaximander in the bungalow later to get some additional dialogue options. One of them will let you tell him about Agnessa's illicit activities at the moon base. Now that the weight of Agnessa's death has sunk in, he will react a lot less violently to the news and thank you for being honest. You will get 75 points of positive karma to offset the negative karma you were given before.
The next day you can check on him to see how he's doing, and he'll mention he has been thinking about trying his hand at dating. This will bring us to "Mr. Pokeylope's Quest For Love". O'Toole will also have a quest, "The Search for Class", available for you...
>> 02 - "The Search for Class"
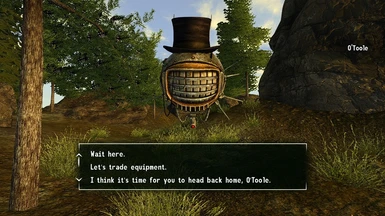
This is a really simple quest. Talk to O'Toole with at least one cap in your inventory, and he will tell you about his dreams of becoming a gentleman. Bring him one scrap metal, a shot glass, a tuxedo hat (one can be found inside the Abandoned Office during "A Decent Proposal") and a wonderglue. O'Toole will be thankful and proudly equip a snazzy top-hat and monocle.
After this quest is complete, you will have another additional, unmarked quest to change O'Toole's voice type if you bring him a voice modulator, which can be found in the REPCONN Facility, somewhere in the office areas. Look for a suspicious mannequin in the vicinity of the sleeping area with the bunk beds. As you come closer to it you will hear a beeping sound that will guide you. There will also be a lightbulb hanging over it. Simply take the modulator to O'Toole and stick it in through the new dialogue option he will have.
>> 03 - "Mr. Pokeylope's Quest For Love"
Anaximander will give you a new misc item, Mr. Pokeylope, and instructions to go meet the first of his potential girlfriends, Tally, somewhere on the way to Goodsprings. You will be forcefully evicted from the bungalow while the quest is running. Mr Pokeylope will be tagged as a quest item until the quest is complete, and can be freely dropped afterwards.
Tally can be found near an abandoned cart southeast of Goodsprings, along the road out of town (across the street from the Indiana Jones Wild Wasteland encounter). She will have been killed by a coyote. Activate the flower bouquet to talk to Anaximander and explain what happened. He will tell you to check on Shay, an NCR conscript in Primm. Check Tally's body for a bullet puller before you go, as this will come in handy later when Anaximander is a follower: he needs to have one in his inventory to offer you the reloading bench functionality, and there are only a few available around.
Shay will be guarding the entrance to Primm, so head there following the road from Goodsprings and you will see her. Tell her that Anaximander sent you and she will take Mr. Pokeylope but say she is not interested. You can do a quick speech check (25 skill) to get it back, or fight her for it. When you get Mr. Pokeylope, activate the bouquet to tell Anaximander what Shay said. He will be disappointed and tell you to try with his friend Valera at the Dino Dee-lite in Novac.
Talk to the security guard outside the Dino Dee-lite front desk and ask about Valera. He will take Mr. Pokeylope and mention that there is no Valera in the hotel. When you ask to get Mr. Pokeylope back he will offer to exchange it for two packs of cigarettes. You can agree, or you can just kill him. Then activate the flowers in the mailbox to tell Anaximander what happened. Anaximander will be flabbergasted and decide that maybe looking for a girlfriend is not worth it, but will still thank you for your time and allow you to keep Mr. Pokeylope as a souvenir.
Go back to his place to confront him about being kicked out and to ask him if he can really work on repairs despite his eye condition. This will lead us to...
>> 04 - Unmarked Quest - "Boolean's Big Rescue"
This tiny, tiny quest is mandatory for Anaximander to become a follower later. After you finish "Mr. Pokeylope's Quest For Love" and come back to Max's Emporium, you'll see that Anaximander's pet rock, Boolean, has gone missing. A ransom note has been left in its place, telling you to head to a camp north of Gibson's Scrapyard.
The camp, if you can even call it that, is really close by, so it should only take a minute. It's just a bunch of junk mounted together to form a small shelter behind a big rock. There is a burning torch to make it easy to spot. Here you will find Berossus, who's waiting for you. You can pay up the ransom (50 caps) or kill him. If you pay up, the caps will be added to his inventory so you can kill him afterwards to get your money back, if you so desire.
The items around the camp are owned by Berossus, but they will be free to take once he dies. You can find some useful things here, including a Carton of Cigarettes, a Stealth Boy, the unique Scorched Survivor teddy bear and and a copy of Meeting People. You can activate the barrel to sleep inside, although this won't give you the Well-Rested buff.
Once you have Boolean, simply bring it back home. Place it back on its pillow to complete the assignment and get a small amount of exp and good rep. If you mention what happened to Anaximander he will be thankful and give you a small amount of caps for your trouble.
>> 05 - "Operation Snellen"
Anaximander will tell you about a friend of his at the New Vegas Medical Clinic who's been working on an implant that could help him get improved eyesight. He is willing to give you the caps required to buy it. Take the caps (300) and head to the clinic.
Here you will find Doctor Leavitt. Talk to her and tell her Anaximander sent you. She will be hesitant to hand over the chip, but you can get it through a Speech check (25 skill) to buy it for 250 caps, or pay the 300 caps upfront. No purchase option will appear unless you have at least 300 caps in your inventory.
When you get the implant, you will be informed that it will require cleaning before you can give it to Anaximander. For this you will need to "cook" it at a campfire in order to disinfect it. You can use any of the vanilla alcoholic drinks, although the Survival skill required will depend on what you have - strong spirit like Vodka will be easier to work with than, say, beer.
Here's the list of drinks that can be used and the skill level required.
- Rubbing Alcohol (from Honey Pomelo): 0 Survival
- Vodka: 10 Survival
- Moonshine: 15 Survival
- Absinthe: 20 Survival
- Whiskey: 25 Survival
- Scotch: 30 Survival
- Wine: 35 Survival
- Atomic Cocktail: 40 Survival
- Rum & Nuka: 45 Survival
- Beer: 50 Survival
Once you disinfect the implant, simply bring it back to Anaximander. He will head to the bathroom to plug it in. One hour will pass, and after that, Anaximander's repair skill will be bumped to 100. If you ask him how he's doing, the following day you will be able to get him to become a potential follower. If you take it, the day after you can make a comment about how he seems to really like trucks. This will lead you to "Truck Pick-Up".
Before moving on to Truck Pick-Up, if Anaximander has been hired and if you have the Wild Wasteland perk, you will have access to an additional quest, "Follow Your Dreams!".
>> 06 - "Follow Your Dreams!" (Wild Wasteland only)
This is a short quest that was cooked up by ToxicBrown1 (Anaximander's voice actor). Ask Anaximander if there's something on his mind, and he will admit he's worried you'll laugh at him. If you do laugh, he will get annoyed and the quest will not be available anymore. Just tell him you'll not laugh and he will explain he dreamed about a giant iguana on a stick on a pedestal somewhere in the Mojave. He wants to go find it, and you can agree to start the quest, or you can decline and the quest will, again, not be available anymore.
If you agree, head to the Yangtze Memorial near Goodsprings with Anaximander in tow. As you approach it you'll hear a voice (yours truly!) calling for him. Once you're close enough the Memorial will turn into a giant iguana on a stick and Anaximander will be stoked. Grab some iguana bits if you want and talk to him so he takes a picture of the iguana before going for a feast. Three hours will pass. Talk to him again and he will give you a unique reward, the Portable Iguana Roaster. This weapon is a flamethrower pistol that does extra damage against geckos. Enjoy!
>> 07 - "Truck Pick-Up"
Anaximander will excitedly tell you about a pamphlet he found showcasing some limited edition miniature toy trucks. He will try to convince you to go look for them together, and since he is stubborn, he will give you the quest no matter what you choose. You don't actually have to bring him along, but if you do, he will make a comment every time you enter one of the buildings with a truck inside. He will give you some caps every time you give him a new truck.
Here's a list of the eight trucks and their locations. They must be given to Anaximander through dialogue, instead of being placed in his inventory through the companion wheel (if he is following, of course).
- Abraxo: Nipton Road General Store, on a wooden shelf near the counter.
- Fancy Lads: Vikki and Vance Casino in Primm, inside one of the open safes behind the cashier's desk.
- Mama Dolce: Dino Bite Gift Shop in Novac, in the corner of the shelves to your left when you enter.
- Radiation King: H&H Tools Factory, next to a turned-off terminal in the room with the two turrets.
- RobCo: REPCONN Facility, next to the terminal in the Administrator's office.
- Nuka-Cola Quantum: Goodsprings General Store, on a wooden shelf to your right when you enter.
- Sunset Sarsaparilla: Sunset Sarsaparilla headquarters, on a shelf behind the reception desk.
- Vault-Tec: Vault 11 Living Quarters, on a wooden shelf next to the entrance to the female dorm.
Every time you give Anaximander a truck you can ask him something about himself. These range from things about his past to his follower skills. You can also choose not to ask him anything if you're so inclined. These dialogue options will be available again later once the quest is complete.
When Anaximander has all eight trucks, the quest objective will update. Talk to him again for your final reward and the quest will complete. Next time you are together in his house (with him following or not, does not matter), you will have a new dialogue option to offer help with his brain chip. This now will lead us to...
>> 08 - Unmarked Quest - "Chip Tampering"
This is another series of dialogue choices with rather serious consequences and will only be available if you have a good reputation with Anaximander and O'Toole. Tell Anaximander that you have been thinking about his brain chip. He does not like talking about it, but will be willing to listen. You will have the option to try and get rid of his brain chip through a medicine speech check or a science speech check (both require 75 skill). You can also just decline.
If you pass the Science speech check, Anaximander will don a patient gown and wait for you in the bathroom. Go there and talk to him. The chip will, sadly, blow his head off and O'Toole, distraught, will attack you. The bungalow will now belong to you, and any items in Anaximander's backpack will be transferred to the cabinet at the foot of his bed. No more quests will be available. Thank you for playing!
If you pass the Medicine speech check, Anaximander will, again, don a patient gown and wait for you in the bathroom. Go there and talk to him. This time, the chip will screech and shatter, but Anaximander will survive. Talk to him and you will realize he has forgotten who you are. He will no longer be available as a follower, but he will still repair and sell, and any items in his backpack will be transferred to the cabinet at the foot of his bed. You will have a new dialogue option to apologize for messing up his brain (he will politely accept your apology, even if he has no idea of what you're talking about), or you can try to forcefully fix the chip, which will turn him hostile. No more quests will be available. Thank you for playing!
If you decide against tinkering with the chip, Anaximander will be relieved and tell you that, if you really want to help, you could travel together to Vault 138, where he was born. This will lead us to...
>> 09- "Back to Vault 138"
This quest has several ways to proceed. To start it, take Anaximander to Vault 138, along the Colorado River, so you can get back his old marriage license and maybe shoot some baddies along the way. A map marker will be visible (but not travellable) to guide you. Once there, talk to Anaximander to confirm you're in the right place. This will enable the intercom outside.
Activate the intercom and Borrelly, the leader of the Peyote Coyotes, will answer, wanting to know if you're the Magnum Tigres. You obviously are not, so he will refuse to let you in. Anaximander will complain about having to dress up, but will mark a new location on your map where the Magnum Tigres can be found. The quest will update and lead you to the nearby Foggy Bottom Cave, west of Vault 138.
This is a very small cave, so upon entering Anaximander will comment that he could try to sneak in and get some outfits without a fight if you keep the leader, Clover, talking for long enough. Approach the group in the cave and Clover will ask you what you are doing there. You can choose to attack them, or talk to Clover through a series of increasingly difficult speech checks (the first one requires 20 skill, the last one 50). You can give up on those at any time and attack the group instead. If you pass all speech checks you will get 3 outfits and be kicked out of the cave. Entering it again will turn the Magnum Tigres hostile.
Once you equip yourself and Anaximander with your new clothes (masks are not required), head back to Vault 138 and activate the intercom to gain access. Inside, Anaximander will panic and tell you that he has changed his mind and wants to go home. Calm him down and open the gear door. The lower levels of Vault 138 are flooded and cannot be entered. The noise of the water will be rather loud, too. Just sayin'.
The leader, Borrelly, and his second-in-command, Zhivko, will be waiting for you. Zhivko will ask you what you want but Borrelly will be more welcoming and placate him. Discuss how the group found the vault, or get down to business right away. Several choices are available here, all with different results.
If you choose to attack them right away, they will, needless to say, become hostile. Kill everybody and collect the Old Marriage License from Borrelly's body. Give it to Anaximander and the quest will complete. Congrats!
If you have the Cannibal perk, you will have an extra option ("I see you are a group of refined palates. How much would you pay for this young man here?") that will allow you to sell Anaximander as meat. You can do a speech check (25 skill) to get a better price or just pay upfront. This will, obviously, kill Anaximander and the quest will fail. Talk to Borrelly in his room to get a special new reward, and unlock the door through the terminal in his room so you can exit the vault. The bungalow will now belong to you, and no more quests will be available. Thank you for playing!
The last option you have is to sell Anaximander as a slave. You can actually go through with it, pass a speech challenge (25 skill) to get some extra caps for him, or you can simply pretend to sell him so you can talk to the Peyote Coyotes and get an idea of what they're all about.
If you go through with it and sell him off, he will, again, be killed and the quest will fail. Talk to Borrelly in his room to get a small pouch that contains a unique headwrap and a note from Anaximander. Unlock the door through the terminal in his room so you can exit the vault. The bungalow will now belong to you, and no more quests will be available. Thank you for playing!
If you simply pretend to sell him, Anaximander will be moved to a cage in the diner area. Talk to him and you will have two choices. If you choose "well, it was nice knowing you" the quest will fail and you will not be able to rescue him. Choose to remove the duct tape so he can talk to you, and you will be told to go talk to Borrelly and figure out a way to rescue Anaximander.
Meet Borrelly in his room. Here you will have several choices. You can leave Anaximander there to rot: if you do, you will be kicked out of the vault and the quest will fail. No more quests will be available. Thank you for playing!
You also have a dialogue option to attack the leader. This will turn the Peyote Coyotes hostile. Kill Borrelly and grab the Old marriage License from his body. Then go back to Anaximander and tell him to come along. You will be taken out of the vault. Talk to Anaximander to ask how he's doing and give him the Old Marriage License to complete the quest successfully. Congratulations!
If you want to free Anaximander but you don't want to fight, you will have a few options: a speech check (65 skill), an option to buy him back (2500 caps), and a special dialogue option if you kept the Moon Dust Exposure perk. If you choose any of these, you and Anaximander will be kicked out of the vault again. Chat him up outside to check on him, give him the License and the quest will be completed successfully. You can also choose to, again, attack the Peyote Coyotes. The quest will proceed in a similar way as before: collect the License from Borrelly's body, grab Anaximander and talk to him outside to complete the quest. Congratulations!
Next time you visit Anaximander's home with him in tow, and if you have a good rep with him, he will approach you to say he has been thinking about something.
FAILSAFE #4: If this fails to trigger and Anaximander is not talking to you automatically, press the switch behind the stove in the kitchen, follow the instructions, and approach Anaximander to carry on.
This will lead us to...
>> 10 - "A Decent Proposal"
Anaximander will have a simple business proposal for you, where, if you agree, he will put aside some caps from his daily profits for you every day. The amount of caps depends on your reputation with his faction: if it's low, it will be about 150 or so caps, and if it's high, it will be about 300 or so. You don't actually have to give him your loot for him to sell, but it would be something nice for you to do, wouldn't it?
If you decline outright the option will not be available anymore, so think carefully. You will lose some reputation if you do and, of course, the daily caps won't be an option anymore. If you agree, however, Anaximander will be happy and mark the location of the Abandoned Office on your map. The quest will then start.
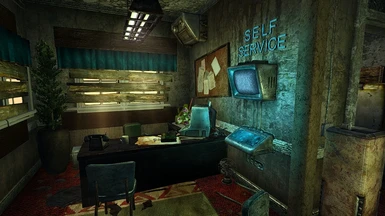
Head to the Abandoned Office, a new addition to the El Rey Motel complex. Outside you will meet a woman accusing Anaximander of having fathered her baby. Deal with her and enter. Activate the self-service terminal and follow the steps. If you decline to give up your name, Anaximander will complain and you can choose to call off the whole thing, which will fail the quest, or to try again. If you successfully sign up for the new business partnership you will be given 50 pieces of pre-war money, a new contract, and Anaximander will give you a special gift. You can give him something too, and this will be your last chance to get a big boost in your reputation meter - from here onwards all rep boosts will be really small. If you ask him for a place to sleep you will be able to use the bedroll outside, on the truckbed. This bedroll will give you the Well-Rested buff, so it's better than sleeping on his couch. You can store items on the truck itself as well.
If you select the option to give him something, you can hand over the Nuka-Cola headwrap and eyepatch found in Zhivko and Pinyon's inventories (if you kill or pickpocket them during "Back to Vault 138"), a copy of "A Message to My Son" if you picked it up in the flooded area of Vault 138, an Ice Cold Nuka Cola if you have one, or simply say you don't have anything. The quest will be completed, and a special extra reward will be placed in the mailbox outside Anaximander's home. You will now be able to set Anaximander's essential/killable status in the meterbox behind his home.
Anaximander's gift contains the new items that are only available as unique rewards from the different branching endings. Most of these are from the initial "Boom to the Moon!" quest - the teddy bear you can only get if you have less than 3 intelligence; the Fizzy Shredifier plasma rifle and some ammo you get if you tell Anaximander about Agnessa's affair right when you come back; and the schematics for the new Rocket Grenade and a couple Rocket Grenades for testing, which you get if you don't tell Anaximander anything about Agnessa's illicit activities at the moon base. You will also get the unique Planets Head Wrap that you'd originally get if you sold Anaximander into slavery during "Back to Vault 138".
Enjoy! Thank you very much for playing, and hope you liked the mod!
- Jokerine
