Would you be willing to port this mod to TR4-6? The TR1-3 outfits are available in that game now; it would be nice to have the wetsuit stay consistent between games. :)
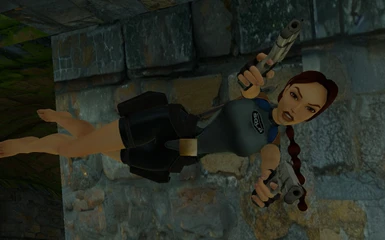
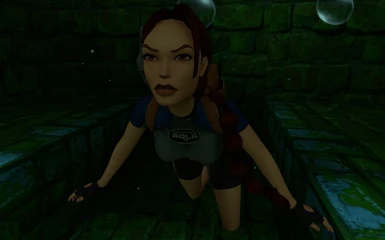
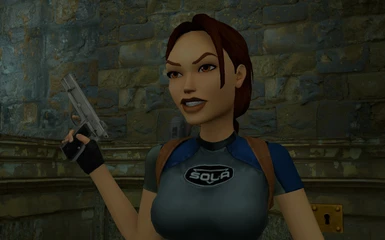
No problems! Great mod, BTW. Once I spotted the new wave logo they added while overlooking the leftover fmv Sola logo, this was one of the first mods I was looking for.
Same, haha. I thought I might as well try to work it out myself first. I hadn't even gotten to 2 yet, hence the TR1 screenshots. Also, would you mind if I added your mod as an add-on and credited you? I figure it might be convenient to have it right there.
I hope you and the other mod authors who restored censored and removed for copyright reasons textures are ready to do the same with the upcoming 4-6 remasters as well.
I'm excited for them! The SOLA change was one that I anticipated considering Anniversary removed it too (and thankfully Remastered didn't mirror the texture like that did), so I was ready almost instantly. I'm not sure what may or may not be censored this time though. Pierre's jacket for sure but I'll let that author port it over.
Static images are encoded a bit differently. You don't need to worry about alpha channels or mip maps for those. For any editing that deviates from my tutorial, drag the original file you want to edit into the Compressonator and use that as a guideline for encoding the image. It should give you the details you need.
The Remastered textures are BC7 .DDS files with 6 mipmaps. You need a program/programs that will be able to properly import and export the files or they won't work. This is the easiest method I found:
1. Download the Intel Texture Works plugin for Photoshop. * (The GIMP has its own method for opening BC7 .DDS textures that I didn't try. Paint.net can open the files but can't edit transparencies.) 2. Follow the instructions in the readme to install it. 3. Drop any texture from the game into Photoshop and select "Load transparency as Alpha Channel" in the window that pops up. 4. Edit the texture however you like and then select "Layer > Flatten Image" when you're done. 5. Save as .DDS with these settings: * Texture Type: Color + Alpha * Compression: none 32bpp * Mip Maps: None
Nothing else should be selected. * (If the texture you want to edit has no alpha channel, select "Color" instead.) 6. Hit "OK" and it should be saved.
By default, the Intel plugin generates 10 mipmaps which creates a blacked out texture in-game. To generate the proper amount of maps, the next step is to: 1. Download the Compressonator (GUI version). 2. Double-click "Double Click here to add files" in the "Project Explorer" window and select your .DDS file from earlier. 3. Double-click the file icon next to your project and it should appear in the "Original Image file" window on the right-hand side with the alpha layer visible. 4. Click the "Generate MIP maps on selected source images" button on the toolbar at the top of the program. 5. Set "Smallest Mipmap Size" to 16x16 and hit "Generate". 6. Make sure that "Mip Levels" in the "Property View" window is at 6. 7. Hit the little "+" button next to the file icon to expand the project and double-click "Add destination". 8. Configure where you want the file to go and then make sure that "Destination Options" are set to: * Format: BC7 * Quality: 0.05 9. Hit "Save". 10. Select the new file name that's been generated. It should have the same name as your source file with no extension and a green orb next to it. 11. Select "Process" at the bottom of the program. 12. If it's successful, place the new file in the proper Remastered folder and you're done!
Hi, I just followed all of your steps but I'm having some issues. This is my first time trying to retexture something in video games and there isnt a guide on modding this game yet because it's in it's infancy. I'm trying to repaint Lara's tank top in TR2. I am editing the 8040.dds file in ((D:\SteamLibrary\steamapps\common\Tomb Raider I-III Remastered\1\TEX)) So I can't load alpha transparency as alpha channel and load mip maps as individual layers. As for the mip maps, do I need to change all of them? Or can I just do the biggest one and to use a shortcut and resize it. The second question is that the texture loads in the game as rainbow television static. What am I doing wrong and how should I fix this.
The rainbow static is a side-effect of the .DDS file having no compression. After running the modified .DDS file through the Compressonator, it puts the new file into the "results" folder. For me, the folder is located in C:/Users/(Your name)/Downloads/results/. If you don't see it there, you can find its location on step 8 under "Destination".
During editing in Photoshop, don't load the mipmaps. Only ask it to load transparencies if there are any. For Lara's top, you want to follow the same steps but select "Color" instead of "Color + Alpha" while saving. Then continue with the Compressonator.
I've followed your steps but when I get to generating the mip maps, it keeps giving the image 8 mip maps instead of 6. I'm not sure what I'm doing wrong as I followed the steps correctly and hit the generate mip map button and use the 16x16, gamma (pixel ^ value) set to 1.000 and the filter type is cmp box. Every time I hit the button it ends up generating 8 mip maps.
I even tried doing another method that involves some other programs with using Compressonator to generate the mip maps and got the same issue, so I started a trial of Photoshop to do it your way and I'm still getting the same result.
You'd think so, but all of Lara's HD models are in the 1 folder. I think it might be the first folder loaded so it might make it easier for them to appear in photo mode.
You'll have to model swap Lara. I've heard you can do it by renaming the "OUTFIT" files in Tomb Raider I-III Remastered\1\ITEM but haven't tried it myself.
If I had to guess, Lara's original textures are probably stored in texture sheets in the "DATA" folder like the classic games. I haven't cracked into those yet, but I'd be willing to edit it in the future.


36 comments
-
1
-
2
Jumphttps://www.mediafire.com/file/06p8cit8765wuh2/SOLA+Suit+Set+Dressing.7z/file
https://i.imgur.com/2W1f7c9.png
1. Download the Intel Texture Works plugin for Photoshop.
* (The GIMP has its own method for opening BC7 .DDS textures that I didn't try. Paint.net can open the files but can't edit transparencies.)
2. Follow the instructions in the readme to install it.
3. Drop any texture from the game into Photoshop and select "Load transparency as Alpha Channel" in the window that pops up.
4. Edit the texture however you like and then select "Layer > Flatten Image" when you're done.
5. Save as .DDS with these settings:
* Texture Type: Color + Alpha
* Compression: none 32bpp
* Mip Maps: None
Nothing else should be selected.
* (If the texture you want to edit has no alpha channel, select "Color" instead.)
6. Hit "OK" and it should be saved.
By default, the Intel plugin generates 10 mipmaps which creates a blacked out texture in-game. To generate the proper amount of maps, the next step is to:
1. Download the Compressonator (GUI version).
2. Double-click "Double Click here to add files" in the "Project Explorer" window and select your .DDS file from earlier.
3. Double-click the file icon next to your project and it should appear in the "Original Image file" window on the right-hand side with the alpha layer visible.
4. Click the "Generate MIP maps on selected source images" button on the toolbar at the top of the program.
5. Set "Smallest Mipmap Size" to 16x16 and hit "Generate".
6. Make sure that "Mip Levels" in the "Property View" window is at 6.
7. Hit the little "+" button next to the file icon to expand the project and double-click "Add destination".
8. Configure where you want the file to go and then make sure that "Destination Options" are set to:
* Format: BC7
* Quality: 0.05
9. Hit "Save".
10. Select the new file name that's been generated. It should have the same name as your source file with no extension and a green orb next to it.
11. Select "Process" at the bottom of the program.
12. If it's successful, place the new file in the proper Remastered folder and you're done!
During editing in Photoshop, don't load the mipmaps. Only ask it to load transparencies if there are any. For Lara's top, you want to follow the same steps but select "Color" instead of "Color + Alpha" while saving. Then continue with the Compressonator.
I even tried doing another method that involves some other programs with using Compressonator to generate the mip maps and got the same issue, so I started a trial of Photoshop to do it your way and I'm still getting the same result.
-
1
-
2
Jump