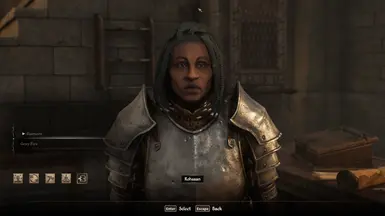
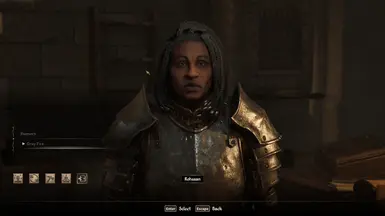
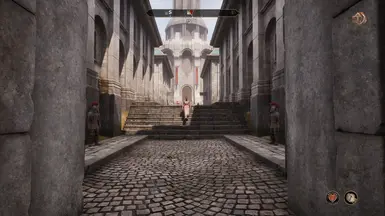
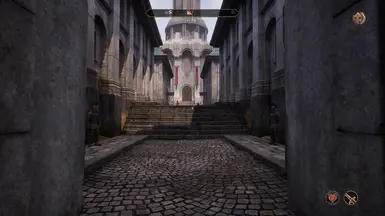
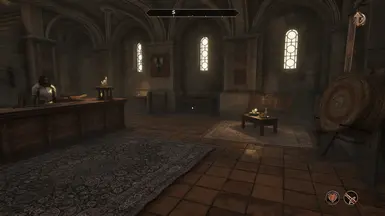
About this mod
Ultra+ is a series of mods designed for all PCs, fixing bugs and performance, with the best possible visuals.
- Requirements
- Permissions and credits
- Changelogs
Support and Supporting

Join The Ultra Place Discord For the fastest support and releases. See you there!

If you'd like to support our efforts please endorse, share or support us on Patreon (this Ultra+ is made by Lazorr)
About Ultra+
Ultra+ is a series of mods designed for all PCs, fixing bugs and performance, with the best possible visuals.
What it Does
Ultra+ mods take complete control of Unreal, from streaming, textures, NPC quality, cut scenes, even game settings menus, with the goal of fixing bugs, and making sure the game works on everything from potato to the highest-end PCs.
This is a work in progress. Ultra+ mods are significant work, with significant testing, to provide the level of polish game studios often don't. We are always listening to feedback and want to know your experiences, good or bad.
The latest versions and full support are available at: discord.gg/ultraplace
What it Looks Like
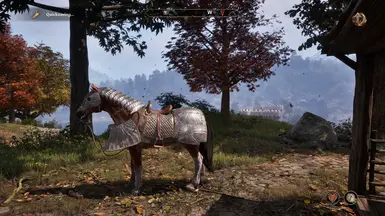
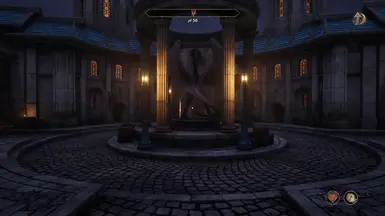
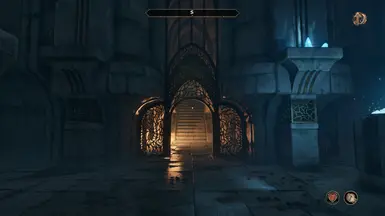
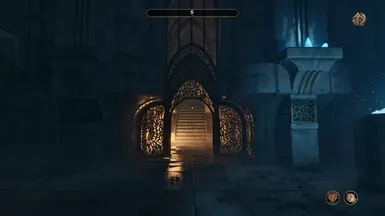
Thank you to Digital Dreams for this amazing video of Ultra+ in action.
What's New?
v1.2.0
Changes since 1.1.2
- F10 now toggles the HUD on and off - sorry if you don't like F10, it is enabled by default
- People that want to use Enhanced RT rejoice, at least mostly resolved VRAM issue I think! Now users with 12GB VRAM are having success
- New setting enabled by default - CustomAutoExposure - results in a more stable autoexposure that can be mixed with the EyeAdaptation settings
- Resolved low quality reflections for SW Lumen or HW lumen low
- Resolved some possible crashes
- Other minor fixes
- Changed the defaults to be more U+ recommended
v1.2.1
- Fix level parsing for levels with dashes and parentheses (Arch-Mage) which should correct graphical issues on advanced
- Enable Lumen FrontLayerTranslucencyReflections on ultra reflection quality
v1.2.3
- Reduced requirements for Enhanced Raytracing
- Increased lighting quality
- Increased lighting quality in standard Enhanced Raytracing
- Added a new version of Enhanced Raytracing denoted with _LessVRAM for users that have 12GB or lower
- Reduced flickering with Advanced lighting mode
- Resolved issue with advanced lighting mode + insane quality
- Slightly tuned sky
- Other minor adjustments
Dynamic Settings
- Highly recommend using SkylightLocationProfile set to uplus_choice or uplus_choice_brighter depending on your monitor/settings. This dramatically improves all of the interiors in the game making them more appropriately lit according to their environment and helps to take full advantage of Unreal Engine 5's lighting system. Moving forward, all locations in the game can be tuned manually if specific places need to be adjusted.
- When using a SkylightLocationProfile, your outdoors skylight intensity will use the configured "SkylightIntensity" and "SkylightIntensityNight" automatically.
- DisableFogIndoors - many users have asked for a method to reduce or disable fog indoors. This option will automatically do it for you. I recommend at least trying the disable_emissive option as it still maintains some fog around light sources without being overwhelming. If you want to maintain the more vanilla look then don't use this setting.
Features
- Drastically improves interior lighting by tuning lighting based on location, time of day, interior, and exterior
- Time of day based skylight
- Allows disabling certain fog only in interiors
- Significantly improves performance
- Reduces stuttering
- Provides customization to achieve a vanilla look with our fixes and performance improvements or settings to increase the quality of the graphics across the game
- Improved light shaft quality
- Enable Ray Reconstruction
- Fixes a compatibility issue with DLSS 4 causing fog artifacts
- Provides control over various game and graphics related options via keybinds, UMM, or configuration file
- Improved fog quality
- Fix fog ghosting
- Fix fog artifacting against the sky
- Include fog in Lumen tracing for GI and reflections
- Increase lighting quality in general via modifying the games PostProcessVolumes
- Add several lighting quality levels allowing maximum theoretical lighting quality
- Improved reflection quality
- Fix screenspace reflection issue when Hardware Lumen is enabled
- Engine performance tuning including addressing stutters
- Replaces NIS sharpening with UE native sharpening and provides setting in U+ mod settings.
- Advanced lighting mode - overhauls the game lighting behave more correctly particularly outdoors and around foliage
- Many other minor improvements
Tips Tricks and Troubleshooting
Do NOT use random engine.ini files like most of the ones found on Nexus - they are not compatible with U+ and will cause problems. U+ handles everything.
Why is my game stuttering or performing poorly?
- Many changes to the game, especially any changes made to driver level configuration will cause the game to recompile shaders live. When this happens, your game will stutter very severely even in the loading menu until the game has finished compiling shaders - this can take a long time. Oblivion has not correctly implemented shader compilation, you will only ever get the shader compilation step on startup the first time you launch the game.
- Recompiling shaders for steam users, it is possible to force a recompile by deleting My Games\Oblivion Remastered\Saved\SaveGames\Save_Settings.sav. Must also delete the .upipelinecache file in My Games\Oblivion Remastered\Saved. I would also clear your driver level shaders, for NVIDIA these can be found at AppData\Local\NVIDIA\DXCache.
- Recompiling shaders for gamepass users, find the ~23KB file inside of a folder "\AppData\Local\Packages\BethesdaSoftworks.ProjectAltar_3275kfvn8vcwc\SystemAppData\wgs\Long Numbers and Letters". Delete it, this is your saved in game settings file that prevents the game from triggering shader compilation. Must also delete the .upipelinecache file in My Games\Oblivion Remastered\Saved. I would also clear your driver level shaders, for NVIDIA these can be found at AppData\Local\NVIDIA\DXCache.
- Enhanced RayTracing is heavily dependent on the bandwidth that your system is capable of. It requires a GPU with a minimum of 16GB VRAM (new version may have success at 12GB). Not all systems are capable of running it. If it causes a lot of stutters and bad performance for you then you can either turn it off or turn down other settings to compensate. The enhancement adds a great amount of detail from all nanite meshes being rendered which is very intensive. Try enabling rebar and ensuring that expo/xmp is enabled for your RAM.
- Have you tuned the mod settings? LightingQuality and LightingDownsampleQuality have significant performance impacts. RayTracingRadius can also have a significant performance impact. Please check out our presets in the top right of UMM for an idea of what you can change. The mod with x32 downsampling and LightingQuality on performance or standard will still look good. Advanced lighting mode is more expensive, however I think it is worth prioritizing over other things. If you really really need more performance then use standard lighting mode.
- Have you tuned in game settings? Try turning shadows and foliage down. Recommend a minimum of high for GI.
- Press F12 when back in game and it should toggle on again
My game is too dark with advanced lighting mode
- Increase skylight intensity
I get christmas lights/artifacts when swapping lighting quality in Advanced Lighting Mode
- This is a known issue using keybinds to change lighting quality in Advanced Lighting Mode. I recommend changing the quality in UMM and pressing F12 instead.
More to come
Performance Information
- Increasing lighting quality will cost FPS
- Ray Reconstruction costs 10-15 FPS
- Lighting quality performance and standard look good — use them if you want to maintain higher FPS or need more frames
- Tune LightingDownsampleFactor up to x32 if you need more performance
- U+ settings presets are now provided. Update UMM and select a preset in the top right.
Installation
Ultra+ Mod Manager Installation and Configuration:
UMM provides a way to easily install, update, and configure Ultra+ mods.
- Download and install Ultra+ Mod Manager (UMM)
- Run the application, and select Oblivion, and click Initialize.
- The path should automatically be detected. If not, navigate to where you installed Oblivion and select the indicated .exe, then click Open, then click Save.
- Select "OblivionRemastered-Win64-Shipping.exe" in "Oblivion Remastered\OblivionRemastered\Binaries\Win64" - Now that UMM is configured for Oblivion, to install or update Ultra+, go to the Installed Mods tab, click the actions drop down next to UltraPlus, select Install, select the zip file you downloaded, and click Open. Confirm installation and UMM will handle installation (or updating).
Note: Steps 1-3 only need to be performed the first time; after which you can simply select your game and select Load or launch through the normal launcher.
Now, you can configure mod settings in the Settings tab; this can be done while the game is running as well; simply press F12 in-game to load your new settings or enable keybinds. Launch the game either via the Launch Game button in UMM or your usual means.
Manual Installation:
- Drag everything in the main zip to your root Oblivion Remastered\ folder
- Configure the mod settings via UltraPlusConfig.ini
Updating DLSS
- To use DLSS 4, use DLSS Swapper to update the main DLL to 310.2.1
- For DLSS Frame Gen, we recommend DLL 3.8.1 for the best and most stable performance (NOT 310.2.1)
- For Ray Reconstruction, copy nvngx_dlssd.dll from here into Oblivion Remastered\Engine\Plugins\Marketplace\nvidia\DLSS\DLSS\Binaries\ThirdParty\Win64.
- It should be next to nvngx_dlss.dll
- If the location isn't the same for you due to a different platform, search for nvngx_dlss.dll and put nvngx_dlssd.dll next to it
- The Ray Reconstruction preset should be overridden to preset E (or K) using Nvidia Profile Inspector Revamped - Use Nvidia Profile Inspector Revamped to set the DLSS SR preset to K
- Ensure that DLSS AutoExposure is enabled in the Ultra+ mod settings
Configuration
All available Ultra+ settings are below, they are the defaults shipped with the mod. All lighting quality levels are enhanced by default, standard will perform well and look good. Expect a significant FPS decrease when using lighting qualities epic or higher
Nomenclature - A value of 'game' means that a setting is game controlled. This is only valid on startup. Lumen is the lighting system that the game uses, it is always the default. Standard is our definition of a baseline setting. Default means we are explicitly setting something to the games default value.
; This configuration file loads on game startup
; In-game keybinds are disabled by default, set EnableKeybinds=on below to enable them on game start - or it can be turned on in game
; Press F12 to load the current configuration file while in-game - you can now edit the configuration file and load the changes while in-game
; If a setting does not specify a keybind, then it can only be changed via the configuration file
; The 'game' option for settings below tells Ultra Plus to leave the setting at game default
; CTRL+F12 will reset the configuration file to default values - you may need to restart game for "game" controlled settings to load game values

; CTRL + F3
; off/percent_20/percent_40/percent_60/percent_80/percent_100; changes intensity of bloom
Bloom=percent_100

; game/off/on;
ChromaticAberration=game

; off/on; fixes fog on DLSS4
DLSSAutoExposure=on

; F2
; game/none/temporal/rayreconstruction;
Denoiser=game

; game/off/on; allows turning off depth of field which can cause a lot of noise in cutscenes/dialogue - note that enabling RR already turns depth of field off
DepthOfField=game

; off/on; off disables all keybinds except for F12 which loads the current configuration file in game - can be toggled on in-game by setting to on in config and pressing F12
EnableKeybinds=off

; F10
; game/off/on/on_with_lumen; allows disabling the color grading that applies a fantasy color map to the game, turn off if you want try a more realistic feel
Fog=on_with_lumen

; CTRL + F9
; lumen/ssao/gtao; ambient occlusion method - SSAO is vanilla, Lumen is U+ default
LightingAO=lumen

; F6
; lighting_mode_controlled/x48/x32/x24/x16/x8; allow users the ability to downsample the lighting more than the mod allows by default, it will be applied after other lighting settings - this is one of the settings that impacts performance the most - by default U+ runs at x24 in standard mode
LightingDownsampleFactorOverride=x24

; F8
; standard/advanced; standard for default enhanced lighting, advanced for experimental lighting
LightingMode=standard

; CTRL + F10
; game/low/standard/high/epic/insane; low for more FPS if you are really struggling with FPS, standard for default settings, high for higher VRAM usage and slight performance hit, epic for higher VRAM usage and performance hit, insane is maximum gather quality at standard resolution, insane_highres is maximum gather quality at higher resolution, noframes is the maximum possible lighting quality and probably only feasible for photos
LightingQuality=standard

; F4
; game/off/low/medium/high/reallyhigh/alltheblur;
MotionBlur=game

; F7
; game/default/high/epic/insane/evenhigher; Hardware Lumen only - increases the raytracing radius to include more objects further away - particularly noticeable in reflections - recommend turning this up and screen space reflections off
RayTracingRadius=game

; F9
; game/off/low/medium/high; controls smoothness of reflective surfaces - some bias is preferred for visual quality
ReflectionBias=game

; CTRL + F2
; default/two/three; allows increasing the number of reflections bounces
ReflectionBounces=default

; game/none/percent_10/percent_20/percent_30/percent_40/percent_50/percent_60/percent_70/percent_80/percent_90/percent_100;
Sharpness=game

; CTRL + F7
; default/less_50/less_25/more_25/more_50/more_75/more_100; changes intensity of the skylight - note that to see this setting change you will need to turn camera 360
SkylightIntensity=default

; F3
; game/off/on
Vignette=game
Other Ultra+ Games
All Ultra+ Games
- Ultra+ Mod Manager (UMM)
Silent Hill 2 (2024 remake)
Days Gone
Hogwarts Legacy
Robocop: Rogue City
Cyberpunk 2077
Star Wars: Jedi Survivor
Star Wars: Jedi Fallen Order
Avowed
Ghostrunner II
RuneScape: Dragonwilds


